How to Make Ghosts for Your Yard
Last Updated on September 4, 2026 by Duncan
Let me get straight to it: the sheet-over-a-stick ghost is a red flag for “I found this in my basement on October 28th.” If you’re going to commit to a yard ghost, commit.
Your neighbors are watching, and they have opinions.
What you’ll need
You don’t need much.
A tomato cage or wire frame, white muslin or ripstop nylon from a fabric store (one yard is plenty), a stake or metal rod, needle and thread, and fabric paint if you want to add a face. That’s it.
And the beauty is that you can reuse everything the following year.
How to make a ghost step by step
Step 1: Build the frame
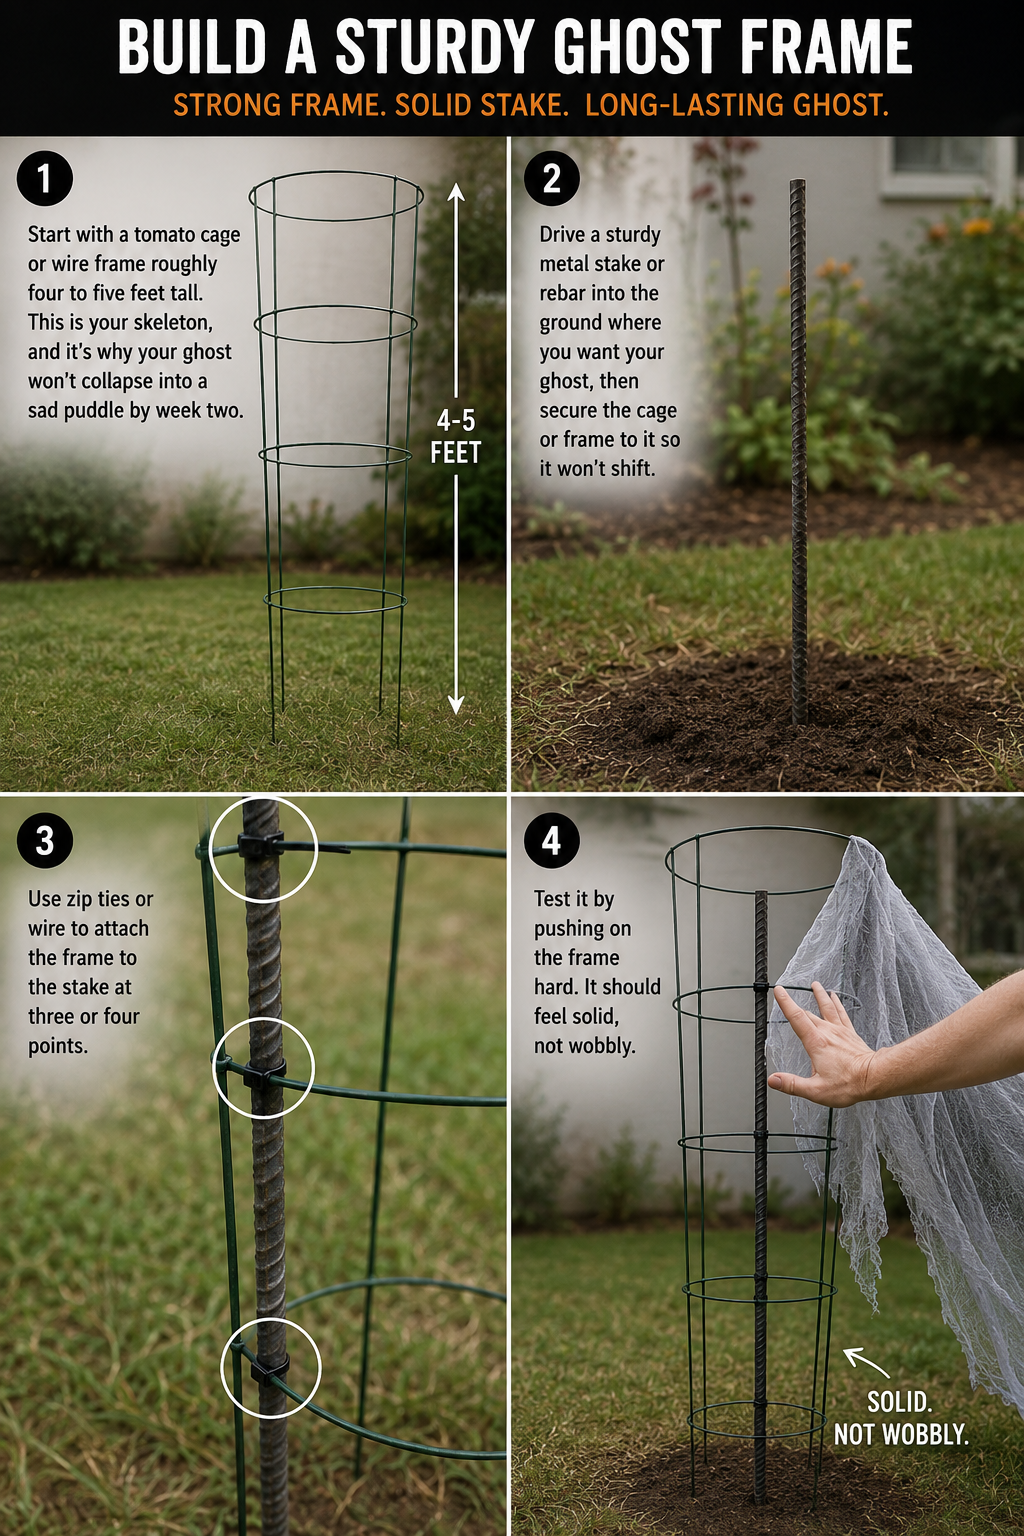
Start with a tomato cage or wire frame roughly four to five feet tall. This is your skeleton, and it’s why your ghost won’t collapse into a sad puddle by week two.
Drive a sturdy metal stake or rebar into the ground where you want your ghost, then secure the cage or frame to it so it won’t shift.
Use zip ties or wire to attach the frame to the stake at three or four points. Test it by pushing on the frame hard. It should feel solid, not wobbly.
This frame is non-negotiable.
Step 2: Stuff the head
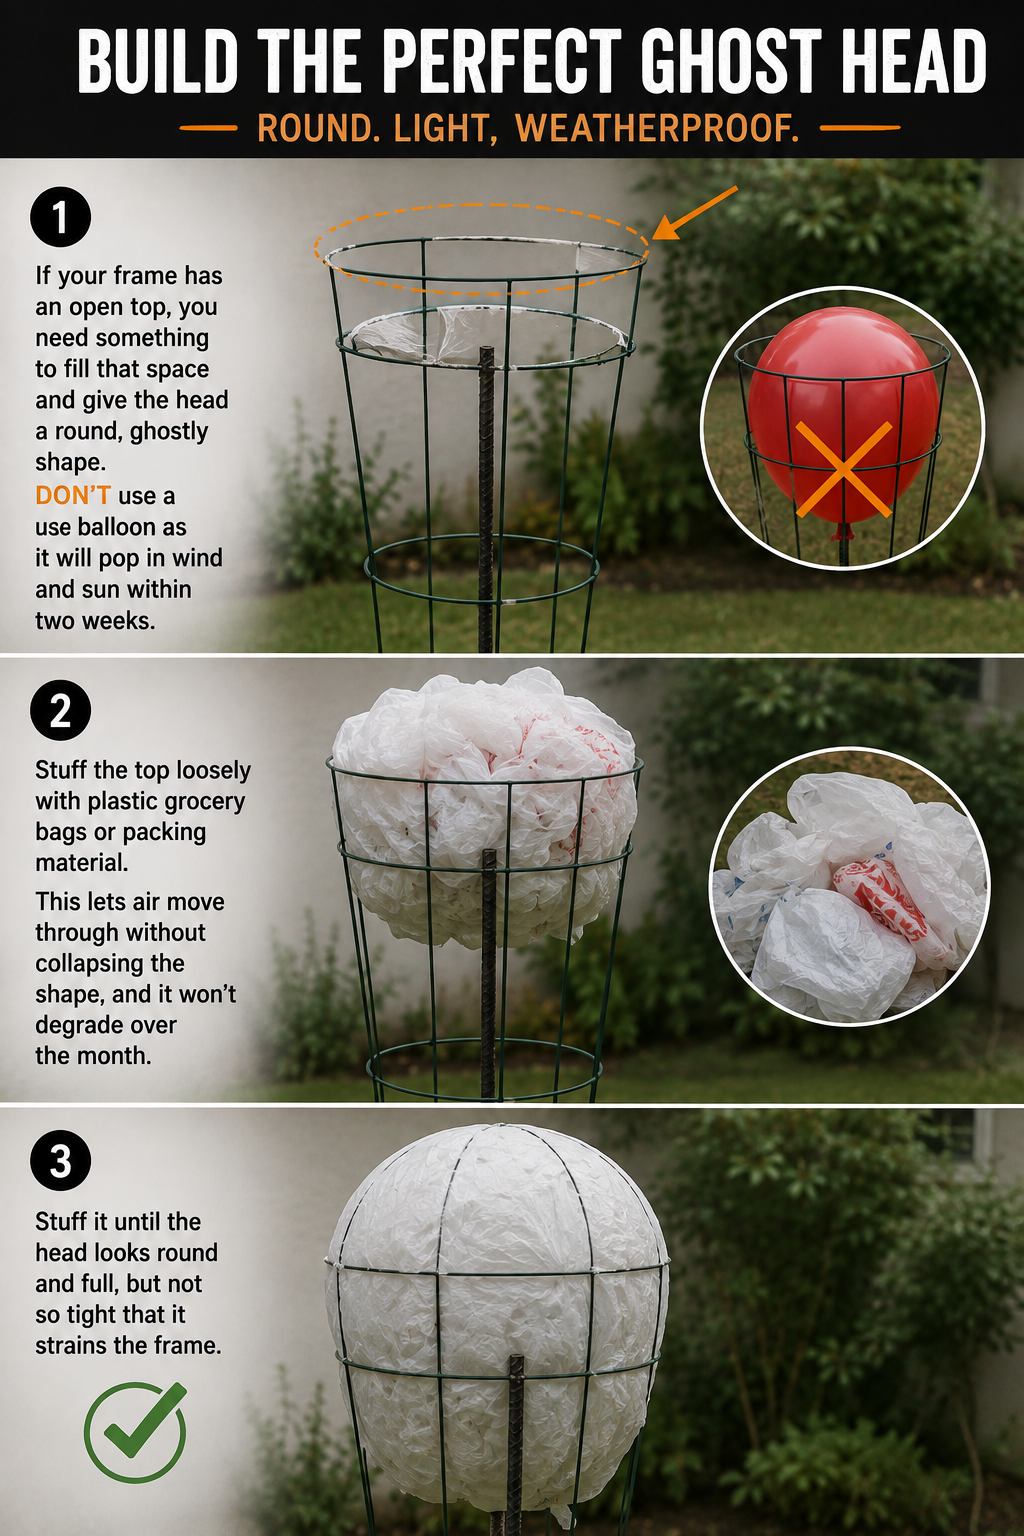
If your frame has an open top, you need something to fill that space and give the head a round, ghostly shape. Don’t use a balloon as it will pop in wind and sun within two weeks.
Stuff the top loosely with plastic grocery bags or packing material. This lets air move through without collapsing the shape, and it won’t degrade over the month.
Stuff it until the head looks round and full, but not so tight that it strains the frame.
Step 3: Drape and secure the fabric
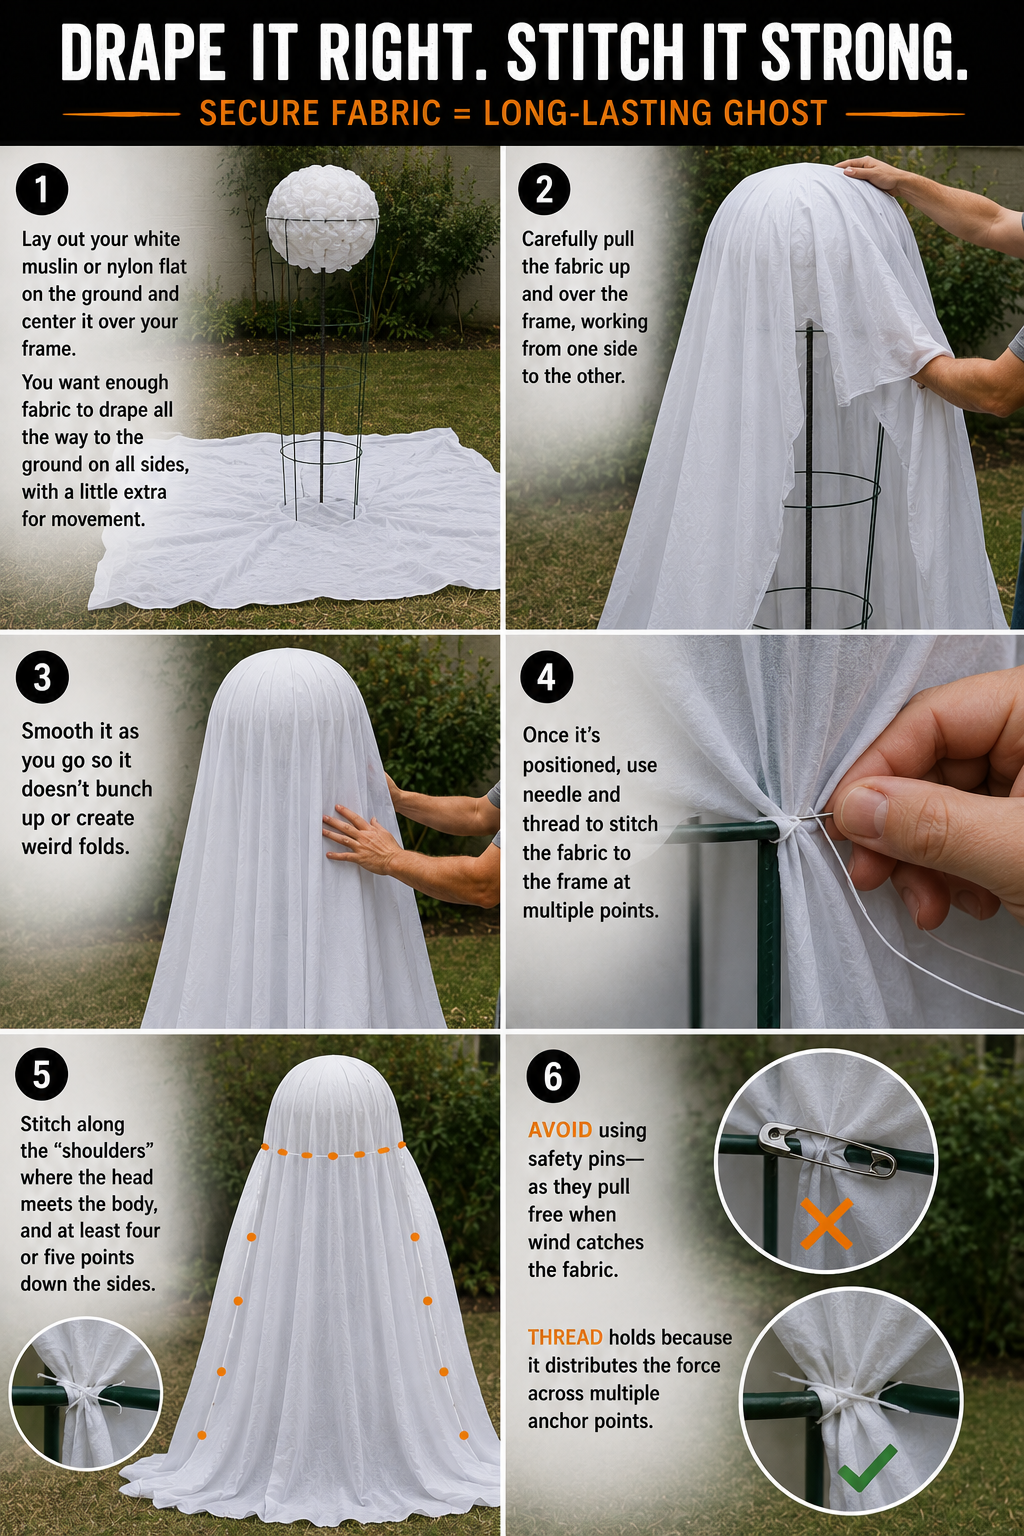
Lay out your white muslin or nylon flat on the ground and center it over your frame. You want enough fabric to drape all the way to the ground on all sides, with a little extra for movement.
Carefully pull the fabric up and over the frame, working from one side to the other.
Smooth it as you go so it doesn’t bunch up or create weird folds.
Once it’s positioned, use needle and thread to stitch the fabric to the frame at multiple points.
Stitch along the “shoulders” where the head meets the body, and at least four or five points down the sides.
Avoid using safety pins as they pull free when wind catches the fabric.
Thread holds because it distributes the force across multiple anchor points.
Step 4: Securing the bottom
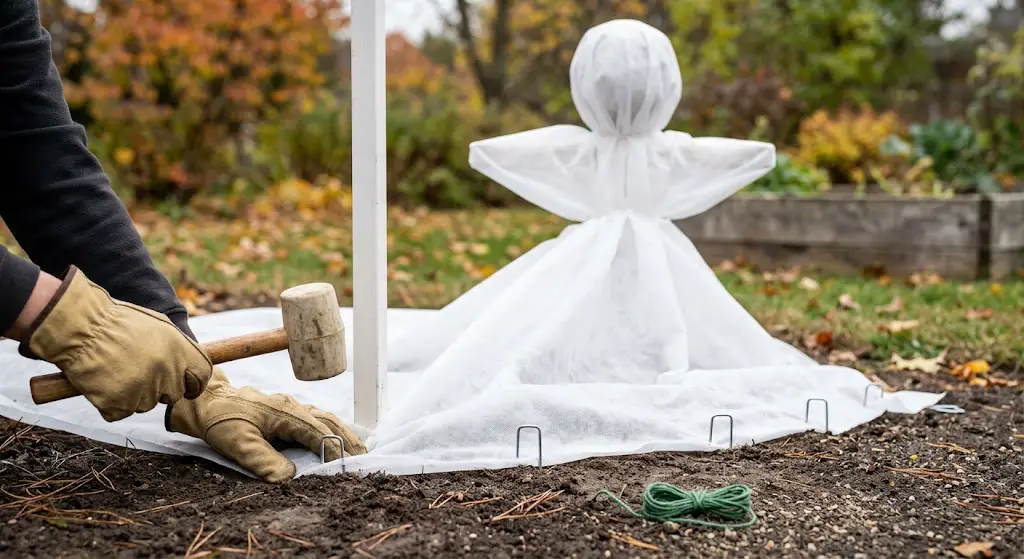
Pull the fabric tight to the ground and anchor the bottom edge.
You can stake it down with landscape pins or garden staples that you drive through the fabric into the ground, or you can stitch the bottom edge to the stake itself.
The tighter the bottom, the less wind will get underneath and topple your ghost.
Step5: Add a face
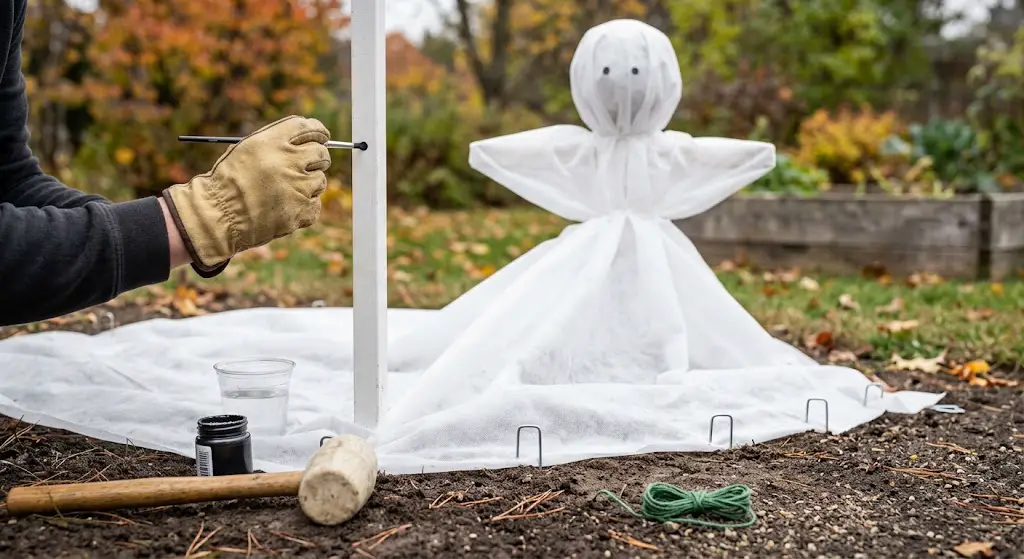
Here’s a hot take: a ghost without eyes is often scarier than one with them. If you want no features, leave it blank. Your ghost will look clean and intentional.
If you want a face, use fabric paint, not scissors.
Cut eyeholes and they’ll fray, look sloppy, and make your ghost look more like a costume.
Paint simple dots for eyes, or a curved line for a smile. Paint them on the front and let them dry completely before moving the ghost.
A painted smile looks playful. Painted dots are mysterious. Big eyeholes read as “maybe I should avoid this house.”
Best practices for a great ghost for your yard
Be strategic with the placement
A pristine ghost standing alone in a bare yard looks like you forgot to finish decorating it.
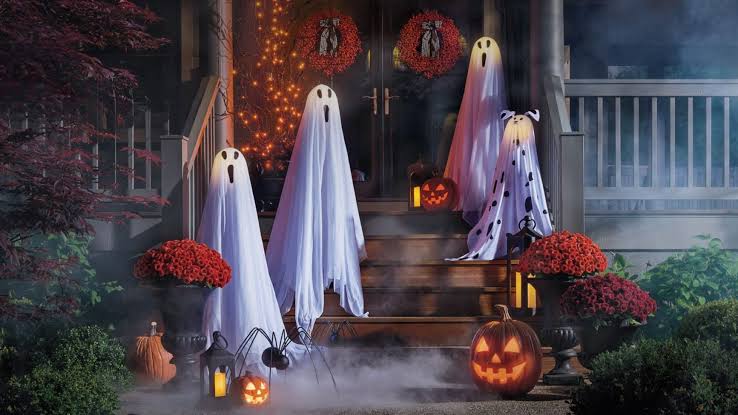
I’ve noticed that yards with impact have ghosts that work with their other elements such as fog rolling around the base, dead branches, maybe some pumpkins nearby.
Your ghost should fit your yard’s vibe, not dominate it.
If you’re doing elegant and subtle, your ghost should reflect that.
If you’re going for horror, lean in completely. Half-committed decorating is more noticeable than fully embracing a single vision.
Keep it upright
Use multiple anchor points. A single center stake isn’t enough if wind is pushing from the side.
Drive stakes at two or three points around the base, or guy-wire the frame from the top to stakes in the ground.
Strategically use the fog machine
If you’re running fog, don’t run it continuously.
Intermittent fog bursts right around dusk look deliberate and create the right atmosphere. Constant fog just makes everything wet and your ghost looks like it’s melting.
You don’t want this.
Run fog in short bursts, especially when it’s still light enough to see the effect. Your ghost will look intentional instead of like you’re trying to hide something.
Use a ghost of the right size
I once made a seven-foot ghost for my front lawn, and for three weeks straight, my mail carrier looked terrified approaching the mailbox.
Turns out a ghost that tall reads as genuinely threatening rather than festive, especially once the sun sets and it’s just a massive white shape looming in the dark.
To be on the safe side aim for four to five feet tall ghost, and here’s why. That’s roughly human-sized, which feels intentional.
Much taller and you’re entering uncanny territory where your ghost looks more like a alien blob than a decoration.
Much shorter and it gets swallowed by your landscape and nobody remembers it was there.
Avoid balloons
Every ghost-making tutorial shows you stuffing a balloon in the head for shape, then acting surprised when a moderate breeze turns it into a deflated sad sack by week two.
Balloons pop, especially in October wind, especially when they’re exposed to direct sun all day.
Use a tomato cage or wire frame for the head instead, and you will have something that holds shape regardless of weather.
Stuff it loosely with plastic such as grocery bags or packing material so air can move through without collapsing it.
This way your ghost will look alert and round, not like it survived something traumatic.
Stay away from a white plastic sheeting
Standard white plastic sheeting yellows and gets dingy after about two weeks of sun exposure.
By November 1st, your ghost looks weathered and it’s not a pleasant look.
For a great experience invest in actual white muslin or ripstop nylon from a fabric or craft store.
Anchor the ghost properly
A ghost with inadequate anchoring will tip over the first time someone’s dog walks past or the wind picks up.
I watched a neighbor’s ghost blow into the street at 6 PM on Halloween itself, tangled in the mailbox. You don’t want this.
Drive a sturdy stake or metal rod into the ground through the center of your frame, and secure the ghost fabric to the frame at multiple points with needle and thread, not just safety pins.
Safety pins pull free when the wind catches the fabric. Stitching distributes the force and holds the ghost together.
Avoid cutting the eyeholes
A ghost with eyeholes is cleaner-looking, sure, but if you just cut two circles out of your fabric, the edges will fray and look sloppy within days. Plus, eyeholes make your ghost look more humanoid, which can freak people out, especially kids.
Leave the eyes closed or add them with fabric paint instead.
No features can be scarier than oversized eyeholes that stare at nothing. If you want expression, paint simple dots or a smile; it reads as playful rather than haunting.
Be strategic with the lighting
A ghost lit from below looks like something from a horror movie, which sounds cool until you realize it’s 6 PM on Halloween and still not dark enough for the lighting to show.
You’ll have paid for those lights and they’ll be barely visible for most of the night.
Light from above or from the side, and aim for uplighting that catches the texture of your fabric. Better yet, place the ghost where existing landscape lighting or porch lights naturally illuminate it.
Your ghost should look intentional at dusk and eerie once it’s truly dark, not require special lighting to exist at all.
Don’t place the ghost on the doorway
That hanging ghost in your doorway seems fun until trick-or-treaters are truly nervous about approaching your door, or your own friends hesitate before ringing the bell.
Some people will actively avoid your house, and not in the fun way.
Keep hanging ghosts away from active entrances.
If you want a scary element at the door, go subtle: a single white hand reaching around the frame, or a ghost-shaped wreath.
People want to know they can access your house without brushing past something spooky.
Take it down before November 2nd
I can’t stress this enough: a ghost still hanging on November 5th shifts from decoration to eyesore. People stop noticing it as intentional and start noticing it as clutter.
Set a calendar reminder to take your ghost down the morning after Halloween.
Your yard will look maintained instead of abandoned, and you’ll want to see this ghost again next year instead of dreading it as you pack it away.
Related Posts: