How To Clean A Snowblower Carburetor Without Removing It: Step-By-Step Guide
Last Updated on August 11, 2024 by Duncan
For the snowblower to continue functioning optimally, you need to provide routine maintenance. One of the ways of maintaining it is cleaning the carburetor.
If you are like me, your strengths don’t lie in opening up machines. The good news is that it’s possible to clean a snowblower carburetor without removing it.
How do you know the carburetor is ready for a cleaning?
A dirty carburetor gives several telltale signs that you should clean it. Some of these signs include:
Starting problems
Do you have to pull the snow blower’s cord several times for the engine to start? And even when it starts, it keeps on going off? The carburetor must be dirty, and you need to clean it.
The carburetor fails to start correctly when debris blocks the fuel and air from getting to the engine.
Rough idling
A dirty carburetor has irregular or bouncy idling, which is not only harmful to the ears forcing you to wear headphones and other forms of ear protection, it also means trouble to the carburetor and the snowblower as a whole.
Stumbling when accelerating
If the machine stumbles when you are accelerating, you must have deposits in the carburetor that you should get rid of.
Increased fuel consumption
Have you noticed that your snowblower is consuming more fuel than it used to? The chances are that the carburetor is dirty, and you need to clean it.
Flooding
The flooding comes about when a lot of fuel gets into the cylinders. When having this problem, the snowblower can be faulty, or it might be having debris in the needle valve that makes it stick open, hence the spillage.
To troubleshoot, you should clean the snowblower carburetor.
Before you start…
Check the owner’s manual
When you bought the snowblower, it most likely came with the owner’s manual. Before you open up the machine, take the time to read the manual.
If you don’t have it or are like me and threw it away, get a new one from the manufacturer’s website.
Inspect the air filter
The air filter significantly impacts how well the snowblower functions and the quality of air getting into the machine.
When the filter is dirty, it prevents clean air from getting into the snowblower; hence, it doesn’t function optimally.
Even if you clean the carburetor and the air filter is dirty, the debris and dust will still get into the snowblower and end up in the carburetor. To prevent this from happening, clean the air filters first.
Get the right tools
Before you begin your work, ensure you have the right tools. The right tools not only make your work easy, but also protect the snowblower from getting damaged.
The tools you need for the work include:
- A socket wrench
- A piece of copper wire
- Compressed air can
- Liquid carburetor cleaning solution
- Wire brush
How to clean a snowblower carburetor—Step by step
Step 1: Switch off the snowblower engine
Has the snowblower been running? It’s absurd to try opening it up with the engine running, so you should switch off the engine first. If it’s hot, give it a few minutes to cool off, so you don’t get burnt.
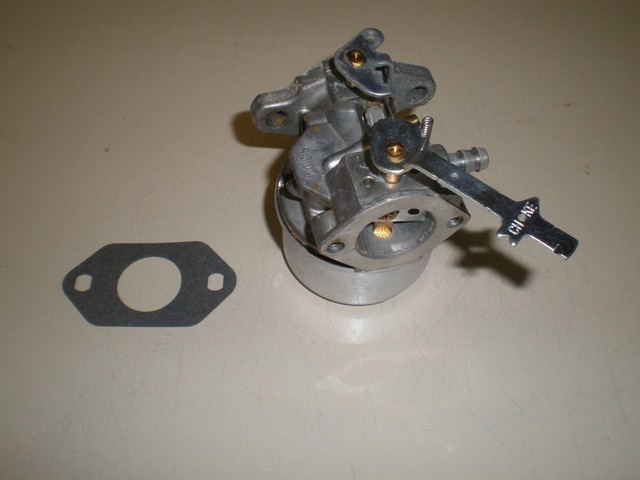
Step 2: Remove the carburetor bowl
Using the socket wrench, remove the adjustment nut, and the carburetor bowl will come off. The bowl will tell you a lot about the carburetor, so you should inspect it.
Take a look at the gasket and ensure that it’s in good condition. If it has worn out, you may have to replace it.
You also should confirm that the bowl isn’t cracked or has any other defects.
If there is a lot of debris in the bowl, the carburetor is quite dirty, and you should be ready to clean it.
Step 3: Remove the float bowl
Using your hands, remove the needle and pin. When removing the pieces, take care that you don’t lose anything. After removing the bowl, shake it and listen for any materials that might have got in through the cracks.
If you hear anything on the inside of the bowl, it means that the bowl is cracked, and you should get another one.
Step 4: Remove the flathead
I often find it challenging to remove the flathead with the wheel, so I always remove the wheel to better access the carburetor. You don’t have to do this if your wheel gives you a reasonable allowance.
Step 5: Spray the carburetor with carburetor cleaner
After removing the flathead, you will easily access the carburetor. Since in this guide, we are cleaning the snowblower carburetor without removing it, you shouldn’t remove it.
Lie on your back and spray the carburetor with the cleaning solution and remove the stuck-on debris using a piece of cloth.
If the carburetor is too dirty or you can’t effectively clean it, remove and submerge it in a liquid carburetor cleaner.
Allow the carburetor to soak for at least an hour to remove all the impurities. You should then remove the carburetor from the liquid and soak it with water.
Step 6: Clean the bowl
Using a clean piece of cloth and cleaning solution, clean the carburetor bowl. If your snowblower is old, it’s common to find the carburetor too dirty or rusted.
In such a case, use sandpaper or other tough material to remove the debris and rust.
Step 7: Scrub the nuts.
It’s normal for some residue to remain on the nuts. Spray the cleaning solution on the nuts and scrub them using a wire brush to remove the debris.
Step 8: Clean the dirty holes
Are there tarnished holes on the carburetor? Clean them using copper wire. When cleaning them, also remember to pay attention to the carburetor’s throat.
Spray the cleaning solution in this area to eliminate any debris that might be present.
Step 9: Blow out any leftovers.
Blow the snowblower with compressed air to ensure that all the areas are clean and free of debris. For maximum efficiency, ensure that the compressed air reaches all the holes.
Step 10: Reassemble everything.
Once everything is clean, reassemble the bowl. When reassembling, pay attention to the gaskets. If your snowblower is new, you don’t need to worry too much about it, but if it’s old, you should get new gaskets for the bowl and bolts.
For maximum lubrication, apply some oil to the gaskets. The oil also preserves the gasket.
Tips to remember when cleaning the snowblower carburetor
You should note that specific actions such as the things you need to remove from the snowblower for you to access the carburetor depends on the model of the machine.
For you to quickly dismantle the carburetor, it’s wise that you have the manual in place to guide you.
If your carburetor is too dirty and you have to remove it from the snowblower, carefully follow how you are removing the parts so that you can put them back as they were.
Since this is the first time you are doing it, it’s wise that you use a digital camera to document your actions. To protect the camera from fuel and water, use a high-quality waterproof camera.
If the problem was due to a clogged carburetor, cleaning should fix it. If you clean the unit and the problem persists, contact a snowblower expert to look into it.
Related Posts: