How to Prepare Soil for Your Rock Garden
Last Updated on September 22, 2026 by Duncan
Soil prep means everything. Get it right and your rock garden coasts for a decade without any issues.
Get it wrong and you have a hard time getting anything to grow there.
So, how do you prepare soil for your rock garden? Here is how to go about it:
Start by choosing the right spot
:max_bytes(150000):strip_icc()/1st-course-rock-garden-big-5ac2235231283400374ebbac.jpg)
Walk your yard at 2pm in July and again at 10am in winter. You want the place that bakes in both.
Six hours of direct sun is the minimum, and eight is better.
These plants come from open mountainsides where the only shade is a passing cloud.
Avoid the bottom of any slope, no matter how pretty the spot looks. Water collects there, and you cannot out-engineer gravity with a bag of grit.
Also check what’s overhead. A maple canopy drops a wet leaf blanket every October that smothers low cushion plants by Christmas.
Get rid of your native soil
:max_bytes(150000):strip_icc()/spruce-rockgarden-Ekaterinasavyolova-5244bd54b3c64e3487421356c9283d4c.jpg)
Most garden advice says work with what you’ve got. Toss that idea out here.
Rock garden plants evolved on scree slopes where water moves through in seconds, not hours.
Your average backyard loam holds moisture like a sponge in a sealed bag.
Picture the crown of the plant, that little collar where stem meets root, sitting damp for eleven weeks straight.
That’s rot, and rot kills more rock gardens than cold, drought, and deer combined.
Remove the existing weeds
Do this first, and do it properly, because you will never get another clean shot at it.
Once your rocks are set and your cushions are established, pulling bindweed out from under a 200 pound boulder becomes too difficult.
Kill the existing vegetation with cardboard and a few months of patience, or dig it out roots and all.
Skip the rototiller, which chops perennial weed roots into hundreds of new plants.
Watch especially for the runners: quackgrass, bindweed, ground elder, horsetail. A single surviving fragment will find daylight through six inches of gravel and look smug about it.
Dig deep enough
A four-inch scrape and a bag of gravel is not soil preparation.
It’s decoration.
You want 12 inches of proper drainage material at absolute minimum, and 18 inches is where things start behaving predictably.
Here’s why depth matters more than any single ingredient.
Water moving down through coarse material stalls when it hits finer material below, forming a perched water table that parks moisture right at your root zone.
Build up
If your ground is clay and you excavate a pit to fill with your fancy gritty mix, you build a bathtub.
Water drains through the good stuff, hits the clay wall, and stops.
Your plants sit in a hidden reservoir all winter with no way out.
Mound your mix on top of the existing grade instead. A raised berm of 12 to 18 inches gives roots room and lets gravity do the work for free.
Already on a slope? Thank your luck and build into it.
Check what happens when you add water

Before you commit to anything, dig a hole about a foot deep and fill it with water.
Let it drain completely, then fill it a second time and start a timer.
This second fill is the honest test, because the first one just saturates the surrounding soil.
Good rock garden conditions empty that hole in under 20 minutes. An hour means you need more grit.
Still holding water after two hours?
Something below is blocking you, and no amount of surface mixing will fix it. Raise the bed higher.
Break up compacted ground
:max_bytes(150000):strip_icc()/rbgettyok-pho-2ba956ce21ac49ceaaeb898a4a93e205.jpg)
Even when you’re building up, spend an hour loosening whatever sits underneath.
Compacted subsoil acts like a sheet of plastic. Water arrives, has nowhere to go, and backs up into the bed you just built.
Driving a garden fork in and rocking it back and forth every eight inches gets the job done. You’re creating fissures, not turning the soil over.
Never do this when the ground is wet. Forking wet clay smears the surfaces and creates a glazed layer that drains worse than before you started.
More compost isn’t better

Every gardening instinct you have says add organic matter. Fight it.
Compost holds water, which is the opposite of what you want here. It also feeds plants that are genetically built to be hungry.
What happens when you overfeed a dianthus or a saxifrage? It grows soft and leggy, sprawls open in the middle, and rots from the inside out.
A friend dumped four bags of premium compost into a new rock bed because leaving it out felt wrong.
Six weeks of gorgeous lush growth, then a damp September, and the whole thing turned to slime.
Cap your organic content at 15 to 20 percent.
Build a gritty soil mix

Here’s my standard recipe, unchanged in years.
Roughly 70 to 80 percent coarse mineral grit, and 20 to 30 percent soil. That’s the entire formula.
For the mineral portion use crushed angular rock in the 3 to 10 millimeter range.
Quarry chips, crushed granite, expanded shale, pumice, whatever your local stone yard sells by the ton.
Mix it on a tarp, not in the bed. You want it uniform, because pockets of pure soil become pockets of pure rot.
Pay special attention to clay soil
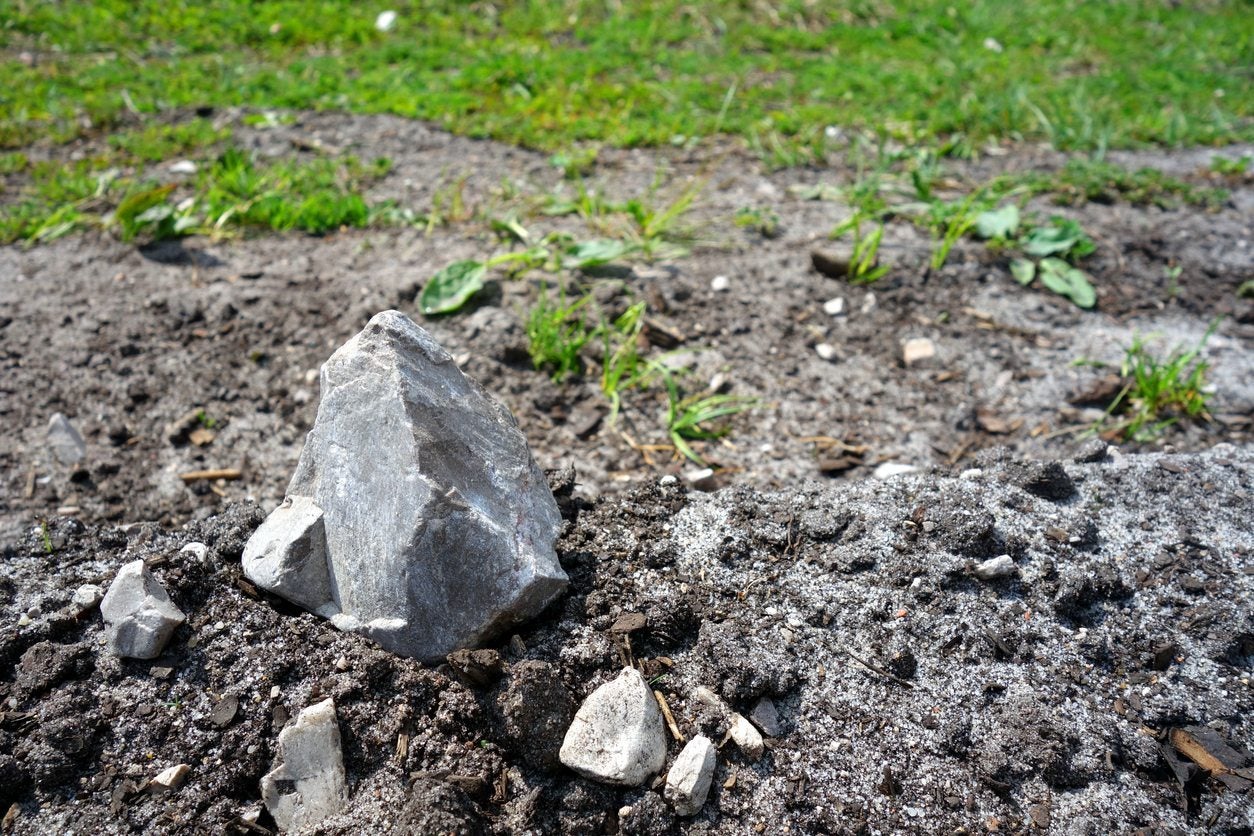
Clay is not a death sentence, but it changes your whole approach.
Do not try to convert clay into rock garden soil by mixing grit into it.
The clay simply fills the spaces between the stones and you get something with the drainage of a brick.
Build entirely on top of it instead. Loosen the surface, then add your mound of prepared mix above.
Give clay sites extra height. Where I’d build 12 inches on sandy ground, I’ll build 20 on heavy clay.
Be careful with sand
Sand sounds like the obvious drainage fix. Used wrong, it’s the fastest way to ruin a bed.
Fine builder’s sand mixed into clay produces something close to concrete. The small particles slot into the clay structure and lock it solid.
If you use sand at all, use coarse sharp sand with visible grit in it, and use it as a minority ingredient. Crushed rock does the job better.
Pool filter sand, play sand, and anything that feels soft in your palm should stay out of the mix.
Create a slight slope instead of a flat basin
A flat rock garden is a puddle waiting for a rainstorm.
Even a gentle grade of a few inches over several feet moves surface water off the bed instead of letting it sink straight down into your crowns.
Slopes also give you something better than drainage.
They give you different microclimates, with a hot dry top and a cooler moister bottom, so you can grow twice the range of plants in one bed.
Point the main face toward the sun if you can. South and southwest slopes dry fastest after rain, which is exactly what these plants want.
Use subsoil rather than topsoil
This tip gives the biggest payoff for the least effort, and almost nobody mentions it.
Topsoil is loaded with weed seeds.
Every bag you import is a decade of dandelions and hairy bittercress you volunteered for.
Subsoil, the paler material below the top eight inches, is nearly sterile and lower in nutrients, which suits these plants perfectly.
Do not put landscape fabric everywhere
I know it feels tidy and permanent. Keep it out of the interior of the bed.
Fabric clogs with silt within two seasons and turns into a drainage barrier, which is a problem you spent a weekend solving.
It also stops roots from growing.
Deep rooting plants like penstemon and eriogonum want to punch down into the subsoil for summer moisture, and fabric tells them no.
Need a weed barrier at the base? Lay plain cardboard. It smothers turf, then rots away within a year and leaves the soil open.
Leave space for the rocks to sit
Rocks are not garnish sprinkled on at the end. They’re structural, and you have to prepare the soil around them.
Bury each stone one third to one half deep. Anything perched on the surface looks like it fell off a truck, and it will shift and slump by spring.
The reason for this is that a buried stone stays cool and condenses moisture on its underside, creating a damp pocket that keeps roots alive through a heat wave.
Pack soil firmly into every void beneath the rock as you set it. Air gaps under stones dry out roots and cause the whole thing to sink sideways after the first wet winter.
Tilt the exposed face slightly backward into the slope so rain runs into the bed instead of off the front of it.
Be cautious of the rock you choose
Most articles treat stone as a visual decision. It’s a chemical one.
Limestone and dolomite slowly raise pH as rain dissolves their surfaces. Granite, sandstone, and basalt stay neutral to slightly acidic.
Build with limestone and then plant lewisia and gentians, which want acid conditions, and you’re fighting your own hardscape forever.
Pick the rock first, then match the plants. Lime lovers like campanula, edraianthus, and aubrieta glow against limestone and sulk against granite.
Avoid uniformity
A uniform bed grows a uniform, boring plant list. Variation is where rock gardens get interesting.
The outer rim of a raised bed dries faster and drains harder than the center. That’s a different growing zone three feet from where you’re standing.
Give the edges your toughest plants such as sempervivum, sedum, creeping thyme, delosperma.
Save the fussy crevice plants for the middle and for the shaded north side of your bigger stones, where moisture lingers a few days longer.
Build in some deliberate variety while you’re mixing. A slightly heavier pocket here, an extra grit-only pocket there, and suddenly you can grow things your neighbor cannot.
Customize the pockets
Not every plant wants the same medium, and the pocket is where you cheat.
For true alpines and anything with a fuzzy or silver leaf, make the pocket almost pure grit with a spoonful of soil. Those hairs are built to shed water, and the plant expects the soil to shed it too.
For woodland edge types and small ferns tucked on the shady side, bump the organic content up toward 30 percent.
Dig the pocket, fill it with the custom blend, then plant. Doing this after the bed is finished means you’re fighting your own construction.
Crevice plants get their own treatment.
Wedge them between two stones with grit packed tight around the roots, and they’ll wander happily into the gap for years.
Keep the transition clean
Grass will invade. It’s the single most common way a beautiful rock garden slowly turns into a mess.
Give yourself a physical barrier. A buried steel or aluminum edging strip sunk four to six inches deep stops the runners.
A wider approach works even better. Consider leaving a band of coarse gravel eight to twelve inches wide as a dry moat between turf and bed. Grass struggles to cross it, and you can see any escapee instantly.
Whatever you do, avoid a fuzzy undefined edge. That’s the boundary you’ll be hand weeding every weekend until you move house.
Do not bury the plant crowns
This one small habit saves more plants than any other thing here.
Set each plant so the crown sits slightly above the finished soil level, not sunk into a little dish.
Water collects in dishes. A crown sitting in a puddle for a few December days is a crown that rots.
When you top dress, push the grit right up against the stem and under the lowest leaves. This way you have the collar dry and airy.
Give the soil time to settle
A freshly built rock bed will drop 20 to 30 percent in the first year. Plan for it rather than being surprised by it.
Build in six inch layers and soak each one thoroughly before adding the next.
Dry grit forms hydrophobic pockets that never wet properly afterward, no matter how long you leave the hose on.
Build higher than your target by about a quarter and let water do the compacting.
Do not bring in a plate compactor. It crushes your grit into powder and destroys the air space you just paid for.
If you can, build in fall and plant in spring. A winter of rain and freeze settles everything and this is what you want.
Choose plants after you understand your soil
Buying plants first and then trying to accommodate them is how people end up with expensive compost heaps.
Finish the bed, run your drainage test, note your rock type and pH, and identify your wet corners and hot edges. Then go shopping.
Bring that information to the nursery. You’ll walk out with plants that survive, which beats plants that photograph well for one season.
Start with the forgiving group while you learn your site.
Great options include: sempervivum, sedum, thyme, dianthus, phlox subulata, aubrieta. Graduate to the harder alpines once you’ve watched a full year pass.
Finish with the right top dressing
Spread one to two inches of the same angular grit across the entire surface once planting is done.
It keeps the crowns and lower leaves off damp soil, stops rain splashing dirt onto foliage, suppresses weed germination, and stays put on slopes.
Match the grit to your feature stones. Limestone chips over sandstone rocks looks disjointed, and once it’s down, it’s down.
Never use bark mulch here. It holds moisture exactly where you don’t want it and looks like a mistake in a rock garden.
Water thoroughly after planting
Gritty mixes drain so fast that new plants can dry out before roots ever leave the nursery plug.
Soak deeply at planting, then water every few days for the first three or four weeks. You’re establishing roots, not maintaining a lawn.
Deep and infrequent beats light and daily every time. Shallow sprinkles train roots to stay at the surface, where they cook in the first heat wave.
After the first season, most of these plants need nothing at all in a normal year.
Watch the garden closely after the first heavy rain
The first real downpour is your free inspection report. Go outside during the rain, or right after, and look.
Note where water pools, where it channels, where grit has washed downhill, and where a rock has started to tip.
Every one of these is fixable in five minutes, and a major excavation in three years.
I still do this walk on every garden I build. It’s the closest thing to a guarantee I have, and it costs nothing but wet socks.
Related Posts: