White Rock Garden Bed Ideas: 21 Ways to Create a Bright, Elegant Landscape
Last Updated on October 30, 2026 by Duncan
White rock garden beds have a way of making a yard look clean before you’ve even touched the broom.
White rock does three jobs at once.
It bounces light into dark corners, it makes every green leaf look sharper, and it never needs replacing every spring like mulch.
I’ve also noticed that white rock makes small yards feel bigger.
Your eye travels across the bright surface instead of stopping at heavy patches of dark mulch.
The downside of these beds is that they can be cumbersome to maintain making your work difficult.
If you’re dreaming about a white rock garden bed that stays beautiful instead of becoming a maintenance headache, these ideas will help you get there.
Build a white succulent garden

Sedum, hens and chicks, echeveria, and agave look like living sculpture against bright white stone.
The rock drains fast, which succulents love, and it reflects light up under their leaves. Tuck a few plants into pockets of gritty soil and let the rock fill every gap between them.
If winters freeze where you live, skip the echeveria and buy the hardy ones, like sempervivum, hardy sedum, and delosperma.
Many pretty succulents sold in spring are tender, and they turn to mush after the first hard frost.
Make lavender the star

Rows of lavender over white rock look like a Provence postcard in your front yard. The silver green leaves and purple spikes pop against the stone.
Plant them at least two feet apart, because crowded lavender gets woody and rots in the middle. The rock keeps moisture off the crown, which is exactly what they want.
Pull the rock back about an inch from each plant’s stems, and plant the lavender on a slight mound.
Rock piled against the base holds damp air right where lavender hates it.
Create a modern front yard with ornamental grasses

Want clean and modern look without a boring lawn? Plant drifts of feather reed grass or blue fescue and let white rock fill the space around them.
The grasses move in the breeze, and the rock stays still.
Choose sterile cultivars like Karl Foerster feather reed grass.
Grasses that self seed will sprout in your rock by the dozens, and pulling baby grass out of gravel is a miserable job.
Mix white rocks with evergreen shrubs

Winter is when most beds fall apart, because everything goes brown and bare. Evergreens like boxwood, dwarf junipers, and holly keep the bed great all year through.
White rock under dark green shrubs looks sharp and formal. Plus, you don’t need to mulch around them every spring.
Light rock bounces winter sun back up into the shrub, and on the south side of a wall, that can bronze and scorch boxwood.
To be on the safe side pick burn resistant varieties or give those plants a little screening the first winter.
Plant silver foliage nearby

Silver plants and white rock are best friends. Lamb’s ear, dusty miller, artemisia, and Russian sage glow against the stone like moonlight.
Use them as a soft transition between the rock and your greener plants. Without them, the bed can look a little stark, like a hospital hallway. And you don’t want this.
Fuzzy silver leaves melt into slimy brown mats in muggy weather.
Water at the base only, and in humid climates choose a variety like Helene von Stein lamb’s ear, which handles damp summers better.
Combine white rock with dark mulch

Dark mulch and white rock in the same yard looks bold and intentional. Use the rock for focal areas near the walkway and the mulch for the larger planted beds.
Keep a hard line between the two, or they bleed together into a muddy gray mess. Thankfully a strip of edging between them solves it.
On a slope, put the rock uphill and the mulch downhill.
Rain floats mulch downward, so if the mulch sits above the rock, you’ll be picking bark out of white stone all spring. You don’t want this, do you?
Pair white rock with black edging

Black steel edging against white rock is the cleanest look you can go for. It draws a crisp outline that reads from the street.
Set the edging just above the rock so the stones stay put. Plastic edging heaves in winter and gets chewed by mower blades, so avoid it.
Install the stakes on the bed side and bury the edging until only about half an inch shows. The line looks drawn on instead of built, and nobody trips over a sharp stake in the grass.
Create curved white rock borders

Straight lines look like a parking lot. Gentle curves look like someone cared.
Lay your garden hose on the ground first and shape the curve you like.
Walk to the street and look at it from there before you dig, because curves that look great up close can look lumpy from the curb.
Make every curve wide enough for your mower to follow. Tight little scallops look cute for a week and then become a weekly trimming chore which can be a bother.
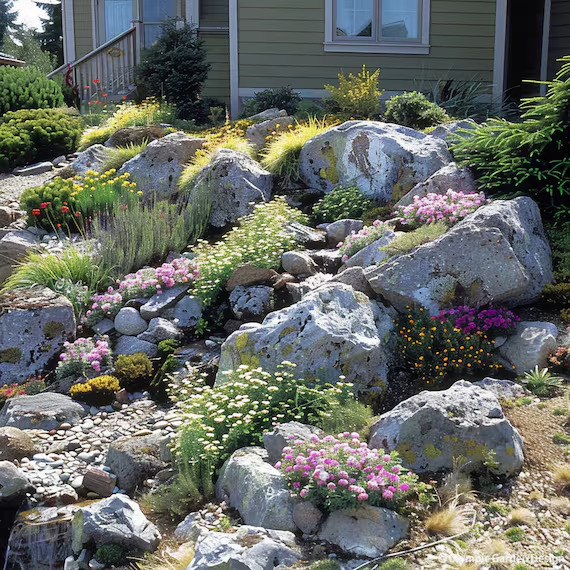
Add large boulders for a natural look

Rock beds with no big stones look flat and fake. Add two or three large boulders and the whole bed suddenly looks like it grew there.
Bury about a third of each boulder so it looks settled, not dropped off a truck. Odd numbers always look better than pairs. So, go with that.
Set every boulder with its natural layers running the same direction.
Real outcrops are tilted the same way, and mismatched grain makes a boulder group look staged.
Use white rock around a tree

A ring of white rock around a tree looks sharp and saves you from mowing close to the trunk. It also keeps weed whackers away from tender bark.
Never pile rock against the trunk, though. It traps moisture on the bark and invites rot, so leave a few inches of bare ground like a donut hole.
Build a dry creek feature

If water pools near your foundation, a white dry creek bed solves two problems at once. It carries runoff away and looks like a feature instead of a fix.
Dig it slightly sloped, line the bottom with larger rock, and finish with smaller white stone. Curve it gently, to prevent it from looking like a ditch.
Run a garden hose into the trench for ten minutes before you lay the top stone. You’ll see right away where water stalls or flows, and fixing it now beats moving a ton of rock later.
Surround stepping stones with white rock

Stepping stones sunk into a sea of white rock look like islands. Dark slate or gray pavers show off the best against the bright stone.
Set the stones slightly below the rock surface so you can walk without kicking gravel everywhere. Space them for a natural stride, usually about two feet center to center.
Test the spacing with the shortest person in your house, not yourself. A path that suits a tall adult turns into an awkward hop for kids and grandparents. And you don’t want this.
Use white rock in a raised garden bed

White rock works beautifully as a top layer in a raised bed full of herbs, succulents, or alpine plants. It keeps soil from splashing onto leaves and cuts down on watering.
Keep it away from the vegetable beds, though. Tomatoes and peppers can cook in the reflected heat, and rock makes it harder to work compost into the soil.
Keep the layer to about one inch in a raised bed. Deeper rock smothers seedlings and makes it a chore to reach the soil when you want to add a new plant.
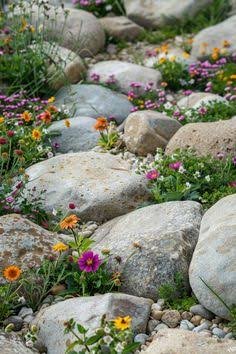
Frame colorful flowers
Bright red or orange flowers against white feel bold and graphic. Think zinnias, red salvia, orange cosmos, or deep purple coneflowers.
Pastels tend to wash out and disappear. If you want soft colors, add a darker plant behind them for contrast.
Plant flowers in groups of three or five of the same kind.
A single plant looks lost and spotty against a big white backdrop, while a clump reads as a deliberate splash of color.
Add driftwood for texture

A weathered piece of driftwood in a white rock bed adds warmth and shape. It breaks up all that hard, bright stone with something soft and organic.
Pick a piece with some curve to it and half bury it like a boulder. Set a small succulent in a crack for a finishing touch.
If the wood came from a beach, soak it in fresh water for a few days before it goes in the bed.
Leftover salt leaches into the soil and will quietly kill the plants around it.
Add solar lights for nighttime drama

White rock catches light beautifully after dark. A few solar stake lights tucked among the plants make the whole bed glow like it’s lit from within.
Aim them upward at a boulder or grass clump, not out at the street. Warm white bulbs look better than the harsh blue ones.
Tips for an elegant white rock garden bed
Watch out for depth
Two inches sounds like plenty, but it isn’t. Rock sinks into soil over time, and shallow layers let dirt come right up through.
Go three inches deep over your cardboard. Skimp, and by next summer you’ll see brown patches poking through like a bad haircut.
Keep the rock at least six inches below your siding or wood trim. Rock piled against the house hides moisture and gives termites and carpenter ants a covered highway.
Get rid of the leaves, don’t let them sit

Leaves don’t rot into rock beds well. They get trapped between the stones, break down into soil, and give weeds a free seedbed.
A leaf blower on low power is perfect here. Do a quick pass every couple of weeks in fall and your bed stays clean.
Wait for a dry day. Wet leaves plaster themselves to the stones and won’t budge, giving you a hard time.
Choose plants that love heat bouncing off rock
White rock reflects sunlight upward. Plants that like a baking, dry site thrive, while delicate ones crisp up like toast.
Yucca, sedum, ornamental grasses, and Russian sage handle it beautifully. Skip hostas and ferns here unless you enjoy sad brown leaves.
Put your toughest plants on the south and west sides of the bed, where the reflected heat is worst. Save the east side for anything a little more sensitive.
Wash it once a year

Dust, pollen, and soil film dull white rock quickly. Thankfully a quick spray with a hose on a sunny day brings back the brightness.
For stubborn spots, a stiff broom and a bucket of soapy water do the trick. Skip bleach, because it can kill the plants nearby.
For a deep clean, shovel a few buckets of rock into an old milk crate and blast it with the hose.
The dirty water drains right through, and the stones come out looking brand new.
Top up every few years
Rock thins out as it settles and gets scooped away by birds and kids. A thin patch invites weeds.
Keep a leftover bag or two in the garage. Matching the color later is nearly impossible, since quarries change batches.
Rake new rock into the top inch of the old instead of dumping it on top. Fresh stone is always brighter, and blending it keeps you from ending up with a patchwork quilt.
Pick your white carefully

Walk into a landscape yard and you’ll see six “white” rocks that look nothing alike. Some are warm and creamy, some are icy blue white, and some are basically beige in disguise.
Hold a sample against your house trim before you buy. If your trim is a cool bright white, creamy rock will look dingy next to it, like a yellowed tooth beside a fresh veneer.
Carry that sample to the exact spot where it will live and see whether it fits.
Mix different rock sizes

A bed of one uniform rock looks like a parking lot. Add a scattering of larger white river rocks, three or four fist sized ones, and it looks planned.
The catch is restraint. Too many sizes turns the bed into a gravel pit sampler, so stick to two or three sizes at most.
On a slope, use the bigger rock on the slope and save the small stuff for flat ground.
Small chips slide downhill in every heavy rain and pile up at the bottom like a little white landslide.
Choose the right size
Tiny chips under half an inch get tracked everywhere. They end up in your lawn, your driveway, and somehow your kitchen.
Aim for one to two inch rock for beds near walkways. It stays put, feels substantial underfoot, and looks intentional.
Choose angular crushed rock over smooth rounded stones for high traffic spots. Sharp edges lock together and hold still, while round stones roll underfoot like marbles.
Related Posts: