How To Sharpen Garden Shears: A Step By Step Guide
Last Updated on June 23, 2020 by Duncan
Sharp gardening shears not only make your pruning and trimming tasks easy, but they also save you time and reduce the chances of injury.
Are your garden shears blunt and would love to improve their efficiency? Here is a step by step guide on how to sharpen garden shears:
How do you tell the shears need sharpening?
When shears stop cutting as effectively as they used to, many gardeners rush to sharpen them, which is often not what they need.
Before you think about sharpening them, first check the fastening nut joining the blades. Is it loose? If it is, tighten it.
You should then follow up with a test cut. If the cut is clean, you don’t need to sharpen the shears. On the other hand, if the cut is poor, inspect the blade and confirm whether it’s bent. If slightly bent, straighten it.
To straighten garden shears, you need to loosen the pivot nut and separate the blades. You should then put the shears into a vise and flex the blades until they are straight.
To prevent putting a lot of stress on the pivot nut and bending the blades, avoid cutting thicker branches or dried wood.
Also, avoid using garden shears as pruning shears. Remember, shears are meant to cut green wood that isn’t thicker than 3/8-inch.
If you inspect the shears and find they are genuinely blunt and they need sharpening, go ahead and do it.
How do you sharpen garden shears?
You can use a hand file, bench grinder, angle grinder, or sharpening stone to sharpen garden shears.
If the blades are too blunt, use two sharpening tools. For example, use a hand file then finish with a sharpening stone.
Would you love to know how to sharpen your shears using each of the tools? Here are step by step instructions on how to go about it:
How to sharpen garden shears with a hand file
Step one: Buy a file
You don’t need a fancy file. A simple 10 in. Long mill file will get the work done.
Step two: Clean the shears
There is no way you will effectively sharpen garden tools while they are dirty. So, remove any soil or any other materials from the shears.
A quick clean under the outdoor tap will do the trick. You can also fill the sink or container with water then use an old cloth or brush to rub away the debris.
Exercise caution when cleaning as you don’t want to get cut. This calls for you to avoid using bare fingers.
Step 3: Remove rust
If your tools have gone for a long time without cleaning, chances are they have already rusted. Rust not only gives the tools an old, ugly look, it also makes it hard for you to open and close them.
If there is rust, use a medium-coarse steel wood, sanding paper, or any other abrasive material to buff away the rust gently.
After removing it, wipe the blades with a cloth and apply some clean oil.
Step 4: Set up the shears
To have an easy time, secure the shears in a bench vise then open them as wide as possible. To avoid accidents, ensure the beveled edge of the cutting blade is facing upwards.
Step 5: Follow the direction of the factory bevel
Holding it in both hands, move the file in one direction, away from you. Make one complete stroke from the base of the blade avoiding small, jerky strokes as you will lose the factory edge.
Apply light pressure while checking the edge of each stroke to ensure you are following the true path of the factory bevel. As you continue working, you will see a clean metal path.
Adjust the filing angle as you need so you file the entire edge evenly.
Repeat this motion several times until you expose clean metal over the entire edge. Once you are done with one blade, work on the next.
Step 5: Sand the burrs away
Once you are done with sharpening, you will feel burrs on the back of each blade. This is often due to the filing action.
To get rid of the burns, lightly sand the back of the blade. When doing it, keep the blade flat and move it in a circular motion.
How to sharpen garden shears with a sharpening stone
Step 1: Clean the blades
Wipe down the blades with a rag dampened with soapy water to remove sap, grease, or dirt that might be on the blades. Then let the blades dry completely.
Step 2: Remove gunk and rust
Rub the blades with a coarse steel wool pad. Is there any sanding dust on the blades? Wipe the blades down with a rag.
Step 3: Sharpen the shears
Begin with dampening a medium-grain sharpening stone with paraffin oil then hold the stone firmly with one hand while you hold the shears with the other.
Holding the sharpening stone at a 10-15 degree angle, work the stone towards the edge of the blade. Ensure you follow the natural curve of the shears.
Continue working the stone across each blade until you have uniformly sharpened it and are satisfied with the results.
Once you are done, complete the look by working 600-grit dry or wet sandpaper over the blades. This is to get rid of the uneven edges.
Step 4: Prevent rust
To prevent the shears from rusting, apply a silicone-based lubricant on the blades. You don’t have to apply a lot of the lubricating product. Wiping the oil on the shear’s blades is enough.
It’s tempting to run your finger along the length of the shear’s blade. Don’t do this as you can easily cut yourself.
Instead, use the shears on a leaf. When you are satisfied with the performance, stop sharpening.
Step 5: Remove burrs
Make several circles, then pick the blade and gently feel the edge. Once you can no longer feel the burrs left by the stone, assemble the blades and lightly apply oil on the moving parts.
Try cutting with the shears, and they should cut better than ever.
Garden shears sharpening tips
Avoid large files
Avoid using large files and electric grinding tools. This is because they remove huge chunks of metal and also heat the metal blade leading to damage and weakening of the cutting edge.
A coarse-grit and fine-grit sharpening stone or sharpening file is enough to give your shears the sharpness they need. You can sharpen the shears with or without disassembling them.
When buying the sharpening files, you will come across three main types: bastard (coarse), second cut (medium), and smooth cut (fine). You may also come across single and double-cut files.
Single cut files have their cutting teeth running in only one direction while the teeth in double-cut files cross each other, creating a diamond pattern.
Double cut files remove the metal fast. Unfortunately, they leave a rough cutting edge. Avoid using these unless you have incredibly damaged or dull blades.
If you have been taking good care of your garden shears, a single cut file is enough.
Always secure the garden shears
While you can sharpen the shears without securing them, it’s always wise to secure them. One of the best tools to use is a bench vise.
When you hold your shears in place, you have both of your, hands-free which gives you more strength, control, and precision.
If you don’t have a tool to help, you secure the shears, keep one of your hands on the shears, and the other on the file or sharpening stone.
Always file until you feel a burr
Also known as a wire edge, a burr lets you know that you have sharpened the shears to the cutting edge.
The burr is a small fold of metal that forms on the opposite side of the edge you are filing. You feel it by running your fingers in a “come here” motion on the backside of the blade.
To have a smooth cutting edge, you have to remove the burr. To do it, place the file on the opposite side of the blade. With the file flat against the shears, pull it back towards yourself with light pressure.
You can also use 300-grit sandpaper and sand the back sides of the blades. For ideal results, keep the blades flat and sand in a circular motion.
Protect yourself
Even if your shears are blunt, be cautious as you can easily get cut when handling them. Before you begin the sharpening, put on a pair of protective gloves that will protect you from scratches, slices, and nicks.
Other than protecting your hands, you also should protect your eyes from shards of metal or rust.
You can easily do this by wearing a pair of safety glasses. Wrap around, or goggle type safety glasses are the best as they prevent the particles from reaching your eyes regardless of the direction they are coming from.
Remember that even with the protective gear on, an accident can happen, and you cut yourself. When this happens, and the cut is large, stop sharpening your shears and seek medical attention immediately.
Other ways to keep garden shears in tip-top shape
Other than sharpening the tools, there are plenty of other things you can do to give them a long life. Some of these things include:
Clean the shears after each use: Once you are done with pruning, remove leaves, soil, or any other debris using a hosepipe. You can also sap off the shears with a clean rag.
This not only leaves the tools looking great, but it also prevents rust from coming about.
Store the shears in a dry, protected area: Good quality gardening tools don’t come cheap so you shouldn’t leave your shears outside as it not only increases the chances of them being stolen, it also enhances its chances of rusting.
After cleaning and drying the tools, bring them under the cover. You can put the shears in the garage or shed.
When storing them, store them hanging, so they don’t come into contact with moisture or soil.
You can also put the shears in a bucket filled with clean sand. Lightly dampen the sand with multipurpose oil then place the bucket in a sheltered area.
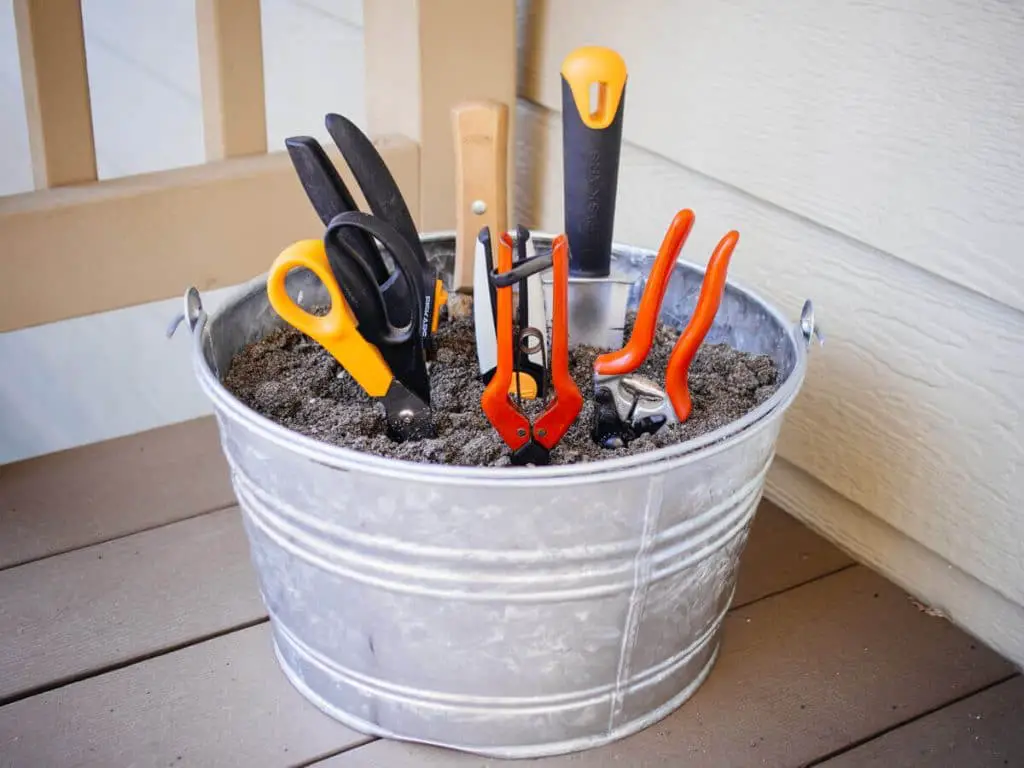
After cleaning, stick the shears into the sand. The sand grains will keep the blades sharp while the oil will prevent the blades from rusting.
Pay attention to the garden handles: Do your shears have wooden handles? Regularly inspect them for splittering. If necessary, sand them smooth then use a clean rag to apply finishing oil.
Related Posts: