17 Amazing Miniature Fairy Garden DIY Ideas You Will Love
Last Updated on May 28, 2026 by Duncan
A miniature fairy garden is a small-scale decorative garden built inside a container which can be a terracotta pot, broken pot, bird bath, wooden planter, or tree stump planted with dwarf plants and decorated with miniature accessories like fairy houses, figurines, and tiny furniture.
The 17 ideas below range from beginner projects that take under an hour (broken pot, rock bucket) to detailed multi-hour builds (stone fairy house, woodland trail).
Every idea includes a materials list, step-by-step guidance, and a personal tip.
This guide covers 17 miniature fairy garden DIY ideas from broken pot staircases and tree stump hideaways to bird bath displays and stone cottages.
Each idea includes a materials list, a personal tip from my own garden, and step-by-step guidance.
Projects range from beginner-friendly (under one hour, no tools) to more detailed builds for experienced gardeners.
All 17 Ideas at a Glance
| # | Idea | Difficulty | Time | Best For |
|---|---|---|---|---|
| 1 | Classic Miniature Garden | Beginner | 1 hr | First-timers |
| 2 | Rock Garden in a Bucket | Beginner | 45 min | Kids & families |
| 3 | Fairy House & Garden | Intermediate | 2 hrs | Year-round display |
| 4 | Multi-Level Flower Pots | Intermediate | 2 hrs | Patios & decks |
| 5 | Broken Pot Garden | Beginner | 30 min | Upcycling |
| 6 | Birdhouse Garden | Beginner | 1 hr | Families with children |
| 7 | Raised Pedestal Garden | Beginner | 1 hr | Accessibility & decks |
| 8 | Planter Box Garden | Beginner | 1 hr | Shady & low-light spots |
| 9 | Pinecone Roof House | Intermediate | 2 hrs | Craft-focused builders |
| 10 | Fairy Tree House | Intermediate | 2–3 hrs | Large-tree gardens |
| 11 | Tree Stump Garden | Beginner | 1 hr | Kids & scavenger hunts |
| 12 | Fairy Door Clay Pot | Beginner | 45 min | Indoor & front doors |
| 13 | Multi-Level Stick Walkway | Intermediate | 2 hrs | Creative builders |
| 14 | Backyard Patio Garden | Intermediate | 2–3 hrs | Entertaining spaces |
| 15 | Woodland Fairy Trail | Beginner | 2 hrs+ | Low-maintenance gardens |
| 16 | Bird Bath Garden | Beginner | 1 hr | Upcycling & displays |
| 17 | Stone Fairy House Scene | Advanced | 3+ hrs | Detailed builds |
1. Classic Miniature Fairy Garden

Beginner
⏱ ~1 hour
Low cost
Indoor or outdoor
A classic miniature fairy garden has no fixed template and this flexibility is the point. Fairies are traditionally associated with birds, flowers, and natural elements, so the most effective designs reflect a scaled-down natural landscape.
They say the best fairy gardens feel discovered rather than constructed.
Use pea gravel for ground texture, mini marbles for decorative accents, and small wooden sticks for fencing or pathways.
You can tailor the whole garden to any personal style — rustic woodland, cottage garden, or sleek modern miniature.
- Choose your container: a shallow tray, large pot, or wooden crate.
- Fill two-thirds with potting soil suited to your chosen plants.
- Plant first small succulents, thyme, or moss that work well.
- Spread pea gravel around the plants to form a ground surface.
- Add wooden stick fencing or small pebble pathways.
- Place fairy figurines last, after plants and paths are established.
- Pea gravel
- Mini marbles
- Wooden sticks
- Small plants or succulents
- Fairy figurines
2. Rock Fairy Garden in a Bucket
Beginner
⏱ ~45 minutes
Great for kids
♻️ Upcycle friendly
Rocks give a miniature garden natural weight and credibility. They ground the scene and make even the most modest setup look intentional.
Repurpose an old wooden bucket as the central dwelling and add layered stones in varying sizes to create the illusion of depth inside a very compact space.
Place larger rocks at the back and smaller ones at the front. Add a tiny watering can for detail, and place decorative mushrooms along the sides for a classic enchanted-forest look.
- Drill a few small drainage holes in the bottom of an old wooden or tin bucket.
- Add a layer of gravel for drainage, then fill with potting soil.
- Place the largest rock at the back to anchor the scene.
- Layer progressively smaller rocks moving forward.
- Tuck moss or low ground cover between the rocks.
- Add the mushroom figurines and tiny watering can as finishing details.
- Old wooden or tin bucket
- Assorted rocks (varied sizes)
- Tiny watering can
- Decorative mushroom figurines
- Moss or low ground cover
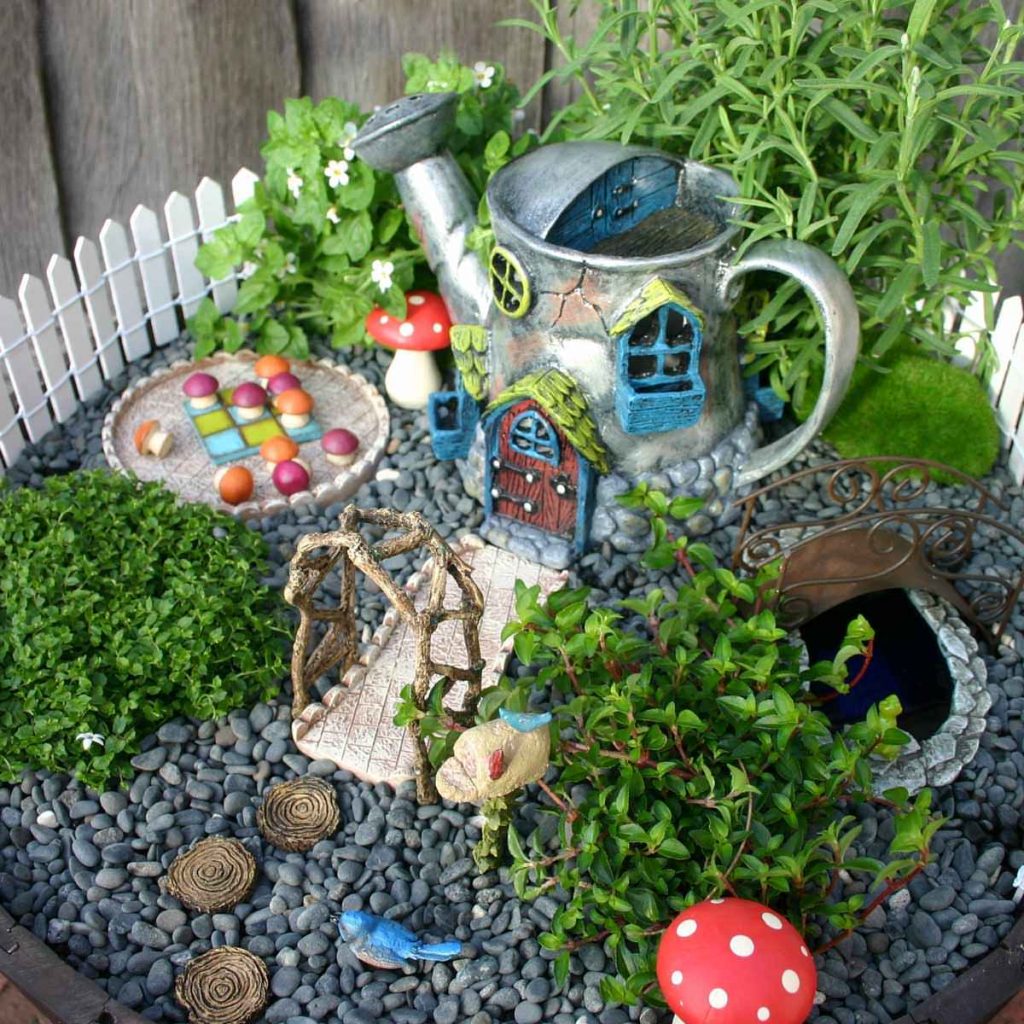
3. Fairy House and Garden Combination

Intermediate
⏱ ~2 hours
Year-round display
Budget-friendly
A fairy house and garden combination creates a complete miniature world which is a dwelling and its surrounding landscape. The key is mixing textures: rough stone, smooth wood, and soft moss give the scene depth and realism.
One of the practical advantages of this design is that it works all year; in summer, surrounding plants fill it out, and in cooler months, the structure itself holds the interest.
When selecting stones for borders and walls, choose the flattest ones available — flat stones stack cleanly and look far more intentional than rounded ones.
- Set a wooden crate as the base platform.
- Place a small unfinished birdhouse at the back as the main structure.
- Lay flat decorative stones around the base to form walls and borders.
- Add wood slices as stepping-stone paths leading to the front door.
- Spread a moss mat across the base for the garden surface.
- Tuck dried or artificial flowers into corners and crevices.
- Finish with small fairy garden accessories such as a bench, a lantern, figurines.
- Wooden crate
- Unfinished birdhouse
- Flat decorative stones
- Wood slices
- Artificial or dried flowers
- Moss mat
- Fairy garden accessories
4. Miniature Flower Pot Fairy Garden

Intermediate
⏱ ~2 hours
Patio favourite
Indoor or outdoor
A multi-level flower pot fairy garden uses three different-sized containers stacked at different heights and connected by miniature staircases cut from birch logs.
The tiered arrangement creates a sense of scale and lets you grow different plants at each level which is a useful way to mix succulents with trailing moss or ferns in one display.
Important: Always match your soil to your plant selection. Succulents need well-draining sandy or gritty soil. Ferns and moss prefer moisture-retentive compost.
Mixing incompatible plants in the same pot is the most common mistake in small fairy gardens.
- Choose three pots in small, medium, and large sizes.
- Fill each pot with soil suited to your chosen plants.
- Stack the pots on a stable surface, offsetting each level for visual interest.
- Cut a birch log into disc slices to create connecting staircase steps between levels.
- Plant your chosen plants and add decorative rocks as mulch.
- Position fairy accessories: a bench on the middle level, a dragonfly pick at the top, a sitting frog at the base.
- Apply an outdoor wood sealer to all wooden accessories before final placement.
- 3 different-sized pots
- Organic potting soil
- Small plants (succulents or ferns)
- Decorative rocks
- Cut birch logs (for steps)
- Garden bench figurine
- Mini wooden ladder
- Sitting frog figurine
- Dragonfly pick
- Black decorative gems
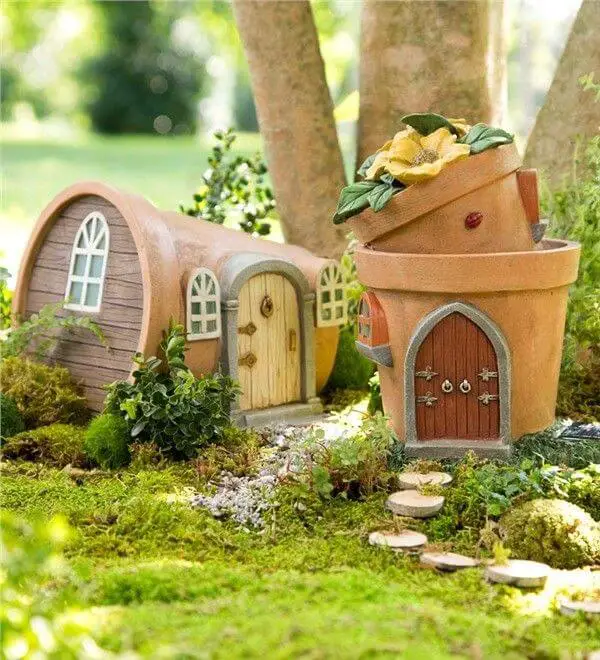
5. Broken Pot Fairy Garden
Beginner
⏱ Under 30 min
♻️ Best upcycle project
Near-zero cost
A broken pot fairy garden is one of the most creative upcycling projects in gardening.
Instead of discarding a cracked or chipped pot, you use the break as part of the design the pot becomes a tiered landscape, and the broken shards become miniature staircases or stepping stones.
Arrange the largest pot base on the ground, then layer shards in a descending staircase formation.
Tuck tiny flowers into the crevices for colour, and add stepping stones and fairy figurines along the shard steps. Adding artificial turf around the base makes the scene look more finished.
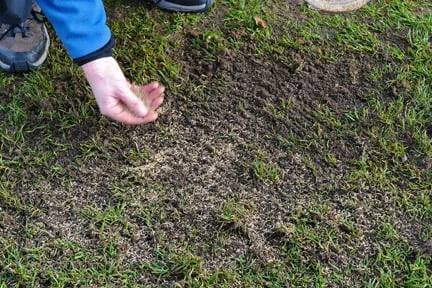
For larger setups, professional Artificial Grass Installation services can help with the surrounding area.
- If you don’t already have a broken pot, gently crack one by wrapping it in cloth and tapping with a mallet, aim for 3–4 large pieces.
- Place the largest base piece flat on the ground or a tray.
- Fill it with potting soil to roughly two-thirds depth.
- Prop the next shard at an angle to create the first stair step; fill behind it with soil.
- Repeat with additional shards, each one slightly higher, to form a staircase.
- Plant small succulents or moss in the soil pockets between each level.
- Place fairy figurines and miniature stepping stones along the shards.
- Broken terracotta or clay pot
- Potting soil
- Small succulents or moss
- Fairy figurines
- Miniature stepping stones
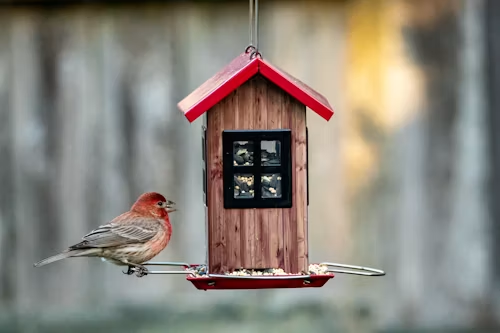
6. Birdhouse Fairy Garden

Beginner
⏱ ~1 hour
Family activity
Porch display
Two decorative birdhouses placed in a large flower pot are enough to create an entire miniature fairy neighbourhood.
The birdhouses become the buildings; the planted pot becomes the village grounds. Small details make the scene: a miniature ‘Welcome’ sign at one entry, a DIY clock made from old watch parts mounted on the wall, and a twig ladder leaning against one birdhouse.
These touches suggest a life being lived inside.
- Buy two unfinished birdhouses from a craft store choose different sizes for visual variety.
- Paint or decorate the birdhouses (let children help with this step).
- Apply an outdoor sealer once the paint is dry.
- Fill a large pot with soil and plant small groundcover plants.
- Push the birdhouse posts firmly into the soil, angling them slightly for a natural look.
- Attach a miniature ‘Welcome’ sign near the entrance of one birdhouse.
- Lean a twig ladder against the taller birdhouse.
- Mount old watch parts or a tiny clock face on the wall of the second birdhouse.
- 2 decorative birdhouses (different sizes)
- Large flower pot
- Potting soil and small plants
- Miniature ‘Welcome’ sign
- Twig ladder
- Old watch parts (optional clock detail)
7. Raised Pedestal Fairy Garden

Beginner
⏱ ~1 hour
♿ Accessibility-friendly
Deck & patio ideal
A pedestal fairy garden raises the miniature scene to a comfortable viewing height ideal for patios, decks, and entryways where ground-level gardens go unnoticed.
Mounting a planter on a trolley or pedestal base also makes the garden easy to reposition seasonally. This design is especially practical for gardeners who find bending uncomfortable.
Use broken pot shards or small mosaic tiles to form a walkway to the front door of the miniature building where the small pathway gives the eye a natural point of entry into the scene.
- Choose a planter trolley or a sturdy pedestal base at a comfortable working height.
- Place a wide, shallow planter on top and fill with succulent soil.
- Position a fairy garden building at the centre or back.
- Arrange mini terracotta pots at different angles around the building.
- Lay broken pot shards or mosaic tiles in front of the door as a pathway.
- Fill gaps with gravel, moss, or small succulents.
- Planter trolley or pedestal base
- Fairy garden buildings
- Succulent soil
- Mini terracotta pots
- Broken pot shards or tiles (walkway)
8. Planter Box Fairy Garden

Beginner
⏱ ~1 hour
Shady spots
Low-maintenance
A wooden planter box gives you a defined rectangular canvas that is easy to arrange and looks tidy in any outdoor setting.
The structured shape makes it straightforward to plan distinct zones a pathway, a planting area, and a structure.
You can purchase a ready-made wooden house or build your own using birch plywood cut to size.
For shady or low-light spots, a mostly-structural garden with dried seed pods and preserved moss looks great year-round with zero watering a more realistic option than trying to grow plants that need full sun.
- Line the wooden planter box with landscape fabric to prevent soil spillage.
- Fill with potting soil or, for a no-water version, preserved moss and sand.
- Position the miniature wooden house at the back third of the box.
- Arrange dried seed pods and stones in front of the house as a garden border.
- Place a small terracotta pot and tray to one side as a water feature detail.
- Add a miniature bird to the birdhouse and flowers at the corners.
- Wooden planter box
- Dried seed pods
- Miniature wooden house
- Small terracotta pot and tray
- Miniature bird figurine
- Small flowers (artificial or dried)
9. Pinecone Roof Fairy House

Intermediate
⏱ ~2 hours
Uses free materials
Craft-focused
Pinecone scales mimic roof shingles naturally as their layered, overlapping structure is essentially the same principle as tile roofing.
Gluing pinecone scales onto the roof of a birdhouse or small clay pot creates a dimensional, textured roof that no paint or craft paper can replicate.
For a creative variation, use a birdhouse gourd as the base structure instead of a standard birdhouse. The organic, irregular shape of a gourd makes each fairy house look genuinely unique and no two will ever be the same.
- Collect dry pinecones — wet scales close up and glue won’t hold on damp scales.
- Gently peel the scales off the pinecone using pliers or your fingers.
- Apply strong craft glue to the underside of each scale.
- Press scales onto the roof of your birdhouse starting at the bottom edge and working upward, overlapping each row like real shingles.
- Allow to dry for at least 2 hours before adding moss or lichen trim around the base of the roof.
- Optional: apply a clear outdoor sealer over the finished roof.
- Pinecones (for scale shingles)
- Birdhouse or birdhouse gourd
- Strong craft glue
- Moss or lichen (for trim)
10. Fairy Tree House
Intermediate
⏱ 2–3 hours
Needs large tree
✨ Evening magic
If you have a large tree in your garden with exposed roots, its root system forms a natural fairy village foundation at no cost.
Roots create rooms, corridors, and sheltered spaces that give a fairy tree house genuine character and the tree provides the entire structure.
Solar-powered micro lights threaded through the roots create a particularly magical evening effect.
- Walk around the base of the tree and identify natural pockets and sheltered root gaps.
- Clear away dead leaves and debris between the roots.
- Nestle small fairy houses into the largest root pockets.
- Press sheet moss clumps between the houses to fill gaps.
- Hang tiny lanterns or thread solar micro lights through the root system.
- Add a miniature rope bridge between two prominent roots for a multi-level element.
- Place small fairy figurines on flat root surfaces.
- Tree with exposed roots
- Miniature fairy houses
- Sheet moss
- Tiny lanterns or solar micro lights
- Miniature rope bridge (optional)
11. Fairy Garden Tree Stump

Beginner
⏱ ~1 hour
Ideal with kids
♻️ Repurposes dead wood
An old tree stump is one of the most naturally suited bases for a fairy garden. Bark crevices, the flat top surface, and the organic shape all provide ready-made texture and shelter that no manufactured planter can match.
This is an ideal project to do with children so ask them to describe how they would design the garden, then build their vision.
Send them on a nature scavenger hunt to collect rocks, interesting twigs, curled bark, and fallen seed pods.
Using found natural materials keeps the cost near zero and makes children genuinely invested in the result. Learn how to preserve a tree stump properly before starting.
- If the stump is freshly cut, allow it to dry for a few weeks before using it as a garden base.
- Apply a wood preservative to slow further decomposition (optional but recommended).
- Scoop a shallow hollow in the top of the stump if the surface is flat. This holds soil and plants in place.
- Fill the hollow with potting soil and plant small groundcover plants or moss.
- Arrange found rocks, twigs, and bark pieces around the stump base.
- Tuck miniature fairy accessories. It can be a tiny door on the side of the stump, a bench on top or any other thing.
- Tree stump
- Found rocks and twigs
- Sheet moss
- Miniature fairy accessories
- Small groundcover plants
12. Fairy Door Clay Pot Planter
Beginner
⏱ ~45 minutes
Front door display
Great for reluctant gardeners
A fairy door transforms a standard terracotta pot into a complete fairy home, the implication that a fairy actually lives inside is the entire concept.
Mount a small fairy door flush with the base of the pot, then build a welcoming landscape around it using pebbles, river rocks, moss, and toadstools.
Wooden discs or a tiny bench along the path give fairies a place to rest before entering.
- Purchase or craft a miniature fairy door sized to fit the base of your terracotta pot.
- Attach the door to the pot using waterproof craft adhesive. You should press firmly and allow to cure overnight.
- Fill the pot with potting soil and plant small trailing plants around the rim.
- Lay river rocks and pebbles in front of the door to form a pathway.
- Press sheet moss between the stones to soften the look.
- Add toadstool figurines on either side of the path, and a wooden disc bench nearby.
- Terracotta clay pot
- Fairy door
- Pebbles and river rocks
- Sheet moss
- Toadstools
- Wooden discs or mini bench
13. Multi-Level Planter Fairy Garden with Stick Walkways

Intermediate
⏱ ~2 hours
Uses wire & sticks
Fairy neighbourhood feel
A multi-level planter fairy garden stacks three flower pots at different heights and connects them with handmade stick walkways.
The result looks like an elevated fairy neighbourhood with distinct levels, each accessible by its own bridge.
Bundle thin wooden sticks together with thin wire (not rubber bands — see tip below) to form sturdy walkways with a natural appearance.
- Choose three pots at significantly different heights. You should note that the more height variation, the more dramatic the effect.
- Arrange and plant each pot individually before assembling the full scene.
- Cut thin wooden sticks to equal lengths for each walkway section.
- Bundle 5–7 sticks together and wrap tightly with thin galvanised wire at each end and the middle.
- Prop each walkway between pots at a slight angle, pressing both ends firmly into the soil.
- Add fairy figurines climbing the walkways and resting on each pot level.
- 3 flower pots at varying heights
- Thin wooden sticks
- Thin galvanised wire
- Potting soil
- Small plants
14. Backyard Patio Fairy Garden

Intermediate
⏱ 2–3 hours
Entertaining spaces
Water feature included
A patio fairy garden integrates the miniature world into your outdoor living space, turning it into a focal point that guests notice and interact with. It should not be something tucked away in a corner.
It works best when it feels connected to the rest of the patio layout rather than isolated.
A small tabletop water feature adds movement and sound, which makes the garden feel alive even when nobody is tending it.
- Choose a corner of the patio that gets foot traffic and is visible from the seating area.
- Set up planters at two or three different heights to create visual depth.
- Place a small tabletop fountain or bird bath as the centrepiece — connect a battery-powered pump to a ceramic dish for a DIY version.
- Position miniature garden furniture (chairs, table, hammock) around the water feature.
- Plant groundcover plants in the surrounding planters to soften the scene.
- Add fairy figurines in the chairs and around the water feature.
- Miniature garden furniture set
- Small tabletop water feature or bird bath
- Assorted planters
- Groundcover plants
- Battery-powered mini water pump (optional DIY)
15. Fairy Garden in the Woods

Beginner
⏱ 2+ hours (extendable)
Lowest maintenance
Grows over time
If you have a wooded area or tree line at the edge of your property, building a fairy garden within it produces an especially immersive result.
Natural canopy, root systems, and uneven terrain create atmosphere that no pot or planter can reproduce. Add a solar-powered Miniature Street Light along the path to suggest a tiny village at dusk.
The existing leaf litter, roots, and irregular ground all contribute without any extra effort, making this the lowest-maintenance fairy garden style on the list.
- Walk your tree line and identify a 2–4 metre stretch with natural root systems and interesting ground texture.
- Clear a narrow path through the area by raking away heavy leaf litter.
- Lay a pebble and rock pathway through the cleared area.
- Position 2–3 miniature fairy buildings first, nestled against tree bases or between roots.
- Add a solar-powered miniature street light at the path entrance.
- Tuck fairy figurines and natural moss around the buildings.
- Extend the trail by a section each year to grow the scene over time.
- Wooded area or tree line
- Miniature street light (solar-powered)
- Pebbles and rocks (for path)
- Fairy figurines
- Natural moss and ground cover
16. Bird Bath Fairy Garden

Beginner
⏱ ~1 hour
♻️ Repurposes old birdbath
Pedestal display
A bird bath provides a naturally shallow, wide stone basin that makes an excellent fairy garden container.
Its raised height gives the garden a pedestal-like presentation, and the aged stone texture suits the fairy aesthetic perfectly without any modification.
If your bird bath is cracked and no longer holds water, drill a few drainage holes in the basin and repurpose it as a raised fairy garden which is a far more satisfying outcome than throwing it away.
- If the basin is cracked, drill 3–4 small drainage holes in the lowest points.
- Add a shallow layer of coarse gravel for drainage.
- Fill with potting soil, leaving about 2cm below the rim.
- Press a sheet of moss across the soil surface and trim to fit and water it in.
- Position the fairy garden house at the centre or back of the basin.
- Arrange decorative rocks and gems around the base of the house.
- Add a miniature well, mushroom figurines, and fairy figurines to fill the available space.
- Allow trailing plants to spill over the edge of the basin for a natural look.
- Bird bath (cracked or intact)
- Potting soil
- Moss sheet
- Fairy garden house
- Decorative rocks and gems
- Miniature well
- Miniature mushrooms
- Fairy figurines
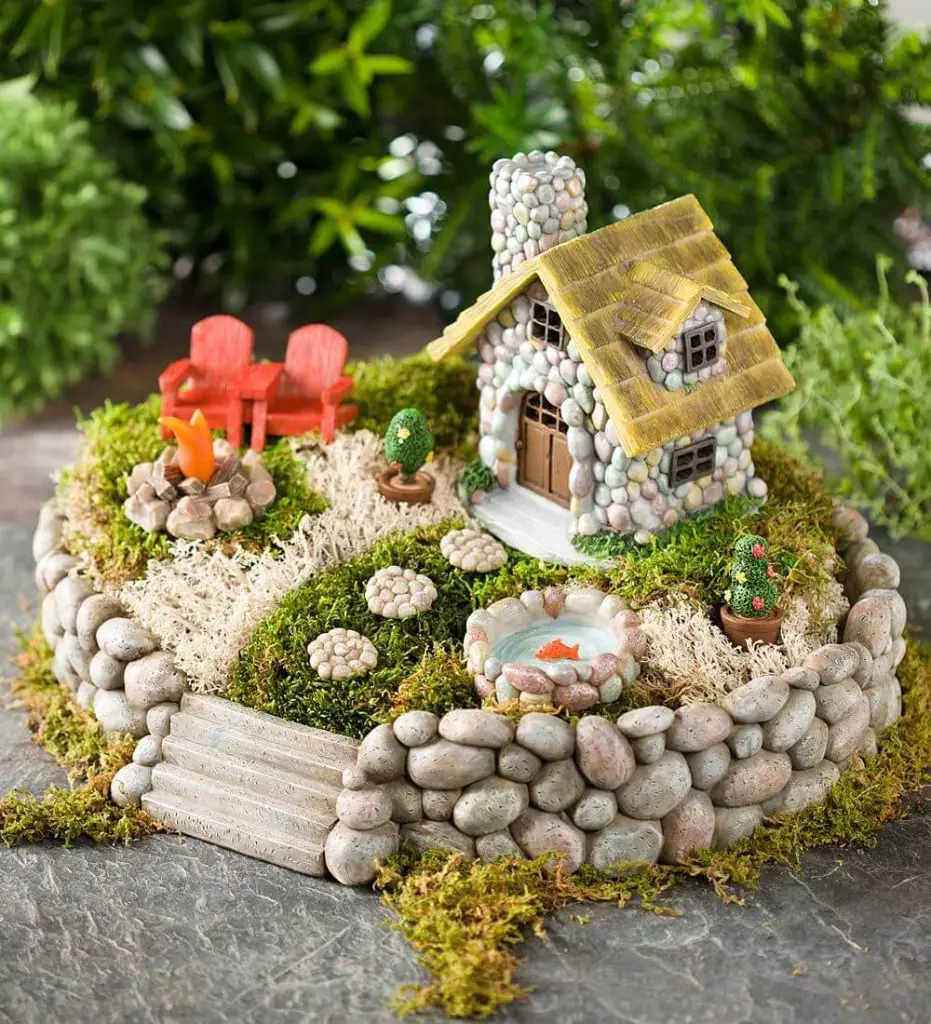
17. Stone Fairy House Scene
Advanced
⏱ 3+ hours
✨ Most detailed build
Ongoing project
A stone fairy house brings together multiple outdoor spaces which can be a cottage, a paved patio, a garden, and a water feature into a single cohesive scene.
The effect is an entire fairy property rather than a single structure.
One large planter tray acts as the base for the entire garden, keeping all elements together and making the scene easy to move or bring indoors seasonally.
This is the most detailed project on this list, and the one most suited to treating as an evolving long-term project replacing one element each season keeps it fresh and the hobby interesting indefinitely.
- Choose a large, wide planter tray as your base — at least 50cm across for this level of detail.
- Fill with a shallow layer of potting soil across the entire base.
- Position the miniature stone cottage at the rear-centre as the anchor structure.
- Lay stepping stones from the cottage entrance to the front edge of the tray, spacing them naturally.
- Place the miniature fish pond to one side of the path — press it slightly into the soil to look embedded.
- Set up the fire pit and two chairs on the opposite side of the path from the pond.
- Add fairy figurines in the chairs and near the cottage door.
- Fill remaining soil areas with low groundcover plants or moss.
- Revisit and replace one element each season to keep the scene evolving.
- Miniature stone cottage
- Stepping stones
- Miniature fish pond
- Miniature fire pit
- Miniature chairs
- Fairy figurines
- 1 large planter tray
Best Plants for Miniature Fairy Gardens
Choosing the right plants is the difference between a fairy garden that thrives and one that struggles within a season. The key is selecting small, slow-growing varieties that stay in proportion with the miniature accessories.
| Plant | Type | Light | Water | Best Use |
|---|---|---|---|---|
| Succulents (Echeveria, Sedum) | Succulent | Full sun | Low | Ground cover, pots |
| Thyme | Herb | Full sun | Low–medium | Pathways, borders |
| Baby Tears (Soleirolia) | Ground cover | Part shade | High | Moss-like carpet |
| Dwarf Mondo Grass | Grass | Part–full shade | Medium | Woodland gardens |
| Creeping Jenny | Trailing | Part shade | Medium | Pot edges, trails |
| Mini Hostas | Perennial | Shade | Medium | Tree stump gardens |
| Sheet Moss | Moss | Shade–part shade | High | All fairy gardens |
Frequently Asked Questions About Miniature Fairy Gardens
What materials do I need to start a miniature fairy garden?
Basic materials for a miniature fairy garden include a container (pot, planter box, or broken pot), potting soil matched to your plant selection, small plants or succulents, decorative rocks or pebbles, sheet moss, and fairy accessories such as miniature houses, benches, and figurines.
Natural found materials such as rocks, twigs, pinecones reduce cost and often look more authentic than purchased items. Most beginner projects can be started for under $20 using items you already have at home.
Which fairy garden idea is easiest for beginners?
The Broken Pot Fairy Garden (#5) and the Rock Garden in a Bucket (#2) are the most beginner-friendly options on this list. Both require no cutting or drilling, can be completed in under one hour, and use materials you may already have at home.
The broken pot design also transforms a damaged container into a feature rather than waste.
What plants work best in a miniature fairy garden?
Small, slow-growing plants work best. Popular choices include succulents, thyme, baby tears, mini hostas, creeping Jenny, and dwarf mondo grass.
Always match soil type to your plant requirements. Remember that succulents need well-draining sandy soil, while moss and ferns prefer moisture-retentive mixes. Mixing incompatible plants in the same pot is the most common beginner mistake.
Can I make a fairy garden indoors?
Yes. Indoor fairy gardens work well in terrariums, wide bowls, or planter trays near a window with natural light. Use low-light tolerant plants like moss, baby tears, or succulents, and avoid water features unless the container is fully waterproof.
The Miniature Flower Pot Garden (#4) and the Fairy Door Clay Pot (#12) from this list are particularly well suited to indoor use.
Can children help build a fairy garden?
Yes, fairy garden projects are ideal for children. Kids can help choose plants, go on nature scavenger hunts to collect rocks and sticks, and arrange fairy accessories without any adult supervision once the container is set up.
The Tree Stump Garden (#11) and the Birdhouse Garden (#6) are especially child-friendly. Letting children paint their own birdhouse gives them genuine ownership of the garden.
How do I protect wooden fairy garden accessories outdoors?
Coat all wooden accessories with an outdoor wood sealer before placing them in the garden.
This protects ladders, fences, benches, and signs from rain and UV exposure, extending their lifespan significantly.
Reapply at the start of each growing season for best results. Thin galvanised wire holds wooden stick structures together far better than rubber bands, which deteriorate outdoors within two months.
How long does it take to build a fairy garden?
Simple projects like the broken pot or rock bucket garden take under 30–45 minutes. Intermediate builds like the multi-level flower pot or birdhouse garden take 1–2 hours.
The most detailed project such as the stone fairy house scene takes 3+ hours and is best treated as an evolving project built across multiple sessions.
What containers can I use for a fairy garden?
Good fairy garden containers include terracotta pots, wooden planter boxes, old wooden or tin buckets, broken pots, bird baths, tree stumps, wide planter trays, and wooden crates.
The base of a large tree with exposed roots or a woodland area edge works as a container-free natural setting.
The best containers are often things you already have such as a damaged bird bath, an old bucket, or a cracked terracotta pot. Free and found materials consistently produce more natural-looking results than purpose-bought containers.
How do I stop a fairy garden from getting waterlogged?
Always add a drainage layer of coarse gravel at the bottom of any closed container before adding soil. Ensure containers have at least one drainage hole or drill your own if needed.
Use well-draining potting mixes rather than dense garden soil, and avoid overwatering. Succulents and many groundcover plants are drought-tolerant and better suited to closed containers than moisture-loving plants.
Can I leave a fairy garden outside in winter?
It depends on your climate and the container. Terracotta pots can crack in hard frost brings them inside or wrap them in hessian.
Wooden planter boxes and sturdy stone bases generally tolerate frost better. Succulents vary widely in cold hardiness; check your specific variety.
A structural garden using dried seed pods, preserved moss, and weather-resistant accessories requires no seasonal management and can stay out year-round in most climates.
Start With What You Already Have
The most-admired fairy gardens are not the most elaborate ones. They are the ones that feel personal, built with found materials, designed by children, or grown from a cracked pot that almost went in the bin.
The 17 ideas above range from five-minute upcycling projects to multi-hour builds. Wherever you start, start with what you already have.
For more inspiration, see the full collection of miniature fairy garden DIY ideas at Homelovr.
Related Posts: