
How to Make a Witchy Garden
Last Updated on July 4, 2026 by Duncan
I’ve been gardening for 15 years, and somewhere around year eight, a client asked me to make her backyard “feel like a witch lived there.” I laughed.
Then I spent the next three years figuring out what that phrase means, because it turns out it means something very specific, and most of the internet is getting it wrong.
If you’ve been pinning photos of moody gardens with black flowers and crumbling stone paths, this one’s for you.
Grab a coffee.
We’re doing this properly, step by step.
First, Let’s Kill a Myth
You do not need deadly nightshade in your yard to have a witchy garden.
I know, I know.
Belladonna sounds so dramatic.
But here’s the thing nobody tells you: If you have a dog, a toddler, or a curious cat, planting actual poison in your flower bed is asking for a 2am trip to the emergency vet or worse.
I learned this the hard way when a client’s golden retriever ate foxglove off her porch.
He was fine (barely), but her hydrangeas got trampled during the panic, and she never planted foxglove again.
Before you go for the common plants, you should know that there are plenty of other plants that look sinister and won’t send anyone to urgent care.
We’ll get there.
Create a witchy feeling

Here’s what took me years to figure out.
A witchy garden isn’t a plant list. I
t’s a feeling.
And that feeling comes from how the space behaves, not what’s growing in it.
Think about it this way.
A perfectly manicured English garden with symmetrical rows of black tulips is not witchy.
It’s just goth landscaping.
What makes a space feel enchanted is a little bit of chaos, a little bit of age, and a lot of shadow.
You’re not gardening here. You’re setting a stage.
How to shift your mindset before you touch a shovel:
- Walk your yard at dusk before you plan anything. Note where the shadows fall naturally.
- Take a photo of your favorite “witchy” Pinterest garden and ask yourself what feeling it gives you, not what plants are in it.
- Write down three words to describe that feeling (mine are usually “hidden,” “old,” and “a little unruly”).
- Keep those three words taped somewhere you’ll see them while you shop for plants, so you don’t get seduced by a pretty flower that doesn’t fit the vibe.
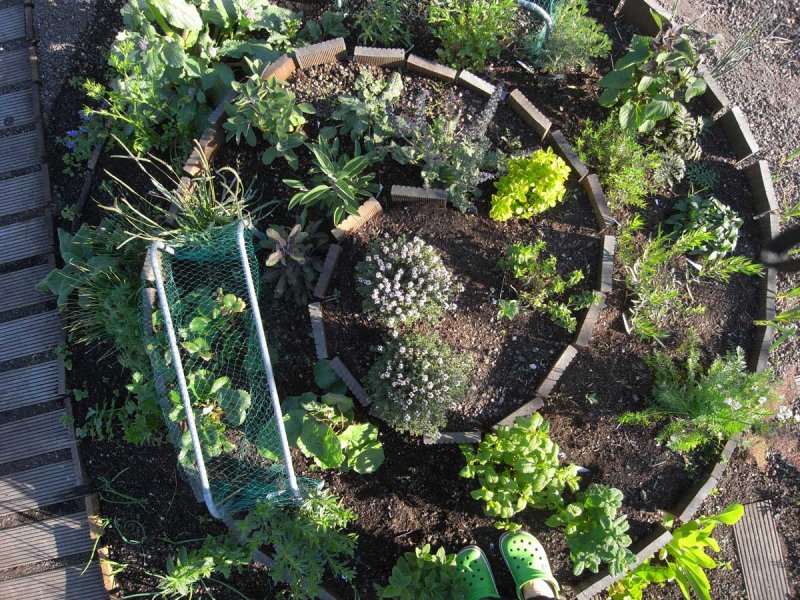
Don’t plant in straight lines
I cannot say this enough. Straight rows and perfect circles read as “someone with a ruler was here.”
Nature doesn’t work that way, and neither should your garden.
Plant in loose crescents or spirals instead.
Let one side spill a little wilder than the other.
Your eye should wander instead of landing on a perfect pattern.
If your garden looks like it could be a diagram in an instruction manual, you’ve gone too clean.
Mess it up a little.
Your garden will thank you.
How to lay out a crescent bed:
- Grab a garden hose or a length of rope and lay it on the ground in a loose C shape. Don’t measure anything, just eyeball it.
- Step back and look at it from your porch or window. Adjust until one end feels a little longer or fuller than the other. Symmetry is the enemy here.
- Mark the hose outline with spray paint or flour so you don’t lose the shape.
- Dig along that line, and resist the urge to straighten any part of it once you start.
- Plant your tallest items toward the back or center of the curve, then work outward and downward in height as you move to the edges.
Let things self seed
This is my favorite tip because it’s basically permission to be a little lazy.
Plants like foxglove, borage, calendula, and poppies drop their seeds and come back wherever they please the next year.
This creates the look of a garden that’s been growing untended for decades, which is exactly the vibe you want.
Every spring you’ll get little surprises popping up in weird spots. That randomness is not a flaw. That randomness is the whole point.
How to set up self seeding without total chaos:
- Choose two or three self seeding plants max for your first year (calendula and borage are the most forgiving).
- Plant them in a loose cluster rather than scattering seeds everywhere. This gives you a “mother patch” to seed from.
- Once flowers fade in late summer, leave the seed heads on the plant instead of deadheading them. This feels wrong if you’re used to tidy gardening. Do it anyway.
- In early spring, resist weeding anything you don’t recognize right away. Let seedlings show their true leaves before deciding what stays and what goes.
- Each year, let one new area “catch” seeds naturally instead of replanting the same spot. This is how the wild look builds over time.
Work with harmless plants
Here’s your real shopping list.
For height and drama:
- Elderberry (birds love it, witches historically loved it too)
- Black hollyhocks
- Angelica (huge, architectural, slightly eerie)
For that “moody middle” layer:
- Lavender (classic for a reason, smells incredible at dusk)
- Rosemary (protective folklore attached, plus you can cook with it)
- Wormwood (gorgeous silvery foliage, but plant it in a container or it will take over your entire yard, I promise you)
For ground cover and creeping charm:
- Creeping thyme
- Violets
- Chamomile
For that “wait, is that real” black aesthetic:
- Black mondo grass
- Black dahlias
- Bat flower (tacca, wildly dramatic, completely non toxic to touch)
Notice none of these will hurt your dog if he takes a nibble. That’s on purpose.
How to layer these into your bed properly:
- Start with your tallest plants (elderberry, hollyhocks, angelica) and place them at the back of the bed or the center of an island bed.
- Move to your mid height plants (lavender, rosemary, wormwood in its container) about a foot and a half in front of the tall layer.
- Finish with your ground cover (thyme, violets, chamomile) along the front edge and in any gaps between taller plants.
- Tuck one or two black accent plants (mondo grass, dahlias) somewhere unexpected, like near the front edge or beside your path, rather than centered. Unexpected placement reads as more natural.
- Stand back and check for gaps where you can see bare mulch. Fill those with more ground cover rather than more tall plants, so the layering stays intact.
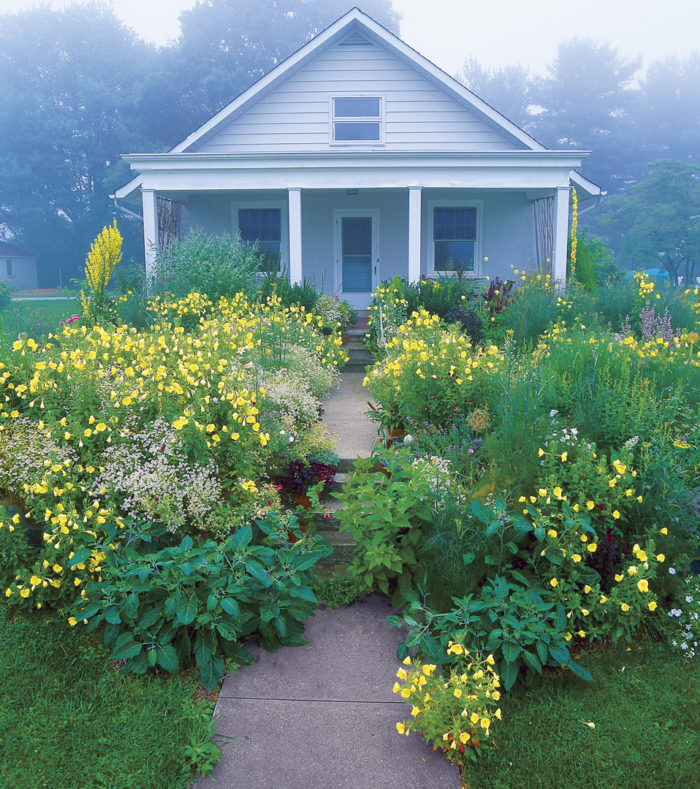
Plant your garden at the right time

Plant your perennials and self seeders in early fall, not spring.
I know spring feels like garden season, but fall planting lets roots settle in over winter so your garden looks established by the following June instead of looking like it just moved in.
This one change is honestly the difference between a garden that looks staged and one that looks like it’s been there forever. Patience pays off here.
How to plant on the right fall timeline:
- Aim for six to eight weeks before your area’s first hard frost. This gives roots time to establish before the ground freezes.
- Plant perennials and self seeding annuals first, since these are the ones that benefit most from a head start.
- Water deeply right after planting, then keep the soil consistently moist for the first two weeks even though it’s cooling down outside.
- Add a two inch layer of mulch once temperatures drop, to protect new roots through winter.
- Do nothing all winter. Let it look a little bare. Resist the urge to add more plants until spring, when you’ll fill gaps rather than start over.
Use irregular stones in your path

Skip the smooth, uniform pavers.
They scream “new construction.”
Use irregular flagstone instead, and here’s the trick, leave the gaps between stones unsealed.
Moss and creeping thyme will move in on their own within a season or two, and suddenly your path looks ancient instead of purchased.
Also make it narrower than you’d normally build a path.
A wide, welcoming walkway feels like a hotel entrance. A narrow, winding one feels like a secret.
How to lay a path that ages well:
- Sketch a winding route rather than a straight line from point A to B, even if it adds a few extra feet of walking.
- Choose irregular flagstone in a mix of sizes, not matching pavers. Ask your stone yard for “seconds” or reclaimed stone, it’s cheaper and looks better for this.
- Lay the stones with gaps of one to two inches between them rather than fitting them tightly together.
- Fill those gaps with sand or fine soil instead of mortar or polymeric sealant.
- Press a few sprigs of creeping thyme or a bit of moss into the gaps by hand to help it establish faster than waiting for it to arrive on its own.
- Keep the gaps watered for the first month so whatever you planted there actually takes hold.
Use ground lights

Your garden gets judged in daylight by every visitor, but it gets felt at dusk.
That’s when the whole witchy thing either clicks or falls flat.
Skip the string lights overhead.
Instead put small lights low to the ground, angled up into tree branches or shrubs.
This throws shadows upward instead of flattening everything with light from above, and it makes ordinary bushes look like something out of a fairy tale.
Go with warm toned bulbs, not the cool white ones. Cool white makes your yard look like a parking lot. Warm light makes it look like candlelight.
How to set up your lighting:
- Wait until dusk one evening and walk your garden with a flashlight, testing different angles to see which shrubs or trees cast the best shadows.
- Buy small solar or low voltage spike lights in a warm white color temperature, not daylight or cool white.
- Place each light at the base of a plant or tree, angled up rather than down.
- Space them unevenly. Clustering two or three lights near a focal point and leaving other areas darker creates more drama than spacing them evenly across the whole yard.
- Turn on all your exterior lights and outdoor lamps and see if they clash with the warm tones. Swap bulbs if needed so everything matches.
Use smell to your advantage

Nobody talks about this and it drives me a little crazy because scent is half the experience.
Damp earth, crushed mint underfoot, and a little decaying leaf litter tucked in a corner all smell like “old world” before your eyes even register anything.
Keep a patch of mulch consistently moist near your seating area.
Step on mint or rue occasionally as you walk.
Your nose will do half the storytelling for you.
How to build a scent layer into your garden:
- Plant a patch of mint or rue right next to your path or seating area, somewhere you’ll brush against it or step near it often.
- Water the mulch near your favorite sitting spot a little more than the rest of the garden so it stays faintly damp.
- Set aside a quiet corner, maybe behind a shrub, where you let fallen leaves sit instead of raking them immediately.
- Add lavender or rosemary near any entry point or gate so guests catch the scent as they walk in.
- Walk through your garden once a week and notice what you smell. Adjust plant placement if one scent is overpowering another.
Everything doesn’t need to be black

A garden entirely made of black foliage looks stunning in a photo and then struggles in real sunlight.
Dark leaves absorb more heat and often scorch by midsummer.
The wise thing to do is to mix in silver, deep purple, and dark green so your plants actually survive July.
How to fix or avoid this:
- Count your black foliage plants before you plant anything else. If more than a third of your bed is black, pull some out of the plan.
- Swap some of them for silver toned plants like lamb’s ear or artemisia, which handle heat better and still fit the mood.
- Check your black plants weekly in July and August for crispy or scorched edges.
- Move any struggling plant to a spot with afternoon shade instead of full sun.
Have a barrier to avoid an invasive takeover

Mugwort and wormwood spread through their roots, not just seeds.
Without a barrier, they will swallow your whole bed within two years and choke out everything else.
To protect yourself, plant them in containers or sink a barrier 18 inches deep around them.
How to contain them properly:
- Decide now, before planting, whether you’re using a container or an in-ground barrier. Don’t wait and see.
- If using a container, choose one at least 18 inches deep with drainage holes, and sink it into the ground so it looks planted rather than potted.
- If using an in-ground barrier, dig a trench 18 inches deep in a circle around the planting area and insert a rigid plastic root barrier before backfilling with soil.
- Check the area every spring for any shoots popping up outside the barrier and pull them immediately.
Have a wild corner

If you deadhead every flower and rake every leaf, your garden will look tidy, not enchanted.
Leave some seed heads standing through winter.
Let a log rot in a corner.
A little visible decay is not neglect, it’s atmosphere.
How to embrace a little mess on purpose:
- Pick one section of your garden, maybe 20 percent of the total space, and designate it your “wild corner.” Leave that one alone.
- Stop deadheading spent flowers in that section after midsummer and let seed heads dry on the stem.
- Drag in a piece of fallen log or branch from your yard (or a neighbor’s, with permission) and tuck it into a shady spot to slowly break down.
- Rake leaves everywhere else in the yard as usual, but leave a thin layer in your wild corner through fall and winter.
Parting shot
A witchy garden isn’t wild.
It’s controlled to look wild.
Every choice, the crescent shaped beds, the self seeding chaos, the unsealed path stones, the leaves left in the corner, is a deliberate decision dressed up as accident.
You’re not letting your garden go.
You’re directing it to look like it went on its own.
How to apply the Neglect Illusion to your whole yard:
- Walk your finished garden and ask yourself honestly, does this look planned or does it look like it happened over time? If it looks planned, add more asymmetry.
- Pick three spots for intentional “age markers,” like a weathered stone, a rusted piece of metal, or an old watering can left to patina.
- Revisit your garden every season and remove anything that looks too fresh or too perfect, whether that’s an unweathered pot or an overly tidy edge.
- Give it time. The Neglect Illusion gets stronger every year, not weaker, so don’t panic if year one doesn’t look magical yet.
FAQs
How to start a witch garden?
Start small and start with the mindset, not the plant list.
Pick one corner of your yard, sketch a loose crescent shape with a garden hose, and choose three or four plants from the safe list above.
Plant in early fall if you can, water consistently, and let the rest fill in over the next year or two.
You’re not building this in a weekend, and that’s okay.
What plants should be in a witches garden?
Lean toward plants with height and drama like elderberry or angelica, moody middle layer plants like lavender and rosemary, and soft ground cover like creeping thyme or violets.
Add one or two dark accent plants like black mondo grass.
Skip anything genuinely toxic if kids or pets are around.
What is a garden witch?
A garden witch is someone who blends everyday gardening with a bit of intention and ritual.
They do this using plants for their folklore, their scent, or their symbolic meaning alongside their practical uses.
Historically this overlapped a lot with herbalists and healers who grew plants for medicine and kitchen use, not just aesthetics.
What plant is associated with witches?
Mugwort and wormwood come up constantly in folklore and old herbal texts, along with belladonna and datura for their more dangerous reputation.
Rosemary and rue also show up often, tied to protection rather than harm.
Most of these have real historical use in medicine, which is honestly more interesting than the spooky reputation alone.
What plants do witches hate?
This one’s more folklore than fact.
But plants like rue and rosemary were traditionally planted near doorways as protective plants.
They were meant to ward off bad energy rather than being “hated” by witches themselves.
Take this with a big pinch of salt, it’s more charming tradition than gardening rule.
What flowers are witchy?
Black hollyhocks, black dahlias, foxglove, poppies, and bat flower all bring that dramatic, slightly eerie look.
Datura and moonflower are gorgeous too, but skip them if pets or kids are in the yard since they’re toxic.
Stick with the safer dramatic options if you want peace of mind along with the aesthetic.
What grows in a witches garden?
A mix of tall dramatic plants, herbs like rosemary and lavender, dark foliage accents, and low creeping ground cover.
Add self seeding flowers like calendula and borage so the garden feels a little wild and unplanned every year.
The variety in height and texture is what makes it feel alive instead of staged.
What herbs do witches use most?
Rosemary, lavender, mugwort, rue, and wormwood show up again and again in folklore and old herbal practice.
Rosemary and lavender are the easiest to grow and the most useful in real life.
This is because you can cook with one and make sachets or dried bundles with the other. If you’re starting small, those two are your best first picks.