What Do You Put in a Hummingbird Feeder?
Last Updated on August 29, 2026 by Duncan
If you want hummingbirds visiting your yard, the good news is that their feeder does not need an exotic recipe, expensive nectar mix, or a bottle of mysterious red liquid.
You only need sugar and water. That’s it.
But the way you combine those two ingredients, how often you change them, and what you don’t add will determine whether hummingbirds show up to your feeder or avoid it like a gas station bathroom.
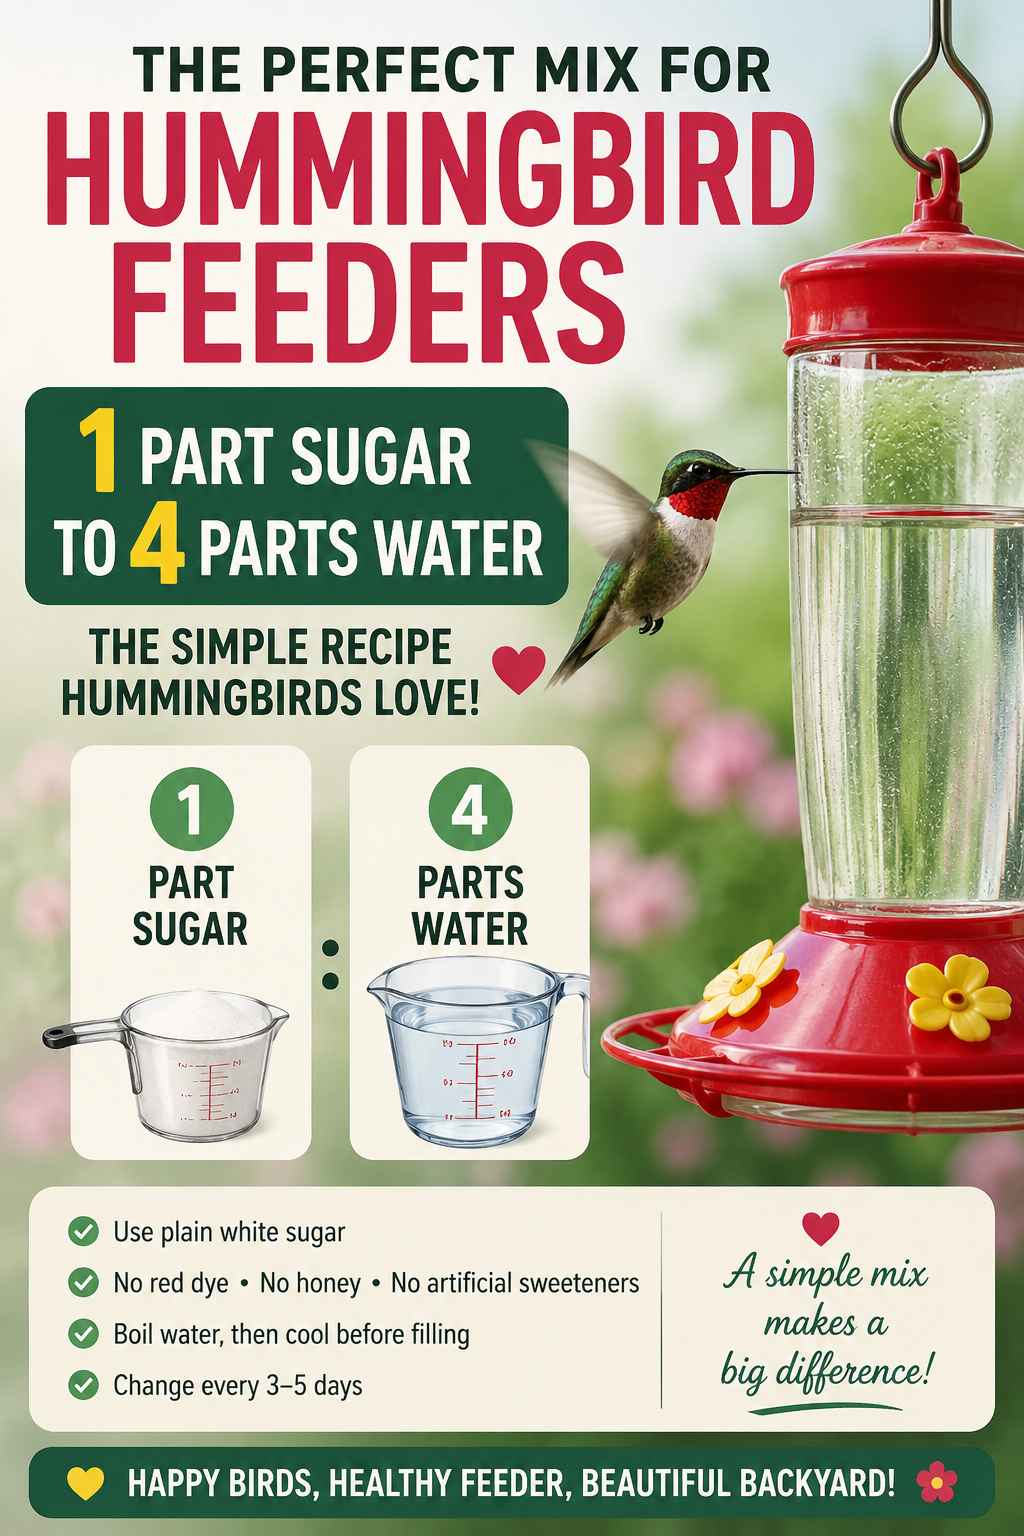
1 part sugar to 4 parts water
This is the foundation of everything.
One cup of white sugar to four cups of water. Not three parts, not five parts. Four.
That ratio mimics the sucrose concentration in the nectar of the flowers hummingbirds naturally visit, so their bodies know how to process it.
When you go lighter on sugar, the birds get hungry faster and spend all their time flying instead of resting.
They burn more energy hunting for your feeder than they gain from drinking it, which sounds like a good deal for you until you realize hummingbirds visit feeders they trust.
They remember.
If your feeder feels like a dead-end convenience store, they’ll visit the neighbor’s place.
Go heavier on sugar and you’re not actually helping them.
You’re offering pure empty calories, and over time, that can contribute to issues with their digestion and feather health.
The birds will drink it, sure, but it’s like them living on soda instead of fruit juice.
The math is simple, but the discipline takes focus. Measure it. Don’t eyeball it.
Avoid red dye or food coloring
Red dye serves exactly one purpose: it makes the feeder look appealing to you.
Hummingbirds don’t care if the liquid is clear or crimson red. They’re drawn to the feeder shape and the bright housing, period.
What red dye actually does is introduce chemicals your homemade nectar doesn’t need.
Some dyes have been linked to metabolic stress in birds, and others can cloud the water so you can’t see when mold has started growing.
You’re adding complexity and risk for zero benefit.
Use a red feeder. Use clear nectar. Problem solved, and your birds stay cleaner.
Stay away from honey
:max_bytes(150000):strip_icc()/GettyImages-1096254220-d093aa94b2534dd5b3a51c4baa119223.jpg)
This one breaks people’s hearts when I explain it, but honey is one of the worst things you can put in a hummingbird feeder.
It sounds natural and wholesome, which is exactly why people add it. That logic is dangerous here.
Honey contains spores of a fungus called Aspergillus, which thrives in warm, wet environments.
A hummingbird feeder in summer heat is basically a petri dish with a straw.
The fungus grows invisibly in the nectar, and when hummingbirds drink it, the spores lodge in their lungs and throat.
The infection progresses quietly until the birds can’t breathe properly or fly with their normal precision.
You don’t see it happen. You just notice fewer birds visiting, and eventually they disappear entirely.
I watched a backyard in my neighborhood lose three years of hummingbird traffic because the homeowner switched to honey.
By the time they figured out what went wrong, the birds had stopped showing up at all. Rebuilding that trust took a long time.
Stick with refined white sugar. It’s sterile. It’s safe. It doesn’t require a second thought.
Also stay away from artificial sweeteners
Aspartame, stevia, sucralose, or any other sugar substitute sounds like a clever idea until you understand how hummingbird metabolism works.
These birds burn roughly 12 times more calories per pound of body weight than humans do.
Their bodies evolved to extract and use sucrose energy with incredible efficiency.
When you feed them sweeteners their bodies can’t metabolize, you’re giving them the caloric equivalent of diet soda.
They taste sweet and think they’ve found food, so they spend energy getting to your feeder.
Then the food offers nothing, and they fly away hungrier than before.
Some birds will figure this out after one visit. Others will keep coming back, wasting precious daylight hours and calories chasing a false meal.
You’re not saving money or helping them stick to a diet. You’re introducing frustration into their day.
Clean the bird feeder regularly
Here’s where reality crashes into most feeder setups.
You can have the perfect sugar solution, but if you’re not cleaning religiously, you’re still growing something that will hurt the birds.
In summer heat, fermentation and mold growth accelerate fast. I’m talking about a week, sometimes less, before the clear nectar starts developing dark spots or a cloudy haze.
Those aren’t impurities settling to the bottom. That’s fungal growth and bacterial fermentation.
The liquid literally goes bad.
Clean the entire feeder at least every three to five days in hot weather. In spring and fall, you can stretch it to a week, but not longer.
Use hot water, not cold, and clean inside the ports and feeding tube slots where mold loves to hide.
A bottle brush is worth its weight in gold here. Mold likes to cling to corners you can’t see.
The birds know when a feeder is sick. They stop visiting it.
They’ll move to a neighbor’s clean feeder instead, even if yours has more nectar.
Use quality water
You can’t just fill a pitcher from the tap and call it good.
What’s coming out of your faucet varies by neighborhood, and some of those minerals and chemicals matter a lot.
Hard water, which has high mineral content, can leave cloudiness in your nectar that makes it harder to spot mold growth before it’s too late.
Chlorinated tap water is fine in small amounts, but if your water is heavily chlorinated, consider using filtered water instead.
Hummingbirds are small and sensitive. They’re drinking far more relative to their body size than you are, so a chlorine level that seems harmless to you is concentrated for them.
In places where the water is particularly hard or heavily treated, I fill my feeders with filtered water.
It’s a small addition to the budget and eliminates one more variable that can go wrong.
Watch how long you store your nectar
Most people make nectar in batches, thinking they’ll be efficient.
They fill a pitcher, put it in the fridge, and figure they’ve got supply for weeks.
Here’s what actually happens: the refrigerated batch gets oxidized and starts separating.
The water and sugar don’t stay evenly mixed, and when you finally pour it into the feeder after sitting for two weeks, you’re pouring a liquid that’s off-balance.
Make fresh nectar weekly, even if you don’t need it all.
A batch that has been in the fridge for more than seven to ten days is not healthy nad you should discard it.
Watch out for filamentous mold
You might notice what looks like spider webs or thin strings of growth hanging from the feeder ports or the bottom.
That’s not a spider.
That’s filamentous mold, and it means the nectar inside has already been colonized.
When you see this, the feeder needs to come down immediately.
Dump the entire contents, rinse it with hot water, don’t use it again for at least a day, and make fresh nectar before you put it back outside.
The hummingbirds visiting that feeder at that stage are potentially ingesting serious fungal loads.
Check your feeders every single day in summer.
You don’t need to clean them daily, but you need to visually inspect them.
Mold growth happens in patterns you can spot if you’re looking.
Get quality feeders
:max_bytes(150000):strip_icc()/GettyImages-2157164331-22b768640d044864a1732bcb4f7888fc.jpg)
Glass feeders with metal ports are going to outlast plastic feeders that have rubber seals.
I’m not saying this to make you feel bad about buying a plastic feeder.
I’m saying it because you should know what you’re paying for and what you’re getting.
The plastic feeders wear faster because the ports get brittle in UV light, and the seals dry out and crack.
When the seals fail, the nectar leaks or air gets in and the nectar spoils faster.
You end up cleaning more, replacing it more often, and ultimately spending more money replacing feeders every couple years.
Glass feeders with stainless steel or glass ports cost more upfront, but I’ve had the same one running for four years.
The only maintenance is cleaning and occasional seal replacement, which costs a couple dollars.
The plastic feeder people are replacing every two to three years.
Buy one good feeder instead of rotating through cheap ones.
Your consistency in cleanliness improves when you’re not dealing with failing equipment.
Provide more food in fall and late summer
In late summer and early fall, as the weather cools and days shorten, hummingbirds need more calories, not fewer.
Migration takes energy, and birds gorging on your feeder are often fueling up for long flights.
During this window, you might think about increasing the sugar concentration slightly, or at least making sure you’re keeping your feeders full and very clean.
The birds are visiting more frequently and under real nutritional stress. This is not the time to cut back on feeder maintenance or let the nectar sit too long between changes.
I’ve noticed that August and September are when most people’s hummingbird traffic surges, then vanishes, then surges again.
That’s migration.
During those spikes, don’t treat your feeders as maintenance mode. Treat them as critical support for birds in survival mode.
Get the timing right
If you live somewhere that has year-round hummingbird populations or early spring visits from migrants, you need to have your feeder out before you see the first birds.
They arrive looking for food, and if there’s nothing, they move on to the next yard.
Similarly, leave feeders up longer into fall.
Migrating hummingbirds pass through in waves, and taking your feeder down in mid-October might mean you’re missing birds that show up the third week.
This isn’t intuitive because hummingbirds themselves know when to leave. They’re not sitting around your yard waiting for you to signal that migration season is over.
But the birds passing through during those shoulder seasons are under enormous energy pressure, and a feeder you leave up for an extra few weeks might be the difference between a bird making it south or not.
Research your area’s hummingbird season.
Put feeders up two weeks before the first expected sightings.
Leave them up two weeks after the last regular sightings.
The birds will tell you when they need to stop visiting by not showing up. You can take the feeders down after that.
Add flowers around the feeder
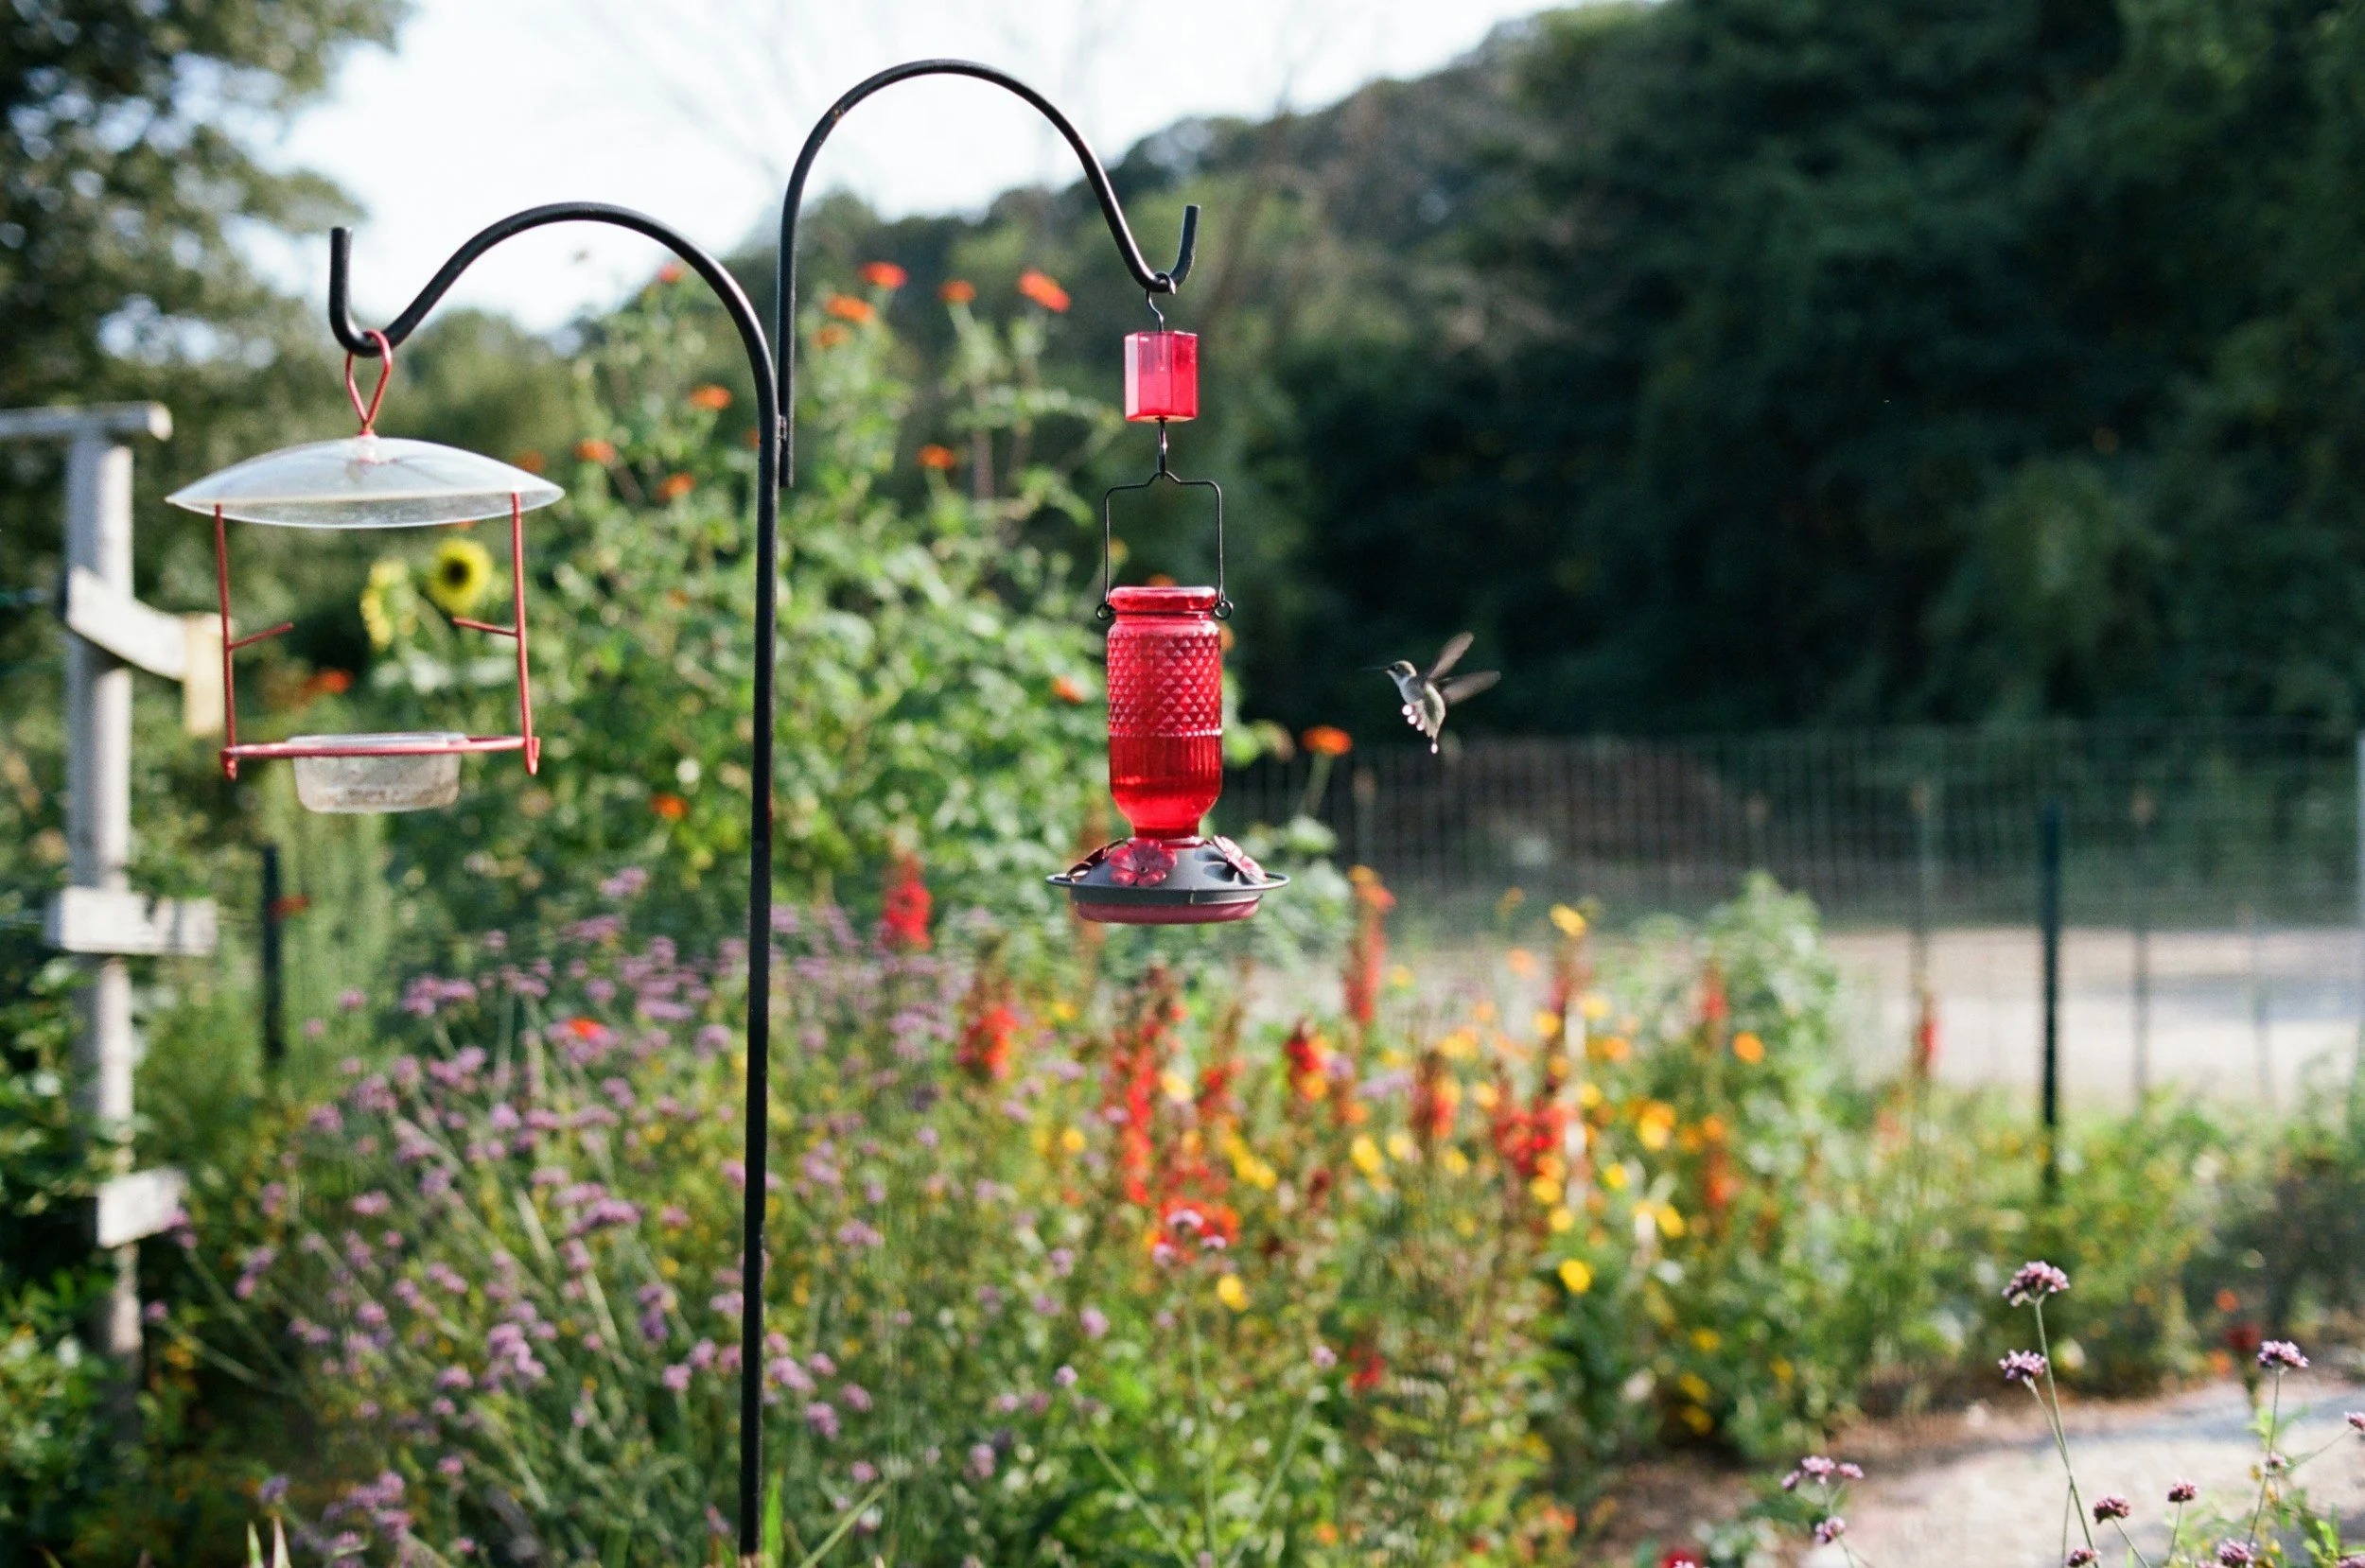
A feeder sitting alone in a yard is inviting, but a feeder surrounded by blooming flowers feels like home.
Hummingbirds visit feeders because they’ve learned to recognize them as food sources, but they’re most comfortable in yards that also have natural nectar flowers available.
Plant bee balm, salvia, zinnias, or trumpet vine near your feeder.
These flowers give birds a backup food source if the feeder runs low or needs cleaning, and they signal to passing hummingbirds that the yard is a legitimate feeding zone.
The flowers don’t need to be fancy or rare. Just reliable bloomers that flower during your local hummingbird season.
I noticed a sharp difference in repeat visits once I planted flowers around my feeder area.
The same birds started showing up more frequently and staying longer, instead of treating the feeder like a quick gas station stop.
They were treating the whole yard as a habitat, not just a convenience.
The flowers also reduce pressure on your single feeder. If four birds want to feed and only one feeder is available, you’re going to see territorial aggression.
With flowers scattered around, birds have options, so they’re less likely to fight over the feeder itself.
Have several feeding spots
One feeder in your yard means one bird gets the best access, and the others get pushed to the edges or chased away entirely.
Hummingbirds are aggressively territorial, and a single male can defend a feeder like he’s guarding a fortress.
Set up a second feeder on the other side of your house or yard where the dominant bird can’t see it.
Suddenly, subordinate birds and females have a place to feed without getting bullied.
You’ll end up seeing more birds overall, and the traffic to your feeders will be more consistent because more of them are getting enough calories.
Three feeders is even better if your yard is large.
I’ve watched a yard that started with one feeder and added two more end up with twelve regular visitors instead of three.
The birds spread out instead of competing for one resource, and more birds feel safe enough to stick around.
The investment is small compared to the payoff in traffic and consistency.
You’re not multiplying your work by much because you’re cleaning the same way, just across more feeders.
Watch for ants around the feeder
Ants can’t drink from the feeder itself, but they can contaminate the entire nectar supply by crawling through it.
When ants get into the feeding ports, they leave behind pheromone trails that attract more ants, and soon the nectar has become an ant highway.
More importantly, some ant species are known to poison or irritate hummingbirds that try to feed from contaminated ports.
You might not see the hummingbird swallow an ant, but you’ll notice fewer birds returning and no obvious reason why.
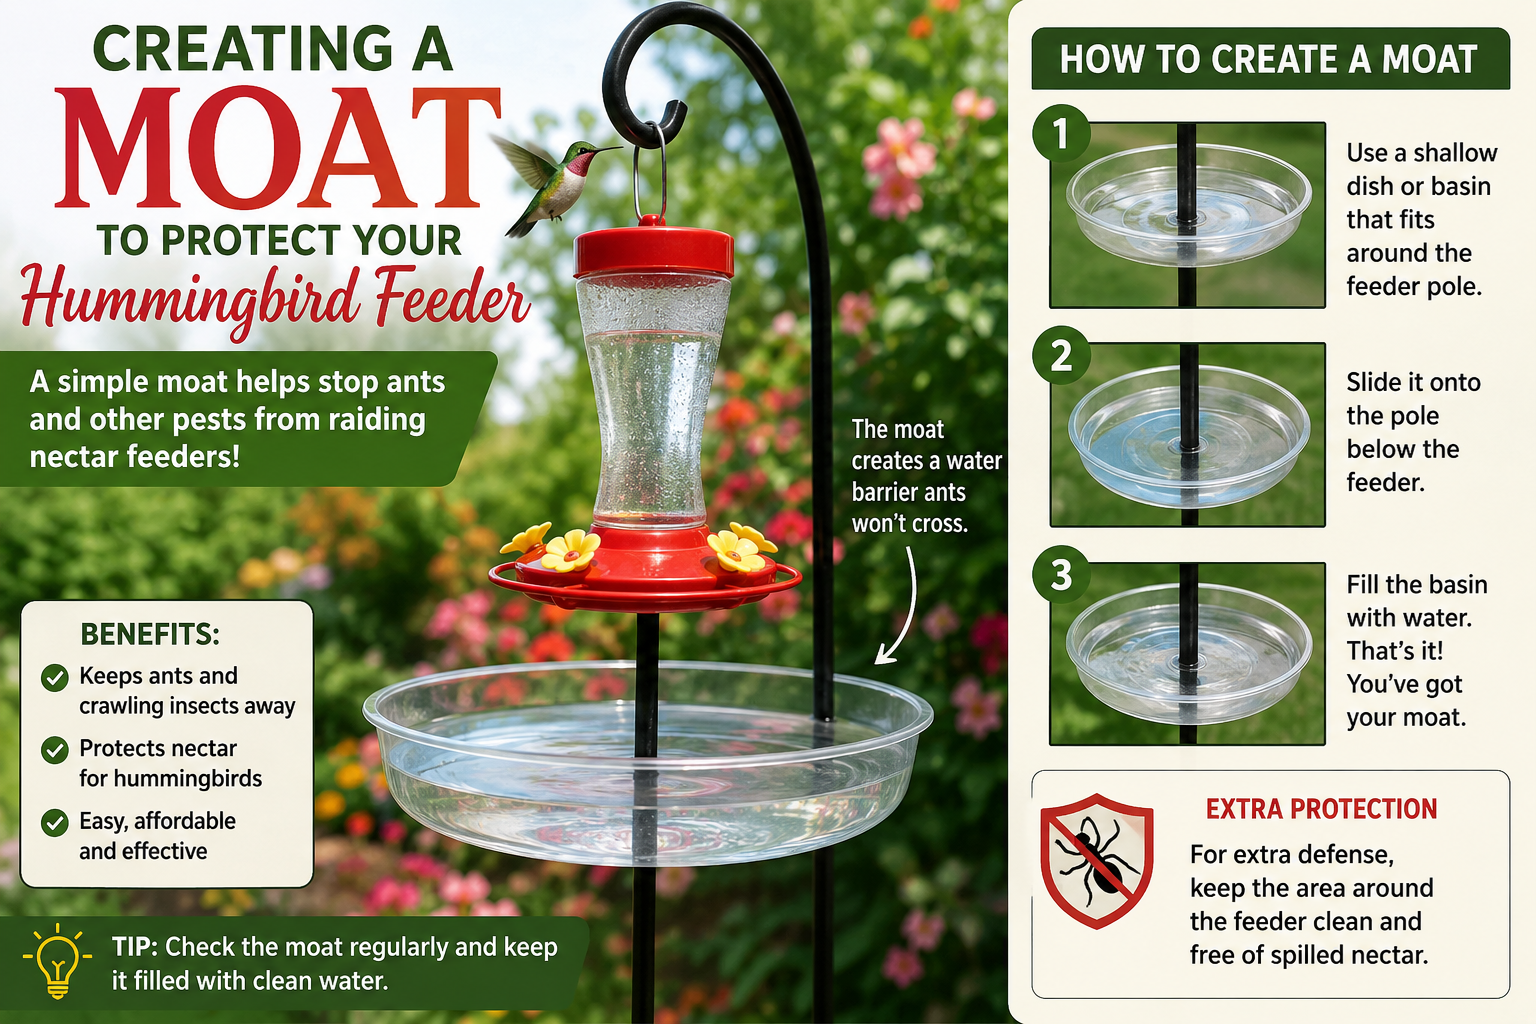
Install an ant moat or ant guard above the feeder, which creates a water barrier that ants can’t cross.
These are sold at most places that carry feeders, and they work instantly. Once you put one up, ants stop appearing at the feeder within a few days.
Check the moat water every few days to make sure it hasn’t evaporated or gotten dirty.
An empty ant moat is useless, and a filthy one becomes its own ecosystem.
This is a small maintenance task that makes an enormous difference in keeping the feeder clean and accessible.
Do not ignore leaks
:max_bytes(150000):strip_icc()/SPR-how-to-keep-ants-out-of-hummingbird-feeder-8665382-05-c8664d5140e94612b6d9e9b98956d3e8.jpg)
A slow leak from a feeder port seems minor until you realize what it’s creating.
Nectar pooling on the feeder base or ground becomes a fermentation site that attracts insects and speeds up mold growth.
The base of the feeder becomes the most contaminated part of your setup, sitting there brewing in the sun.
A persistent leak also wastes nectar faster than birds can drink it, and that waste attracts ants, bees, and wasps looking for an easy sugar source.
Your hummingbird feeder becomes a hummingbird feeder surrounded by other insects that make birds nervous or physically threaten them.
If you notice nectar accumulating on the feeder housing or dripping onto the ground, the seals are failing and the feeder needs to come down.
Clean it, check all the ports and seals, and replace any rubber gaskets that have cracked or dried out.
You can buy replacement seals for most feeders for a few dollars. It’s cheaper and faster than replacing the whole feeder.
Some feeders are designed with better seal systems than others, which is another reason that upfront quality matters.
The cheap plastic feeders with questionable seals leak constantly. The better feeders rarely leak if the seals are maintained.
Your feeder choice directly affects how much of your work goes toward managing leak-related problems.
Keep the feeder out of direct afternoon sun
A feeder baking in four hours of direct afternoon sun is going to ferment faster than one in partial shade.
The heat accelerates the growth of mold and bacteria, and it can change the chemistry of the sugar solution, making it less stable.
If you have no choice but to place the feeder in sun, you’ll need to clean and replace the nectar more frequently, sometimes every two to three days instead of every five.
You’re looking at double the maintenance work because of feeder placement.
Ideally, position your feeders in morning sun but afternoon shade. The birds can see them easily in daylight, but the shelter keeps the nectar cooler during the hottest part of the day.
If you’re already struggling to keep up with cleaning, this single placement change can cut your problems in half.
I moved a feeder from a sunny spot to a shaded area, and the mold issues I’d been fighting all summer disappeared.
The nectar stayed clear longer, the cleaning intervals stretched out, and I ended up with more consistent bird traffic because the feeder was reliably clean and full.
Parting shot
If your feeder stops getting visitors and you’ve done everything right here, something else is probably going on. Maybe there’s a better feeder location one block over.
Maybe a territorial bird is defending your yard. Maybe it’s simply migration timing, and the birds will return in a few weeks.
But if you’re cleaning properly, using the right sugar ratio, filling it with good water, and storing batches correctly, you’ve done everything in your control.
The birds showing up to that feeder are voting with their visits. That’s all the feedback you need.
Related Posts: