Are Lawn Mower Blades Worth Sharpening? How to Decide — and How to Do It Right
Last Updated on June 2, 2026 by Duncan
Yes, lawn mower blades are almost always worth sharpening — but only if they pass a set of specific inspection criteria first.
A blade with the right kind of wear is restored to full performance in 20–30 minutes with basic tools. A blade with the wrong kind of damage is a safety hazard regardless of how sharp you get it, and sharpening it is wasted effort.
In 17 years of lawn care, I’ve sharpened blades far more often than I’ve replaced them. The key is knowing which situation you’re actually in before you pick up a file.
This guide gives you a clear, step-by-step framework: how to read the condition of your blade, how to decide between sharpening and replacement, and how to sharpen correctly — including the one step most guides leave out that determines whether your freshly sharpened blade cuts cleanly or vibrates the mower apart.
Why Sharp Blades Matter More Than Most People Realize
A dull lawn mower blade doesn’t just cut poorly — it actively damages your lawn in a way that compounds over weeks.
A sharp blade slices through each grass stem in a single clean motion, leaving a flat, sealed cut tip.
A dull blade lacks the edge to slice cleanly, so instead it tears and shreds the grass. Torn grass tips have a ragged, open wound rather than a clean cut. That wound:
- Turns brown within 24–48 hours, giving the lawn a dry, burnt appearance even when it’s well-watered.
- Creates entry points for fungal disease. Pathogens such as brown patch and dollar spot enter through damaged tissue far more easily than through cleanly cut grass.
- Stresses the grass plant, diverting energy to wound recovery rather than root development and new growth.
- Increases mowing time. A dull blade often requires multiple passes over the same area to achieve an even cut, adding wear to the mower and time to the job.
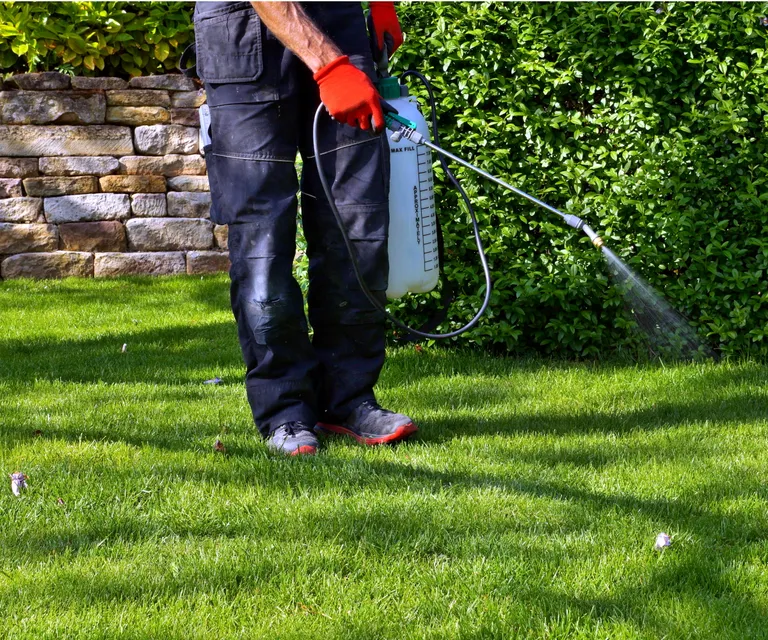
The visible test is straightforward: if your lawn looks ragged and brown-tipped within a day or two of mowing — and you watered correctly — your blade is almost certainly dull. For a deeper look at what consistently happens when sharpening is skipped, see our guide on what happens if you don’t sharpen your lawn mower blades.
How Often Should You Sharpen?
For the average homeowner mowing a residential lawn: sharpen every 20–25 hours of mowing. This works out to roughly once or twice per season for most properties.
A practical seasonal schedule:
- Once at the start of the mowing season — before the first cut of spring, when the blade has sat unused over winter and the new season’s grass is fresh and soft.
- Once mid-season — typically around midsummer, when the blade has accumulated significant hours.
- After any impact with a hard object — a rock, a buried root, a piece of pipe, or any solid obstacle. Even a single impact can chip or bend the blade enough to warrant immediate inspection.
If you mow a large property, mow on rocky or sandy soil (which accelerates blade erosion), or mow frequently on thick, tough grass varieties, sharpen closer to every 15–20 hours.
Step 1: Inspect the Blade — Sharpen or Replace?
Before doing anything else, remove the blade and inspect it under good light. This inspection takes five minutes and determines everything that follows.
Always disconnect the spark plug wire before touching the blade. On a cordless mower, remove the battery.
This is the single most important safety precaution in blade maintenance, an accidental engine start with your hand near the blade causes catastrophic injury.
To remove the blade: tilt the mower on its side with the air filter and carburetor facing upward (this prevents oil from draining into the combustion chamber), then use a socket wrench to loosen the blade bolt.
Most push mower blade bolts are ⅝ inch or ¾ inch. The bolt is typically reverse-threaded on older mowers if standard counter-clockwise loosening doesn’t work, try clockwise.
Once the blade is removed, assess each of the following:
✅ Sharpen if you see: Dullness
What it looks like: The cutting edge has lost its bevel and feels flat or rounded to the touch. The blade is otherwise straight, undamaged, and structurally sound.
What to do: Sharpen. This is the most common finding and the easiest to fix.
✅ Sharpen if you see: Minor Chips or Small Nicks
What it looks like: Small notches along the cutting edge typically from debris strikes but none deeper than approximately 3–4 mm (⅛ inch) and no cracks radiating from the chip.
What to do: These can be ground out with a file or angle grinder as part of the sharpening process.
Work the affected area slightly more than the rest of the edge until the nick is removed, then continue sharpening the full length evenly.
❌ Replace if you see: Cracks
What it looks like: Any visible crack whether hairline or otherwise in the blade body, cutting edge, or near the center mounting hole.
Why this matters: A cracked blade is a structural failure waiting to happen. At 3,000 RPM, a blade fragment becomes a high-velocity projectile capable of penetrating metal, concrete, and human tissue.
There is no safe level of cracking. Even a hairline crack is immediate grounds for replacement, do not sharpen, do not continue mowing.
❌ Replace if you see: Bends or Dents
What it looks like: Place the blade on a flat surface a workbench, concrete floor, or level table. If any part of the blade lifts off the surface, it is bent.
Why this matters: A bent blade is permanently unbalanced. No amount of sharpening corrects a physical deformation in the steel.
An unbalanced blade spinning at speed generates vibration that travels through the spindle, deck, and frame, accelerating wear on bearings and mounts, and producing an uneven cut that no technique adjustment can compensate for.
❌ Replace if you see: A Thin, Worn Trailing Edge (Fin)
What it looks like: The trailing edge, the rear edge of the blade opposite the cutting edge, sometimes called the fin is the thicker, slightly upward-angled portion that creates airflow under the deck to lift grass and discharge clippings.
On a new blade, this fin is 3–5 mm thick and visibly robust. As the blade wears, metal erodes from both the cutting edge and the fin until the fin becomes thin, fragile, and potentially corroded.
Why this matters: A worn fin reduces the mower’s ability to lift grass before cutting it, resulting in an uneven cut even with a sharp edge. A severely thin fin is also at risk of fracture under stress.
What to do: If the fin is noticeably thin, visually paper-like or flexes under light finger pressure, replace the blade. Sharpening the cutting edge won’t restore the fin’s structural integrity or function.
❌ Replace if the blade is paper-thin at the cutting edge
Over many sharpenings, the blade body itself becomes thinner as metal is progressively removed.
Most manufacturers specify a minimum blade thickness in the owner’s manual, typically around 2.5–3 mm at the cutting edge before replacement is required.
If your blade has been sharpened many times and the cutting edge feels noticeably thin or flexible, measure it with a calliper and compare to the manufacturer’s spec.
Sharpen vs. Replace at a Glance
| Condition | Action | Reason |
|---|---|---|
| Dull edge, blade otherwise sound | Sharpen | Standard maintenance, fully fixable |
| Small chips under 3–4 mm, no cracks | Sharpen | Grind out during sharpening process |
| Any crack, anywhere on the blade | Replace immediately | Structural failure risk at speed |
| Visible bend confirmed on flat surface | Replace | Permanent imbalance, unfixable |
| Thin, corroded trailing fin | Replace | Lost lift function, fracture risk |
| Blade worn paper-thin at cutting edge | Replace | Below safe minimum thickness |
| Large chunks missing from edge | Replace | Too much material removed to restore balance |
Cost context: A replacement blade for a standard residential push mower typically costs $15–$40. A replacement blade for a riding mower runs $20–$60 per blade (riding mowers often have two or three blades).
Professional blade sharpening at a small engine shop costs $5–$15 per blade. DIY sharpening with an angle grinder or file costs only your time after the initial tool investment.
My approach: I keep one spare blade in my shed and rotate it in at the start of each season while the removed blade goes to the shop for a professional sharpen. It costs me $8 and guarantees I always start the season with a freshly sharpened blade rather than scrambling to sharpen the old one on the first day I want to mow.
How to Sharpen a Lawn Mower Blade: Step-by-Step
Once you’ve confirmed the blade is worth sharpening, the process is straightforward.
You’ll need: a socket wrench, a bench vice or blade clamp, an angle grinder with a grinding disc (fastest) or a mill bastard file (slower but precise), a blade balancer, safety glasses, hearing protection, and heavy gloves.
1. Secure the Blade
Clamp the blade firmly in a bench vice with the cutting edge accessible.
Mark the underside of the blade with a permanent marker before removal so you reinstall it in the same orientation, blades have a specific correct side to face the ground.
2. Sharpen at the Correct Angle
The cutting edge of most lawn mower blades is ground at a 30–45 degree bevel angle. Do not change this angle during sharpening and instead follow the existing bevel exactly.
Changing the angle removes more metal than necessary and can create an edge that is either too steep (weak and prone to chipping) or too shallow (won’t hold an edge).
With an angle grinder: Work in smooth, consistent strokes along the full length of the cutting edge, moving from the center outward.
Apply light, even pressure and let the disc do the work. Heavy pressure overheats the steel and can draw the temper out of the metal, permanently softening the edge.
If the blade turns blue or discolors, you’ve overheated it, slow down and let it cool.
With a file: A mill bastard file works the cutting edge in the same direction, center to tip with the file held at the blade’s bevel angle.
This is slower than an angle grinder but gives more tactile control and eliminates the overheating risk entirely.
It’s the method I use for touch-up sharpenings mid-season when the blade doesn’t need significant metal removal.
For full guidance on sharpening methods and tool selection, see our detailed guide on the best way to sharpen lawn mower blades. The question of exactly how sharp the blade should be is also worth reading, the answer may surprise you.
3. Sharpen Both Cutting Edges Evenly
Most residential mower blades are double-sided, there is a cutting edge on each end of the blade.
Sharpen both ends, removing the same number of strokes and approximately the same amount of metal from each side. Removing significantly more metal from one end than the other creates an imbalance.
4. Check Blade Balance — the Step Most Guides Skip
This is the most commonly overlooked step in DIY blade sharpening, and skipping it is why many people sharpen their blade and still experience vibration afterward.
A blade that has more metal on one end than the other, even by a small amount, is unbalanced.
When it spins at 3,000 RPM, that weight difference creates centrifugal force that vibrates the entire mower.
Over time this damages the blade spindle bearing, the deck mounting points, and the crankshaft.
To check balance: Hang the blade horizontally on a nail or cone-style blade balancer through the center hole. If one end dips lower than the other, that end is heavier.
Remove a small amount of metal from the heavy end, from the non-cutting side, not the cutting edge, with a file, and recheck. Repeat until the blade hangs level.
A blade balancer costs under $10 at any hardware store and is one of the most valuable small tools in a homeowner’s shed.
5. Reinstall Correctly
Reinstall the blade with the sharp cutting edge facing the correct direction of rotation (the marker you made earlier confirms orientation).
Torque the blade bolt to the manufacturer’s specification, typically 35–50 ft-lbs for push mowers, 60–90 ft-lbs for riding mowers.
An undertightened blade bolt can allow the blade to shift during mowing; an overtightened one risks stripping the crankshaft thread.
Reconnect the spark plug wire, start the mower, and listen for smooth running without unusual vibration. A well-sharpened and properly balanced blade runs noticeably smoother than a dull or unbalanced one.
Signs Your Blade Needs Attention Right Now
If you’re not sure whether your blade is due for sharpening, these are the lawn-level signals that indicate it’s time, without needing to remove the blade first:
- Brown or tan tips on grass within 1–2 days of mowing, despite adequate watering. This is the torn-tip browning caused by a dull blade tearing rather than cutting.
- Uneven cut height across the lawn after a single pass, where some areas are cut cleanly and others appear higher or patchy.
- Increased mowing time or the need for multiple passes over the same area to achieve an even cut.
- Visible fraying or shredding at the grass tips when examined up close immediately after mowing.
- Unusual mower vibration that wasn’t present before, this may indicate blade imbalance from uneven wear rather than simple dullness.
For more on reading your lawn’s signals and cutting correctly, see our guides on how to cut grass properly, how close to cut grass before winter, and maintaining a greener, healthier lawn.
Understanding Your Blade: Further Reading
The decision to sharpen or replace is easier when you understand blade construction, what the trailing fin does, why blade thickness matters, and how different blade designs affect cut quality and clipping discharge.
Our full guide on lawn mower blades covers all of this in detail and is worth reading before your next blade purchase or maintenance session.
Final Thoughts
The sharpen-or-replace decision comes down to a five-minute inspection with the blade in your hand. Dull? Sharpen. Cracked, bent, or dangerously thin?
Replace without hesitation, a blade replacement costs $15–$40 and is not worth gambling against.
For most homeowners mowing a standard residential lawn, blades go through two sharpenings for every one replacement.
That ratio keeps the mower cutting cleanly, the lawn healthy, and the total cost of blade maintenance well under $30 per season.
The extra step that makes sharpening actually work, and that most people skip, is the balance check.
Do it every time. It costs five minutes and protects the mower’s spindle and crankshaft from vibration damage that is far more expensive to fix than a new blade.
Related Posts: