How to Harvest Herbs Correctly So They Keep Growing
Last Updated on June 25, 2026 by Duncan
I killed three basil plants before anyone told me the truth about harvesting herbs.
Every blog said the same thing.
Cut above a leaf node. Harvest in the morning. Don’t take too much at once.
Cool, thanks, but my basil still turned into a sad, leggy stick within a month.
Here’s what nobody told me: harvesting is a skill, not a one-time tip.
And it makes the difference between a windowsill herb garden that feeds you all season and one that gives up by week three.
So let’s fix that. Grab your scissors, because we’re doing this properly.
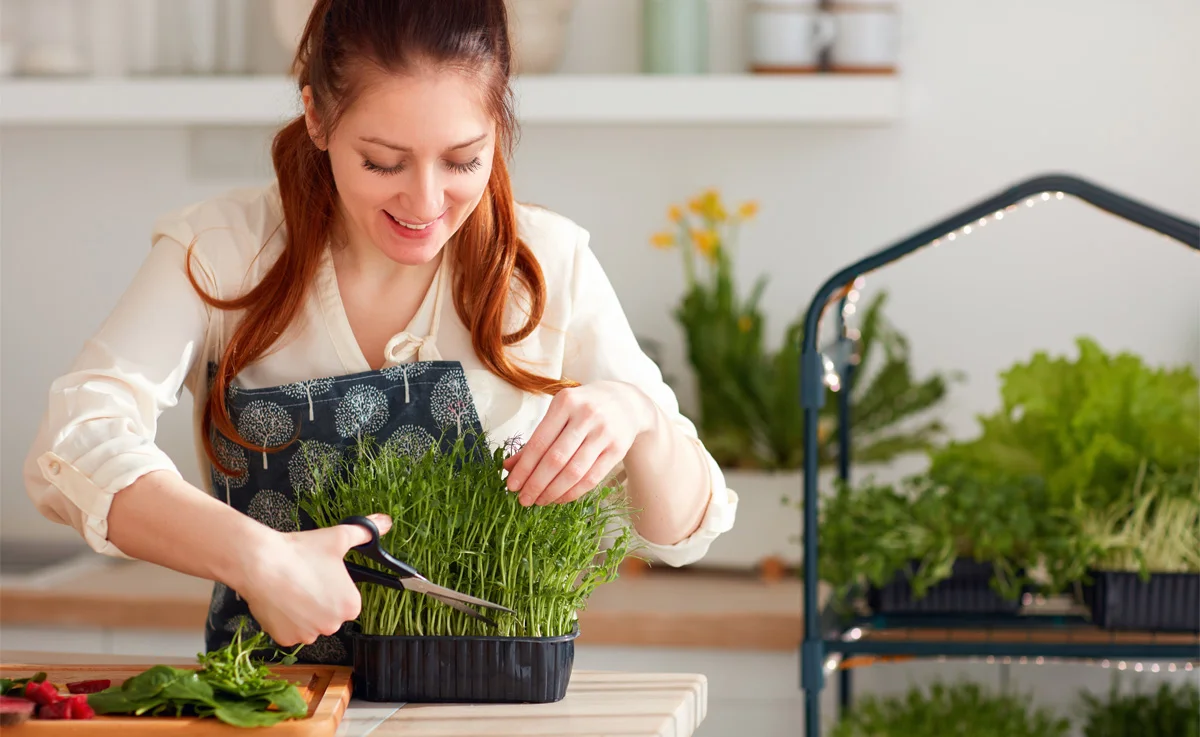
Signs Your Herbs Are Ready for Harvest
:max_bytes(150000):strip_icc():format(webp)/GettyImages-2157991295-3d317b3696b748519cebe9bab20d61b1.jpg)
Here’s a question nobody asks but should: how do you even know your herb is ready to be cut in the first place?
Most of us just see a plant on the windowsill and start snipping because it looks “big enough.” That’s a guess, not a sign.
Some of the signs that your herb is ready for harvesting include:
The plant has at least six to eight sets of leaves
This is the real starting line. A baby herb with three or four tiny leaves doesn’t have enough energy reserves to bounce back from a cut yet.
Be patient here, I know it’s hard when you just want fresh basil in your pasta tonight.
The leaves look fully sized for that variety, not stretched or pale
A healthy mature basil leaf is a deep, rich green and feels slightly thick between your fingers.
If your leaves look thin, washed out, or yellow at the edges, that’s a hungry or stressed plant, not a ready one.
The stems feel sturdy, not floppy
Give a stem a gentle squeeze.
A stem that’s ready to be cut has a bit of firmness to it.
A weak, bendy stem usually means the plant needs more light or more time before it can spare any leaves.
Brush the leaves and smell your fingers
This sounds silly but it works. A mature, ready to harvest herb releases a strong, unmistakable scent the second you touch it.
A faint or barely there smell means the oils haven’t fully developed yet.
You can see new growth starting at the base or tips
This is the green light.
New little leaf buds forming mean the plant has enough energy to spare and is actively investing in growth, which means it can afford to lose a few leaves without missing a beat.
The stem has started to feel slightly stretchy or thin before any flowers appear
This one’s different, it’s not a sign to wait, it’s a sign to harvest right now.
That stretchy growth means the plant is about to bolt and shift its energy toward flowering instead of leaves.
Once you see this, stop waiting for “more leaves” and cut immediately.
If your herb is checking most of these boxes, grab your scissors.
If it’s only got two sad little leaf sets, give it another week or two and resist the urge.
Why Timing Decides Everything
Your herbs aren’t just sitting there waiting to be picked whenever you feel like cooking.
They’re running on an internal clock, and if you ignore it, you’re working against your own plant.
Here’s the thing about flavor.
Those amazing aromatic oils that make basil taste like basil and mint taste like mint?
They build up overnight and start evaporating once the lights or sun hit the leaves full force.
So if you harvest in the late afternoon thinking “eh, whenever works,” you’re picking herbs that have already lost some of their punch.
Your basil will still taste fine, just a little flatter than it could’ve been.
The sweet spot is a few hours after your grow light turns on or after the sun’s been up for a bit.
Not first thing, not midday.
The plant needs time to wake up and rehydrate, but you want to beat the heat.
I learned this the hard way by harvesting basil right before dinner one too many times and wondering why my pesto tasted underwhelming.
Be cautious of the tools you are using

You don’t need fancy garden shears. You need clean, sharp ones, and you need to use them correctly.
Here’s a tip nobody mentions: how you angle the blade matters as much as how sharp it is.
If you drag a sharp blade across a stem at a shallow angle, you crush the stem before it actually cuts through.
A crushed stem bruises.
A bruised stem browns within hours and becomes an open invitation for mold.
The fix is simple.
Cut straight across at close to a 90 degree angle for soft herbs like basil, mint, and cilantro. Quick, clean, decisive.
For woody herbs like rosemary, thyme, and sage, angle your cut slightly so water doesn’t pool on top and rot the stem.
And please, for the love of healthy plants, wipe your scissors down between plants.
Bacteria and fungus spread faster than gossip in a group chat, and your herbs can’t tell you they’re sick until it’s too late.
Where to Cut
“Cut above a leaf node” is technically correct and also kind of useless advice on its own. Which node? How far above it? Nobody says.
Here’s the real rule.
Always leave at least two full sets of leaves below your cut on soft stemmed herbs.
Why?
Because those leaves are doing the work of feeding the plant while it regrows.
Strip too much away and the plant has no energy left to recover.
It’s like asking someone to run a marathon after skipping every meal that week.
For herbs like basil, this also encourages the plant to grow bushier instead of tall and floppy.
You’re not just harvesting, you’re shaping the plant’s entire future.
The “One Third Rule” Isn’t Wrong, It’s Just Incomplete
You’ve probably read that you should never take more than a third of the plant at once. True, but it leaves out something important.
That rule assumes every plant has the same healthy root system and the same number of strong stems.
In reality, a root bound plant crammed in a tiny pot can’t handle even a third without going into shock.
A thriving plant with room to breathe can sometimes give you more.
So instead of obsessing over percentages, look at what’s left after you cut.
If each remaining stem still has four to six healthy leaf sets, you’re in good shape.
If you’re looking at bare, sad little stems, you took too much.
Think of your plant like a savings account.
Every healthy, mature leaf is money in the bank. Every cut is a withdrawal.
You can absolutely spend from it, but if you keep overdrawing the same stem over and over without giving it a chance to earn anything back, it goes broke.
That’s usually why your herbs look “tired” a few weeks after a big harvest. You didn’t kill them. You just overdrew the account.
Tips to Pick Herbs So They Keep Growing

Picking herbs the right way isn’t just about getting a good harvest today.
It’s about setting your plant up to give you another one next week, and the week after that.
To do this you need to:
Cut above a node
Those little leaf nubs are the plant’s plan for what grows next.
Cutting right above them tells the plant “go ahead, branch out here,” and you’ll end up with two new stems instead of one.
That’s how a single basil plant turns into the bushy monster taking over your counter by August.
Harvest from the top of the plant, not the bottom
This feels backwards because the top leaves look the freshest and most tempting.
But pinching the top forces the plant to grow outward and bushy instead of tall and thin, which means more leaves overall, not fewer.
Spread your harvest across multiple stems
I know it’s tempting to take everything from the easiest, closest stem. Don’t.
Take a little from several stems instead, so no single stem gets left with nothing to work with.
For leafy herbs like cilantro and parsley, take the outer, older leaves and leave the center alone.
The center of these herbs is where all the new growth comes from.
Strip that part and you’ve basically pulled the plug on future leaves.
Pinch off flower buds the second you spot them, even if you’re not ready to harvest leaves.
Flowering is the plant’s signal that it’s done growing leaves and ready to make seeds.
Pinching the bud off buys you more time and more leaves before it tries again.
Harvest small amounts
This one surprises mant. A little trim every few days encourages more new growth than one big chop every few weeks.
Think of it like a regular haircut versus letting your hair get wild before a drastic cut.
Frequent light trims keep things healthier.
Skip the harvest if your plant looks stressed, wilted, or was just repotted.
A stressed plant doesn’t have spare energy to recover from a cut.
Wait a few days until it perks back up.
Your patience now means a faster bounce back later.
Mistakes That Quietly Kill Your Harvest
A few habits that seem harmless but absolutely are not. They include:
Watering heavily right before you harvest
I get the instinct, you want plump, juicy leaves.
But all that extra water dilutes the flavor sitting inside the leaf.
Your herbs will look fuller and taste weaker. Water normally, then harvest, not the other way around.
Always cutting from the same side of the plant
We all do this without thinking, because one side just faces us and is easier to reach.
Over time this creates a lopsided plant that grows unevenly and gets structurally weak on the thinned side.
Spin your pot every time you water it. Your plant will thank you with better balance.
Waiting for flowers before you harvest cilantro or basil
Once you see the stem segments suddenly stretching out and getting thinner before any flowers appear, the plant has already started shifting into “I want to make seeds now” mode.
Flavor drops fast after that.
The second you notice that stretchy growth, harvest immediately, don’t wait for the pretty (and useless) flowers.
Leaving cut herbs sitting out on the counter
Those wonderful aromatic oils start breaking down within twenty to thirty minutes of cutting if you leave them exposed to light and warm air.
Either use them right away or pop the stems into a glass of water like you would cut flowers.
Herb by Herb Cheat Sheet
Because every herb has its own personality, and treating them all the same is how you end up with one thriving herb and four dead ones, here’s how to treat each of the herbs in your indoor garden:
Basil: Pinch from the top, not the sides. This forces it to grow bushier instead of tall and floppy. Never let it flower if you want continuous leaves.
Mint: This one is basically unkillable, so harvest generously and often. Cutting it back hard keeps it from turning into a leggy mess that takes over your windowsill.
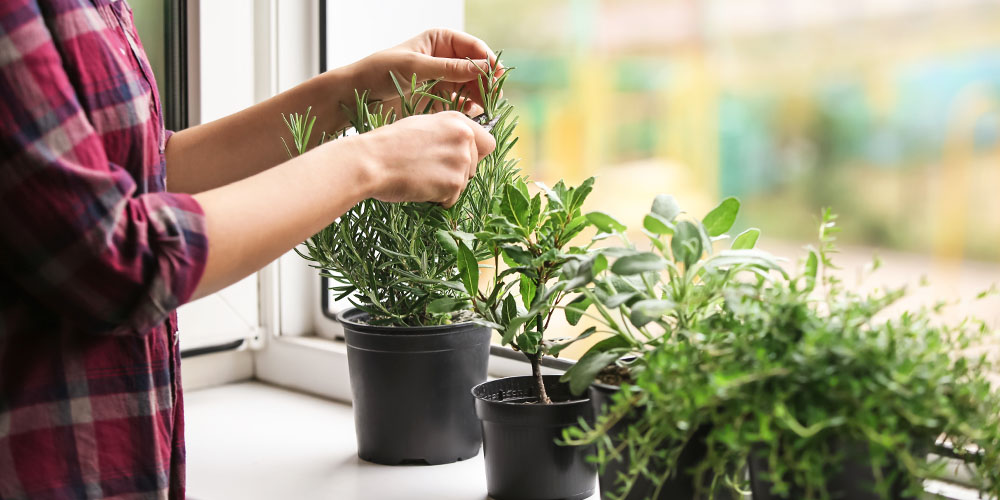
Rosemary and thyme: These woody herbs grow slower, so go easy. Snip the soft new growth at the tips rather than hacking into old woody stems, which barely regrow.
Cilantro: Harvest the outer, older leaves first and let the inner ones keep developing. This herb bolts to flower fast, especially in warm rooms, so don’t get lazy with this one.
Parsley: Cut the outer stems at the base, close to the soil line, not just the leaves off the top. New growth comes from the center, so this method keeps it productive for months.
Chives: Cut straight across about two inches above the soil, like giving it a haircut. It regrows from the base, so don’t worry about leaf nodes here at all.
What to Do Right After You Cut

This is the step everyone skips, and it’s the difference between herbs that last a week and herbs that turn into compost by Wednesday.
The clock starts the second you cut.
Those wonderful aromatic oils start breaking down within twenty to thirty minutes if your herbs sit out exposed to light and warm air.
Get them into water or the fridge fast, don’t let them sit on the cutting board while you finish prepping everything else.
Hold off on washing your herbs until right before you use them.
Washing them too early traps moisture against the leaves, and trapped moisture is just an invitation for rot and mold.
How to Keep Herbs Fresh After Harvesting
So you’ve got a little pile of fresh herbs and you’re not cooking with all of them tonight. Now what?
The flower trick (basil, cilantro, parsley)
Trim the stem ends at an angle, then stand the bunch upright in a glass with a couple inches of water, like a bouquet.
Leave it on the counter out of direct sun. Basil specifically hates cold and will turn black and sad in the fridge, so this is its forever home, not the crisper drawer.
Loosely tent a plastic bag over the top if you want a little extra humidity around the leaves.
Done right, this buys you about a week, sometimes longer for parsley.
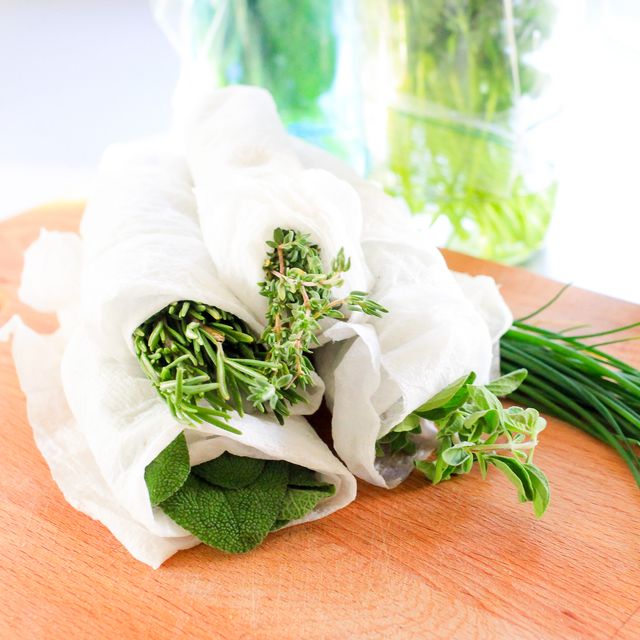
The damp towel roll (mint, parsley, cilantro, dill)
Wrap the stems loosely in a slightly damp paper towel, then tuck the whole bundle into a partially open plastic bag or container in the fridge.
Loosely is the key word here, herbs packed tight with no airflow turn slimy fast.
This method usually gets you one to two weeks.
The chill and forget method (rosemary, thyme, sage)
Woody herbs are low maintenance and can go straight into the fridge, either in a damp towel or just loose in a bag.
They’ll happily sit for two to three weeks without much fuss, which is honestly why I always have more rosemary than I know what to do with.
Freezing in oil (basil, parsley, cilantro, mint)
Chop your herbs, pack them into an ice cube tray, and top each cube off with olive oil.
Once frozen, pop them into a freezer bag.
These little flavor bombs go straight into soups, sauces, and pans for months without any prep on a busy weeknight.
Freezing whole or chopped (most herbs)
Skip the oil if you’d rather, just chop and freeze in small freezer bags, pressing the air out before sealing.
The texture goes a bit limp once thawed, so this is best for herbs going into cooked dishes, not garnishes.
Air drying (rosemary, thyme, oregano, sage)
Tie small bundles by the stems and hang them upside down somewhere dry and out of direct sunlight.
Give it one to two weeks until the leaves crumble easily between your fingers.
This works beautifully for woody herbs and is a disaster for soft, watery herbs like basil, which just turn brown and sad instead of drying nicely.
A quick rule for choosing your method
If you’ll use the herbs within a week, go fresh storage.
If you’re staring down more herbs than you can possibly use in time, freeze or dry the extra instead of watching them wilt in the back of your fridge.
Frequently Asked Questions
How do I harvest indoor herbs?
Wait until you’re a few hours into the light cycle, grab clean sharp scissors, and cut just above a node, leaving two full leaf sets behind on the stem.
Indoor herbs don’t have dew or sun angle to worry about, so the light cycle is your only real clock here.
What is the best way to gather herbs?
Don’t grab a fistful and yank, that just bruises the stems and stresses the plant.
Cut with sharp, clean scissors, spread your cuts across multiple stems instead of stripping one bare, and always leave enough leaves behind for the plant to keep feeding itself.
How many times can you harvest herbs?
As many times as the plant has the energy to recover from.
For most herbs that’s every week or two throughout the growing season, as long as you’re never taking more than the plant can rebuild before your next cut.
What is the best time of day to harvest herbs?
A few hours after your grow light turns on or the sun’s been up for a bit.
That window gives the plant time to rehydrate overnight while keeping you ahead of the heat that starts breaking down flavor later in the day.
Do herbs regrow after cutting?
Yes, and eagerly, as long as you cut above a healthy node and leave enough leaves behind to fuel the regrowth.
Cut too low or strip too much, and regrowth slows down or stalls completely.
What are the 4 steps of harvesting?
Check that it’s ready, using the leaf count and scent test.
Time it right, a few hours into the light cycle.
Cut it clean, sharp scissors above a node, leaving two leaf sets behind.
Store it fast, into water or the fridge within thirty minutes.
Is it better to harvest in the morning or at night?
Morning wins, hands down.
The plant has had all night to recharge its energy and aromatic oils, and cutting before the day heats up means the wound seals faster and the leaves hold onto more flavor.
Why harvest herbs in the morning?
Because the plant is fully recovered from its overnight cycle and hasn’t faced any heat stress yet.
Cut later in a hot, bright room and you’re harvesting leaves that have already started losing some of their oils to the heat.
Do you pick herbs from the top or bottom?
It depends on the herb.
Basil and mint want top pinches to encourage bushy growth, while cilantro and parsley do better when you take the outer, older leaves and leave the center alone to keep producing.
Your Quick Recap (Pin This Part)
- Wait until your herb has at least six to eight leaf sets and smells strong when brushed before that first cut
- Harvest a few hours after light, not first thing and not at the end of the day
- Use clean, sharp scissors and cut decisively, don’t drag the blade
- Always leave two full leaf sets below your cut on soft herbs
- Think “growth bank account,” not “one third rule.” Don’t overdraw the same stem repeatedly
- Rotate your pot so you’re not always harvesting from the same side
- Get your herbs into water or the fridge within thirty minutes of cutting
- Wash herbs right before you use them, not right after you cut them
- Freeze extra basil, parsley, or cilantro in oil filled ice cube trays so nothing goes to waste
- Watch for stretchy, elongated stems on cilantro and basil, that’s your cue to harvest now, not later
Parting shot
Harvesting herbs correctly isn’t about following one rigid rule.
It’s about paying attention to what your plant is telling you and working with its natural rhythm instead of against it.
Do this right, and your little windowsill herb garden will keep feeding you all season instead of giving up after a few sad cuttings.
Trust me, your pesto will taste better for it.
Related Posts: