12 Stunning Outdoor Water Features to Transform Your Property
Last Updated on May 28, 2026 by Duncan
There’s something almost magical about the sound of flowing water. It calms the mind, masks noise, attracts wildlife, and instantly elevates the look and feel of any outdoor space. And it can do the same for your property.
Whether you have a sprawling estate or a cozy backyard, there’s a water feature made just for you. To help you out, here are 12 gorgeous ideas to inspire your next outdoor project.
1. Koi Pond

A koi pond is the crown jewel of any garden. These stunning fish are bound to bring life, color, and tranquility into your property.
All you need to do is to line the edges with smooth river stones and native aquatic plants like water lilies and lotus flowers. A koi pond works beautifully in both formal and naturalistic garden styles.
Materials you’ll need:
- EPDM liner or preformed fibreglass shell
- Biological filter and UV clarifier
- Submersible pump (600–2,000 GPH depending on pond size)
- Air pump and aerator
- Pond underlayment felt
- River stones and cobbles for edging
- Water lilies, lotus, and marginal plants
- Water treatments and dechlorinator
- Fish net cover (optional but recommended)
What to consider when installing:
- Aim for 4–6 hours of sunlight for plant growth, but remember that full sun all day encourages algae growth. The right environment is one where you have partial shade.
- Koi need a minimum depth of 900 liters of water to survive winter and have room to swim so deeper is always better
- Factor in ongoing electricity costs as the pump and filter run 24 hours a day, every day
- Include an overflow drain during installation to handle heavy rainfall and prevent the pond from flooding the surrounding ground
- Stock fish gradually. This calls for you to introduce a few fish at a time and let the biological filter establish
Mistakes to avoid:
- Buying a small number of fish then overcrowding the pond as they grow. To be on the safe side plan for adult koi, which can reach 60–90cm
- Skipping the underlayment. If you do this, you should know that sharp stones underneath the liner will eventually puncture it so always have an underlayment.
- Forgetting predator protection: Herons are remarkably persistent and will empty a pond in a single visit so secure your pond.
- Filling with tap water and immediately adding fish: Always dechlorinate first, or chlorine will kill the fish within hours. And you don’t want this, do you?
Pro tip: Add a small waterfall or return pump to keep the water oxygenated and clear as koi thrive with surface agitation.
2. Natural Stone Waterfall
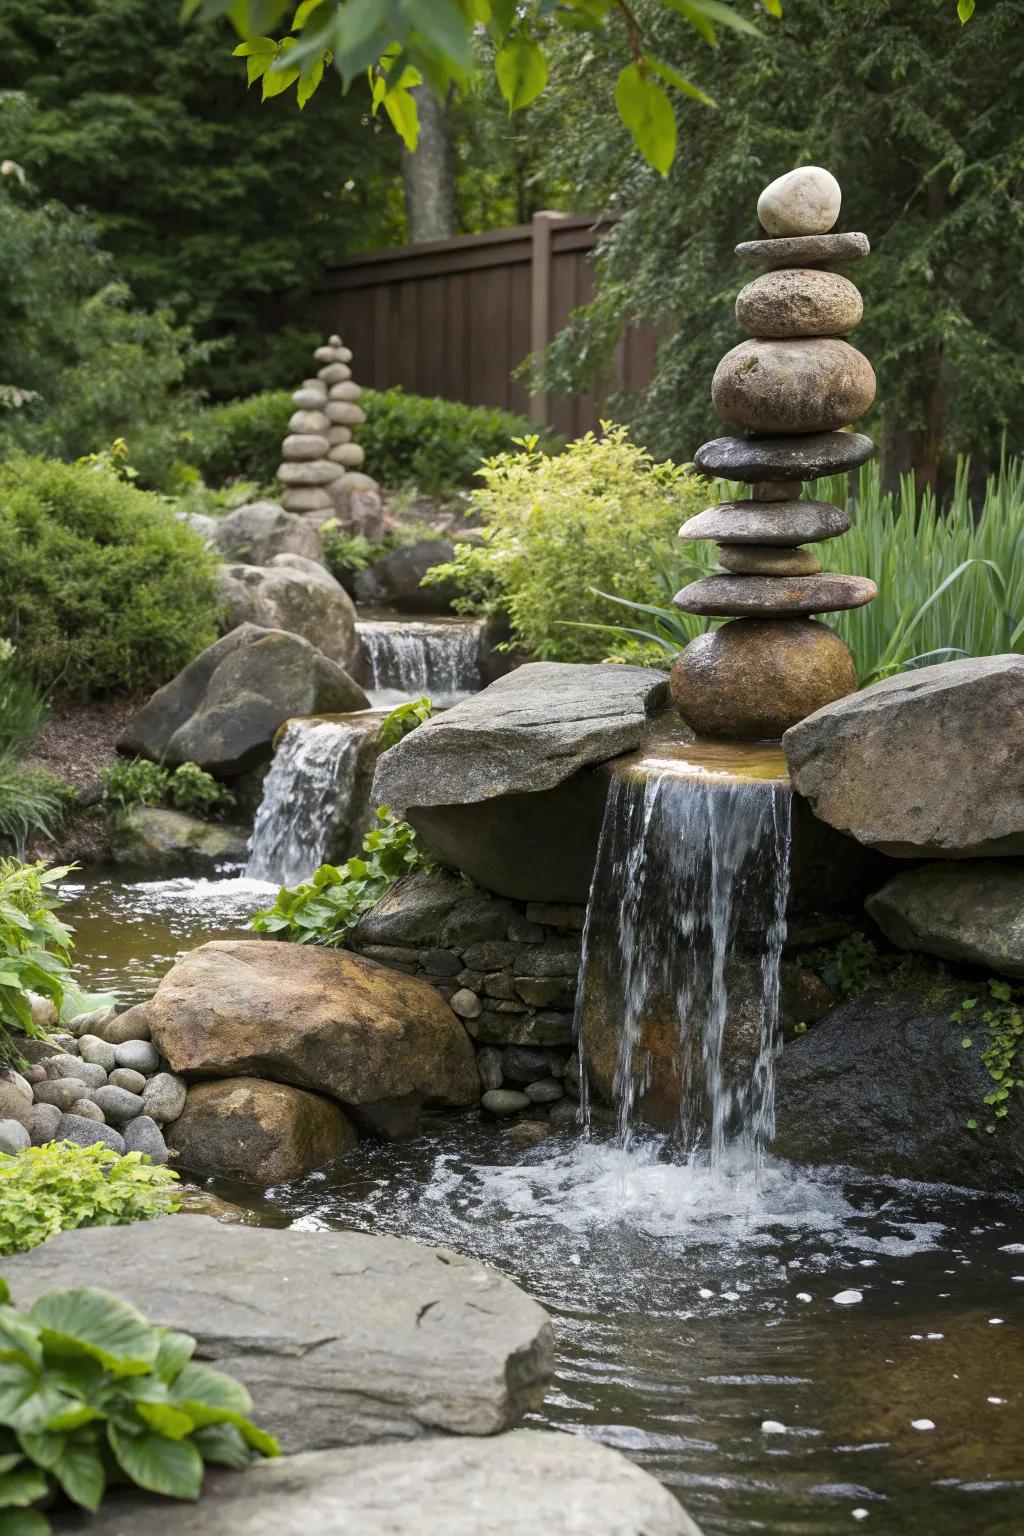
Nothing says luxury quite like a cascading stone waterfall. Using stacked fieldstone or boulders, you can create a feature that looks like it has always been part of your landscape.
Position it at the edge of a pond or as a stand-alone focal point backed by lush tropical plants.
Materials you’ll need:
- Fieldstone, boulders, or flagstone (native varieties look most natural)
- EPDM flexible liner with underlayment
- Submersible pump with high flow rate
- Flexible return hose or rigid pipe
- Waterfall foam sealant / hydraulic expanding foam
- Mortar (optional, for locking key stones)
- Spirit level
- Tropical or large-leaf backdrop plants
What to consider:
- Flow rate determines the sound you get where a higher GPH pump gives a dramatic roar and a lower GPH gives a gentle trickle. You should choose your pump based on the mood you want to set in your property.
- Stone is extremely heavy so the base must be compacted and level to prevent sinking or shifting over time
- The foam sealant between rocks does most of the work where it directs water over the face of the stones rather than letting it disappear underground
- Position the intake pump away from fine sediment to prevent clogging
Mistakes to avoid:
- Not sealing gaps between stones thoroughly as a consequence the water finds every crack and the pond can lose hundreds of liters a day underground
- Choosing stone that clashes with the surrounding landscape in color or texture
- Placing the return pump outlet directly beneath the waterfall cascade. When you do this the turbulence stirs up sediment and clouds the water
- Ignoring evaporation in summer.
Pro tip: Use native stone that matches your region for the most realistic, organic look. Imported stone often has a different mineral tone that makes it look out of place.
⛲ 3. Classic Garden Fountain
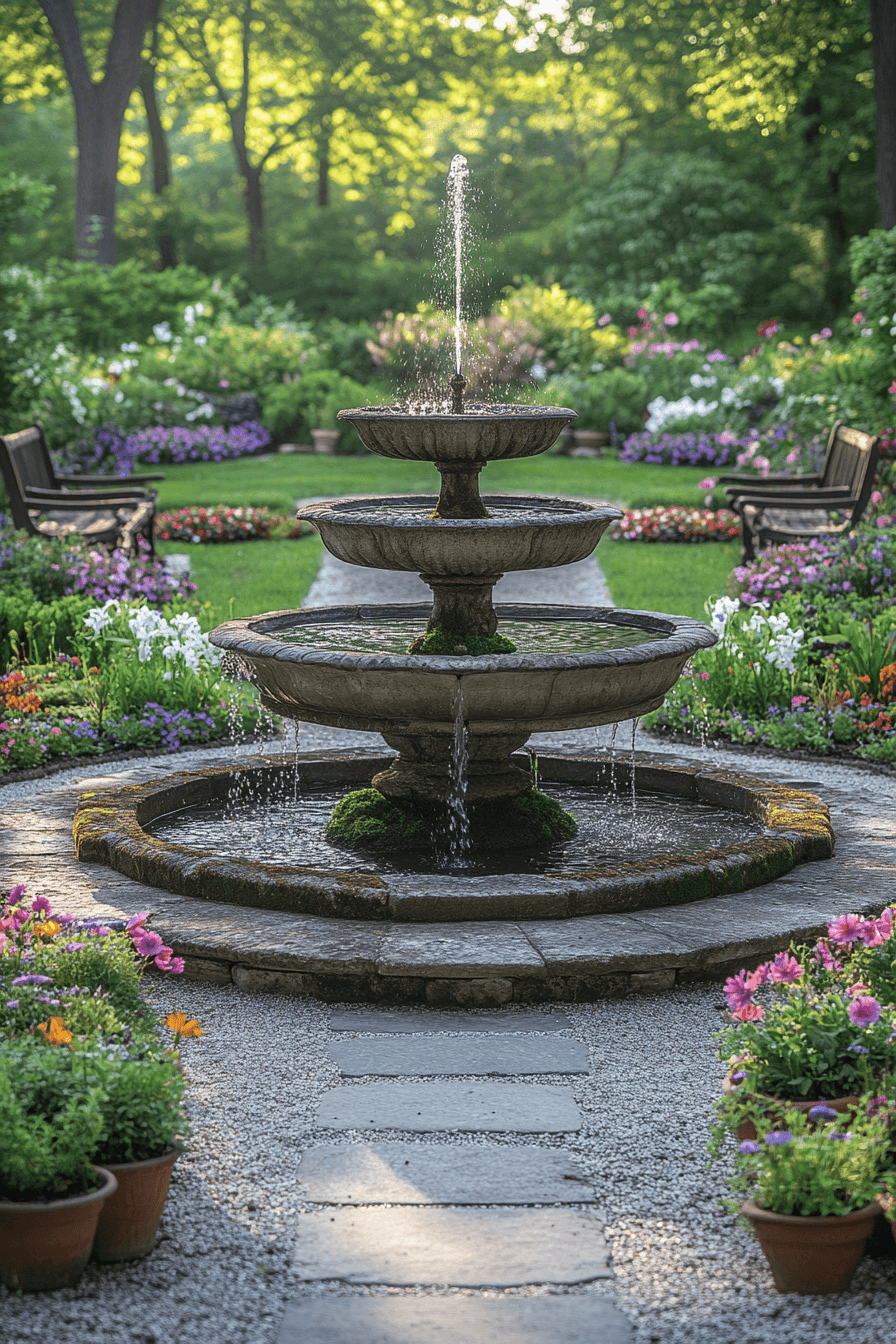
A tiered stone or cast-iron fountain adds timeless elegance to any outdoor space. Place it as a centerpiece in a formal garden, at the end of a pathway, or in the middle of a courtyard.
The gentle sound of trickling water creates instant ambiance and serves as a focal point in your landscaping.
Materials you’ll need:
- Stone, cast iron, resin, or fiberglass fountain basin and tiers
- Submersible recirculating pump (sized to the fountain height)
- Outdoor waterproof power cable and conduit
- GFI/RCD-protected outdoor power socket
- Levelling sand or mortar bed
- Paving slabs or a plinth base
- Algae inhibitor tablets
- LED lighting kit (optional)
What to consider:
- Wind scatters water from tall-tiered designs so choose a sheltered spot or a low-profile fountain that reduces splash loss
- The power supply must be on a GFI/RCD-protected circuit and you should never run standard indoor cable to an outdoor water feature
- Seal porous natural stone before filling to prevent staining, cracking, and moss colonization
- In cold climates, drain the fountain before winter or insulate the pump. Here the frozen water expands and cracks stone and cast iron
Mistakes to avoid:
- Installing on uneven ground. You should note that a tilted fountain sprays unevenly and overflows on one side so ensure that your surface is level.
- Running the pump dry even for a short time. Most submersible pumps burn out within minutes without water covering the impeller so ensure you have water at all times.
- Choosing a pump that is too powerful for the basin. In such a case water overshoots the lowest tier and is wasted
- Neglecting algae treatment. Without it, green slime coats the basin within a matter of weeks, especially in warm weather
Pro tip: Surround your fountain with symmetrically trimmed hedges or climbing roses for a classic European feel.
4. Pondless Waterfall
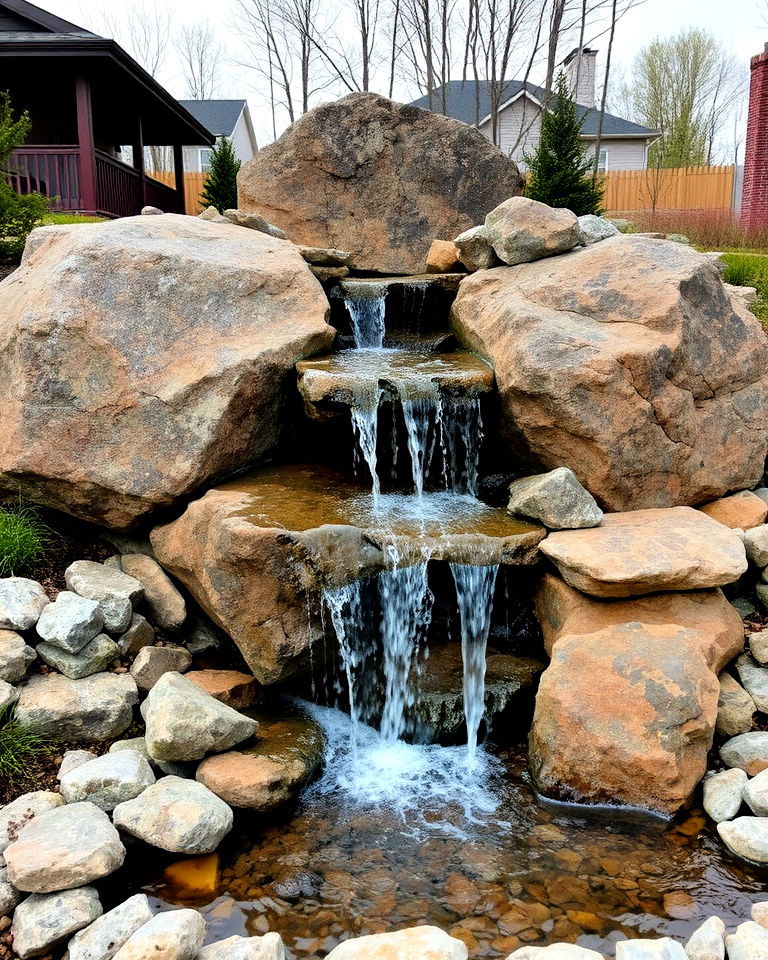
Do you love the look and sound of a waterfall but don’t want the maintenance of a pond? A pondless waterfall is your answer. Water cascades over rocks and disappears into a hidden underground reservoir, then recirculates back up.
A pondless waterfall is safe for families with small children and requires minimal upkeep.
Materials you’ll need:
- Underground vault or basin (sized to hold enough water for the pump)
- High-flow submersible pump
- EPDM liner and underlayment felt
- Decorative boulders and gravel
- Waterfall foam sealant
- Pump vault mesh lid
- Flexible return pipe
- Outdoor power supply
What to consider:
- The underground reservoir must hold enough volume that the pump never runs dry. To be on the safe side, always size it generously
- Slope and drop height determine the character of the flow so plan the grade and cascade height before a single shovel goes in the ground
- The rock layer over the vault should be loose enough to lift for pump access when maintenance is needed
- In freezing climates, the basin can crack so drain it or install foam insulation around the vault before winter
Mistakes to avoid:
- Undersizing the reservoir. This is the single most common cause of pump burnout in pondless systems
- Not installing a check valve on the return pipe. Without it, all the water drains back into the vault on shutdown and the system floods and overflows on the next start
- Packing rocks too tightly over the vault. Remember you will eventually need to reach the pump, and this makes it a major excavation job
- Failing to seal the liner edges with foam at rock transitions. Making this mistakes means the water finds its way underground and the system slowly loses volume
Pro tip: A pondless waterfall ideal for sloped yards so take advantage of your natural grade and minimize the amount of earthwork that you need to do.
5. Infinity Edge Pool
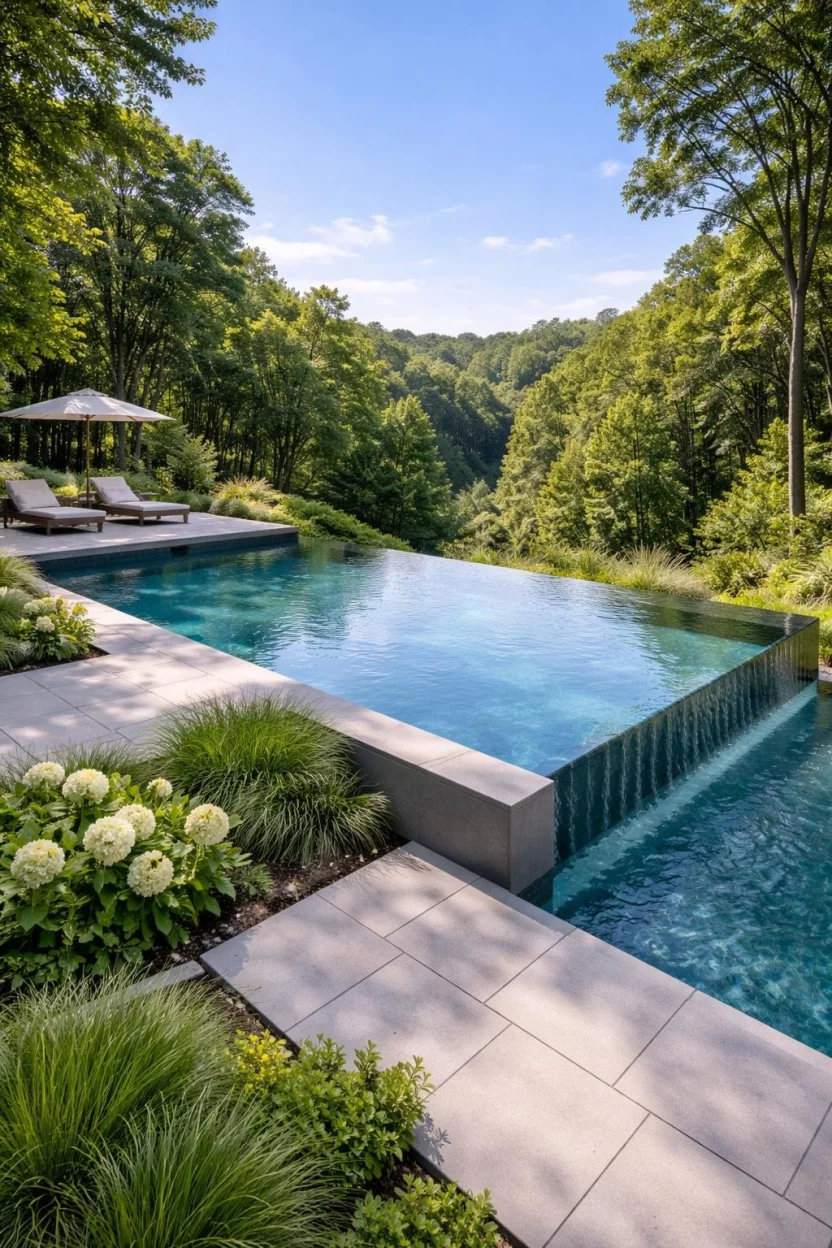
If your property has a view, an infinity (or vanishing) edge pool is the ultimate statement piece. The edge of the pool appears to merge seamlessly with the horizon, whether it’s a valley, ocean, or cityscape. It’s bold, dramatic, and absolutely breathtaking.
Materials you’ll need:
- Reinforced concrete shell (professionally engineered)
- Pool plaster, pebble, or tile finish
- Catch/balance tank positioned below the infinity edge
- Variable-speed pool pump (two separate circuits: main pool and catch tank)
- Sand or cartridge filter
- Automatic chemical dosing system
- LED underwater lighting
- 400V electrical supply (requires licensed electrician)
- Pool surroundings in non-slip stone or composite decking
What to consider:
- This is not a DIY project as the infinity edge wall must be structurally engineered. You should note that even a few millimeters of deviation and the water sheet looks uneven
- The catch tank must be large enough to absorb the water displaced when multiple swimmers enter the pool at once
- The infinity edge must face the view intentionally. You should note that a poor orientation means that you are looking at a blank wall rather than the horizon
- Running costs are substantially higher than a standard pool as you have two separate pump circuits, increased chemical demand, and greater water loss from the edge splash
Mistakes to avoid:
- Attempting construction without a licensed pool engineer and builder. The structural failure of an infinity edge wall is a serious safety hazard so always ensure you have an expert with you.
- Choosing the wrong direction for the vanishing edge. Once built, it cannot be moved
- Undersizing the balance tank: The catch pump runs dry whenever the pool is in use, destroying the motor
- Placing the pool on an exposed, windy ridge without a windbreak. The splash loss from the edge becomes enormous and the pool requires constant topping up
Pro tip: An infinity edge pool is best suited for elevated terrain. Pair it with a sundeck and a fire element for a full resort-style outdoor space.
6. Japanese Bamboo Fountain (Shishi-odoshi)

This minimalist, Zen-inspired water feature uses a tilting bamboo tube that fills with water, tips, empties, and resets with a satisfying clack.
It’s perfect for meditation gardens, Japanese-themed landscapes, or any other space where you want to cultivate calm and mindfulness.
Materials you’ll need:
- Bamboo poles. These can be natural or made from faux UV-resistant synthetic
- Small stone basin or ceramic container
- Mini solar-powered or mains pump with narrow outlet tube
- Wooden or bamboo frame with a pivot dowel
- Pea gravel and decorative stones
- Stone slab or catch dish beneath the spout
- Pond-safe sealant for natural bamboo
What to consider:
- Natural bamboo lasts only 2–3 seasons outdoors before splitting and rotting. Faux bamboo is far more durable and virtually indistinguishable from a distance
- The pivot point balance is critical. If the tube is too heavy at the front, it tips before filling fully and this ruins the rhythm. When it’s too heavy at the back, it never tips at all
- Flow rate must match the tube’s internal volume. If the flow rate is too fast, the clacking sound is quickly replaced by a constant splashing mess. You don’t want this.
- Check local planting regulations before adding real bamboo to the garden as some species spread aggressively via underground rhizomes
Mistakes to avoid:
- Leaving the hollow ends of natural bamboo poles open. Remember that wasps, hornets, and mosquitoes can nest inside within a single season
- Over-sealing or varnishing the bamboo. This makes the bamboo look plastic and loses the wabi-sabi character that makes the feature compelling
- Setting the pump flow too high. This destroys the gentle, meditative rhythm that defines the shishi-odoshi
- Placing the feature on bare earth without a gravel base. The mud splatter coats the basin and surrounding stones after every rain
Pro tip: Pair with raked gravel, moss, bonsai trees, and a stone lantern for an authentic Zen garden atmosphere.
7. Bog Garden
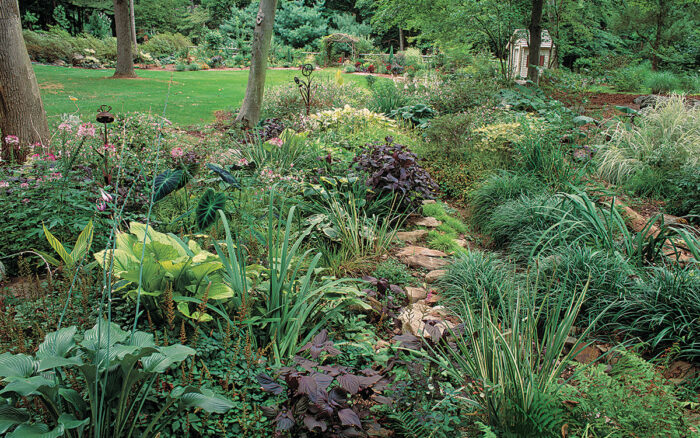
A bog garden is a shallow, marshy water feature filled with moisture-loving plants like irises, pitcher plants, and cardinal flowers.
It requires no pump and is incredibly low maintenance. It also supports biodiversity by attracting frogs, dragonflies, and birds.
Materials you’ll need:
- Butyl or EPDM liner (perforated, not sealed)
- Coarse grit and pea gravel
- Low-nutrient bog compost or sandy loam
- Moisture-loving plants: iris, pitcher plant, cardinal flower, marsh marigold
- Garden hose connection for top-ups
- Border edging (timber, stone, or steel)
- Stepping stones for access (optional)
What to consider:
- The liner should be perforated, not sealed. This way water drains slowly, keeping the soil perpetually moist rather than creating a stagnant pool; it still needs topping up in dry summers
- Soil mix matters enormously: bog plants evolved in nutrient-poor, waterlogged conditions; standard garden compost will cause weeds to overwhelm them
- Positioning in a natural low point of the yard captures rainwater passively and reduces the need for supplemental watering
- Leave some areas of bare mud at the edges as frogs and birds actively use muddy margins for feeding and shelter
Mistakes to avoid:
- Using a fully sealed liner. This creates a stagnant, anaerobic pool that smells and supports mosquito breeding rather than a true bog habitat
- Planting ordinary garden perennials that tolerate wet feet. You should note that only true bog species will thrive long-term; others rot at the crown
- Forgetting to top up during summer dry spells. Bog plants have almost no drought tolerance and will die faster than you’d expect
- Adding fertilizer or nutrient-rich compost. The bog plants are adapted to poor conditions and will be outcompeted by weeds if the soil is too fertile
Pro tip: Site your bog garden in a low-lying area of the yard that already tends to retain water. This way you will be working with the land, not against it.
️ 8. Water Wall / Sheet Waterfall

Sleek, modern, and dramatic.A water wall sends a thin, glassy sheet of water cascading down a vertical surface of stone, stainless steel, corten, or glass.
It’s perfect for contemporary homes and creates a stunning visual backdrop for outdoor entertaining areas or pool surrounds.
Materials you’ll need:
- Feature panel: stainless steel, corten steel, glass, or natural stone slab
- Hidden reservoir or sump tank
- High-flow circulation pump
- Weir or distribution header (for even water spread)
- Waterproof LED strip lighting (for backlit effect)
- Frame anchors and concrete footings
- Anti-scale and algae water treatment
- Water softener unit (highly recommended for glass panels)
What to consider:
- The panel must be perfectly plumb as even a 1mm deviation from vertical causes the water sheet to run sideways rather than straight down
- Mineral deposits streak glass and polished steel panels very quickly; using softened or purified water dramatically reduces maintenance
- LED backlighting transforms the feature entirely after dark so plan the wiring conduits before the panel is installed, not after
- Wind causes spray drift from the sheet edge. This feature needs at least partial shelter to function cleanly
Mistakes to avoid:
- Installing directly on a timber deck without full waterproofing beneath. The constant splash and humidity will rot the structure within a single season
- Choosing a panel size that the pump cannot adequately supply. When you do this the water sheers off in patches and the visual effect is ruined
- Neglecting anti-algae water treatment. The green streaks appear on the panel surface within weeks, especially in warm weather
- Cutting corners on the weir or distribution header. The uneven water distribution at the top is the most common reason water walls look amateur
Pro tip: Backlight your water wall with LED strip lighting for a jaw-dropping nighttime effect that elevates any outdoor entertaining space.
9. Container Water Garden

Don’t have the space or budget for a large pond?
A container water garden, using a large ceramic pot, half whiskey barrel, or galvanised trough is bound to bring the beauty of aquatic plants and the sound of water even to small balconies or patios.
Materials you’ll need:
- Large ceramic glazed pot, half whiskey barrel, or galvanised steel trough
- Small solar-powered fountain head or mini mains pump
- Aquatic plant baskets
- Aquatic potting media or washed gravel
- Water plants: miniature water lily, water hyacinth, hornwort, dwarf papyrus
- Dechlorinator
- Silicone sealant (for containers with drainage holes)
- Bricks or stackable pots to raise baskets to the correct depth
What to consider:
- Dark-colored containers sitting in direct sun heat the water significantly. This extreme temperature swings stress plants and fish
- Verify that any ceramic container is lead-free and food-safe; old or imported glazed pots can leach toxins into the water
- Evaporation from a small container is surprisingly rapid in hot weather so plan to top up every 2–3 days in summer
- Weight is a serious consideration where in some cases a large container fully filled with water, gravel, and plants can exceed 250kg; check your balcony or deck load rating before filling
Mistakes to avoid:
- Using standard garden soil in aquatic plant baskets clouds the water immediately and triggers severe algae blooms
- Overcrowding with too many plants causes them to compete, the weaker ones decompose underwater, and the water quality deteriorates rapidly
- Starting with a container that has a drainage hole and not sealing it. This way the silicone pond sealant solves this, but it must cure fully before filling
- Adding fish to a small container without a proper pump or oxygenating plants. Here the oxygen levels drop overnight and fish die by morning
Pro tip: Float a few water hyacinths for natural water filtration and gorgeous purple blooms throughout summer.
10. Stream or Creek Feature

Mimic nature by building a winding, shallow stream through your property.
Lined with river stones and planted with water-edge grasses and ferns, a garden stream creates a naturalistic landscape that feels effortlessly wild.
It can connect two separate ponds or simply meander through a garden bed.
Materials you’ll need:
- EPDM liner in wide rolls (streams require generous width for curves and folds)
- Pond underlayment felt
- River cobbles, boulders, and gravel in mixed sizes
- Submersible pump housed in a header pool or vault at the top
- Flexible return hose or buried return pipe
- Waterfall foam sealant for rock-to-liner transitions
- Marginal plants: iris, sedge, rush, water forget-me-not, creeping Jenny
- Stepping stones
What to consider:
- The stream bed must slope consistently toward the catchment. For a great outcome aim for a 2–3cm drop per meter. Remember that inconsistent grade creates flat pools and dry patches
- Lay liner generously wide as stream curves require substantial overlap folds at the bends, and cutting corners here leads to leaks
- Planting the margins with native edge species stabilizes the bank and prevents soil erosion into the stream
- Test the flow with a garden hose before committing to final rock placement and adjust grade and rock positioning while changes are still easy
Mistakes to avoid:
- Making the gradient too steep which makes the water race through the channel like a drain rather than babbling gently over stones
- Placing rocks too tightly together. When you do this you restrict the liner from expanding and contracting with temperature, eventually cracking the seams
- Forgetting to extend liner well up the bank on both sides. In heavy rain, the stream overflows and erodes the surrounding ground
- Choosing rocks of uniform size. You should get rocks of varied sizes to create natural-looking turbulence and visual interest. Uniform pebbles look manufactured and you don’t want this.
Pro tip: Add stepping stones crossing the stream for a whimsical, storybook garden feel.
11. Fire & Water Feature Combo
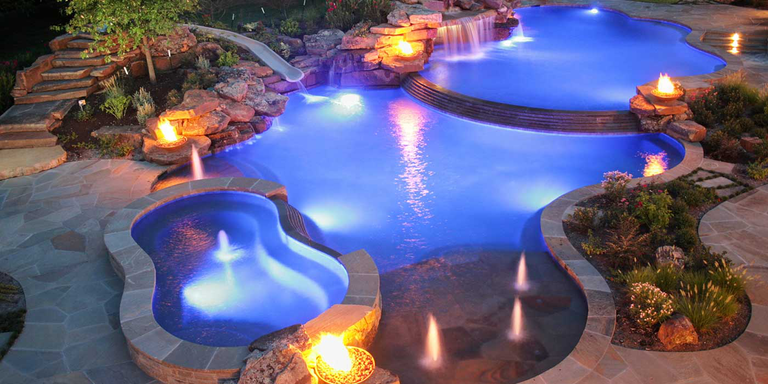
Why choose between fire and water when you can have both?
Combining a water feature with a fire element such as a gas torch rising from a pond or a fire bowl flanked by water jets creates a striking contrast of elements. It’s modern, theatrical, and perfect for entertaining.
Materials you’ll need:
- Gas fire bowl, torch burner, or fire pit insert
- LP gas line, regulator, and shutoff valve
- Gas-rated flexible supply hose
- Water feature (surrounding pond, jets, or sheet waterfall)
- Submersible pump for the water element
- Fire-rated surrounding materials: natural stone, concrete, or steel
- Weatherproof electrical connections for the pump
- Licensed gas plumber (non-negotiable for installation)
What to consider:
- Gas installation must be completed by a licensed professional as this is a legal requirement in most jurisdictions, not a suggestion
- All surrounding materials must be non-combustible; timber decking, certain composite materials, and some synthetic stone are fire hazards at close range
- Wind management is critical. Fire extinguishes or flares dangerously in gusts so consider having a windbreak, a recessed burner placement, or a wind-sensing auto shutoff
- Position the water element so that normal spray and splash cannot reach the burner as steam and salt residue corrode gas components rapidly
Mistakes to avoid:
- Any DIY gas work whatsoever. This is because gas leaks in outdoor entertaining areas are genuinely life-threatening
- Placing the fire element directly over water jets. The splashback extinguishes the flame repeatedly and accelerates corrosion of the burner
- Ignoring local regulations on open outdoor flames. Some municipalities and HOAs prohibit gas features entirely
- Insufficient clearance from overhanging plants or timber structures. Even a ‘controlled’ gas flame presents a fire risk in dry conditions
Pro tip: This feature becomes the ultimate conversation starter at evening parties. When done right, the contrast of flame and flowing water is endlessly captivating. And this is what you want for your property.
12. Wildlife Pond

Design a shallow, irregularly shaped pond with a gently sloping edge to attract birds, frogs, hedgehogs, and beneficial insects.
Plant the margins with native rushes, water mint, and sedges. Skip the pump for a truly natural ecosystem that practically manages itself.
Materials you’ll need:
- Butyl liner or preformed shell with at least one shallow zone
- Sand or underlayment base layer (no sharp grit)
- Native gravel and pebbles for the base
- Native marginal plants: water mint, yellow flag iris, sedge, rush, bulrush
- Submerged oxygenating plants: hornwort, water starwort, rigid hornwort
- Shallow slope entry paving or flat stones for wildlife access
- Rainwater (preferred over tap water)
What to consider:
- At least one side of the pond must have a gentle slope all the way to the water’s edge. Remember hedgehogs and frogs cannot climb vertical walls and will drown without a safe exit route
- Position the pond near cover such as a hedge or fence so wildlife feels safe enough to approach; an exposed pond in the center of a lawn will be used far less
- No pump is required but the pond is rainfall-dependent; plan to top up with collected rainwater during dry summers
- Tap water contains chlorine and phosphates that encourage algae and harm invertebrates. Collect rainwater or let tap water sit for 48 hours in an open container before adding it
Mistakes to avoid:
- Steep vertical sides on all edges. This is because animals fall in and cannot escape; this turns a wildlife habitat into a trap
- Adding goldfish or any ornamental fish. They consume every invertebrate egg and tadpole in the pond, entirely destroying the food web you are trying to create
- Using treated timber for edging. The preservative chemicals leach directly into the water and kill invertebrates for years
- Introducing aquatic plants bought from garden centers without checking their origin. You should know that non-native invasive species like New Zealand pygmyweed arrive hitchhiking in plant packaging and are nearly impossible to eradicate once established
Pro tip: Place your wildlife pond near a fence or hedge so animals can easily access and escape the water and you’ll be amazed how quickly nature moves in.
️ Before You Start: Key Considerations
- Location: Choose a spot that gets 4–6 hours of sunlight if you want aquatic plants to thrive; full sun all day encourages algae in most features
- Power: Most pumps and lights require access to a GFI/RCD-protected outdoor power source; plan cable routes before breaking ground
- Water supply: You’ll need to top up regularly for evaporation; a hose tap nearby makes this effortless, or connect an auto-fill valve for hands-off management
- Maintenance: Plan for seasonal upkeep: algae control, debris removal, pump cleaning, and winter preparation or drainage
- Regulations: Check local bylaws regarding water features, especially for deep ponds, gas elements, and electrical installations near water
#OutdoorLiving #WaterFeatures #GardenDesign #BackyardGoals #LandscapeDesign #KoiPond #GardenInspiration #HomeImprovement
Related Posts: