
23 Herb Garden Ideas in Pots (Outdoor Setups That Actually Work)
Last Updated on June 14, 2026 by Duncan
You don’t need a garden bed. You don’t need a big backyard. You don’t even need much money.
What you do need is a plan, because sticking random herbs into random pots and hoping for the best is exactly how you end up with a sad balcony full of dead plants and a drawer full of dried herbs from the supermarket.
These are 23 real outdoor pot herb garden ideas, from single-pot setups to full balcony transformations, with the nuances nobody else bothers to mention.
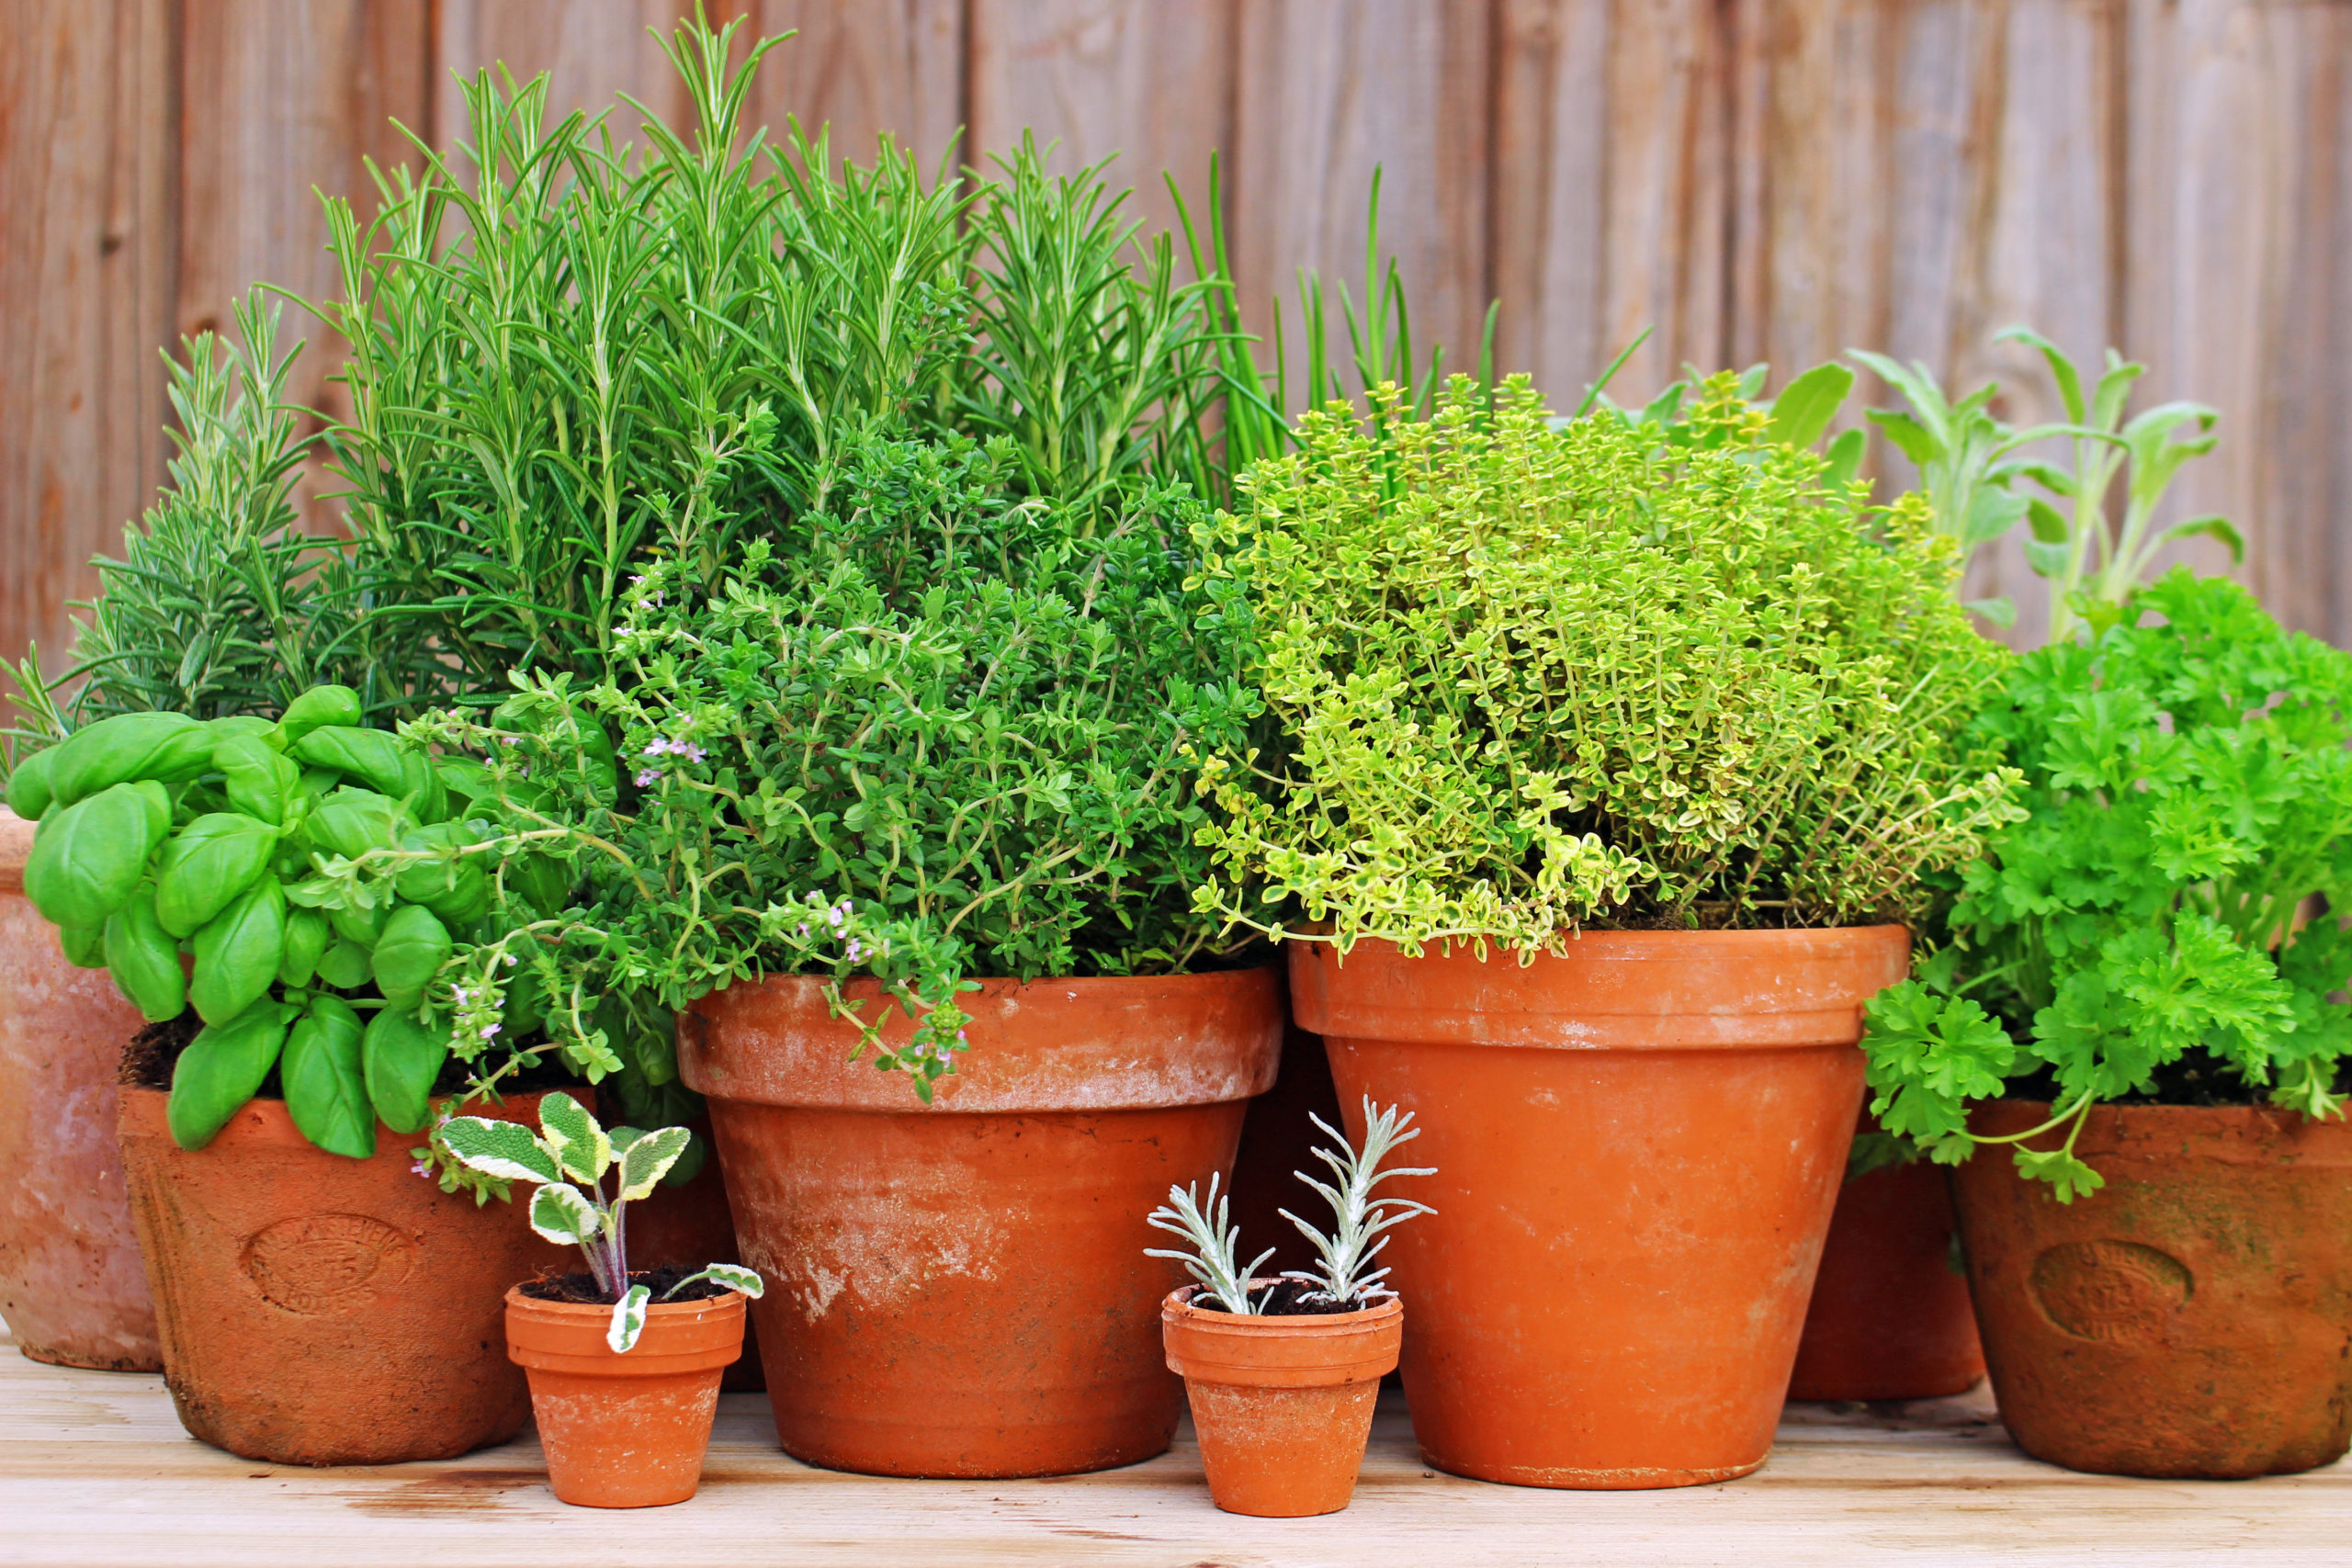
1. The Mediterranean Terracotta Cluster
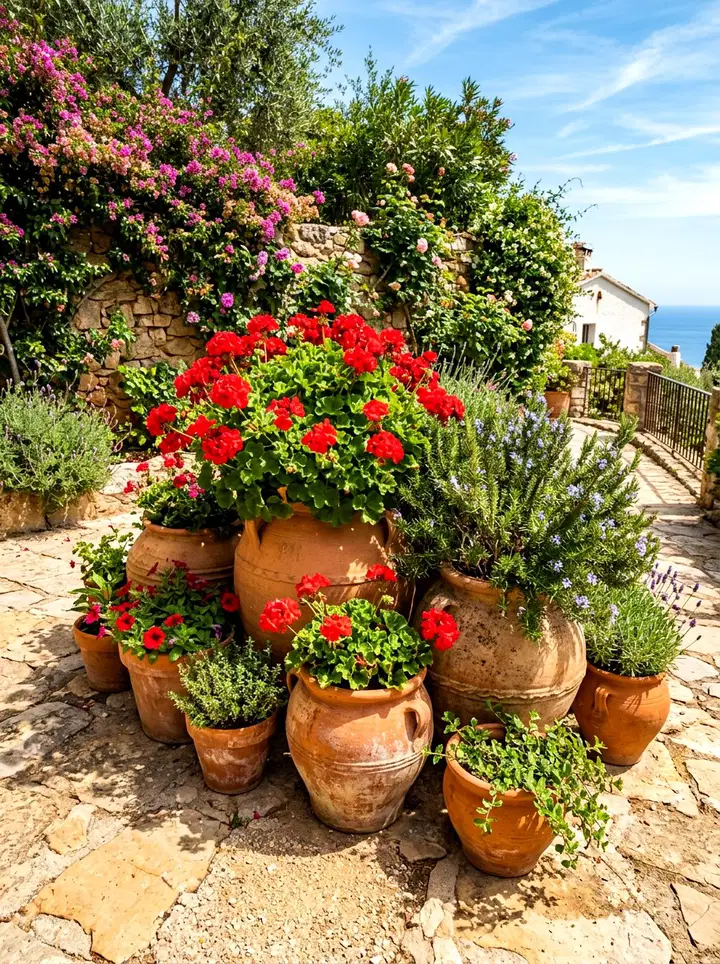
Group three to five terracotta pots of different heights and plant rosemary, thyme, oregano, and sage, one per pot.
Arrange them tightly together on a sunny patio, slightly overlapping so they look like a colony rather than a lineup.
The insider detail nobody mentions: The tight grouping creates a shared microclimate that slightly raises humidity between the pots.
Mediterranean herbs are drought-tolerant but they don’t love harsh dry wind, and this clustering gives them a buffer.
It also looks intentional and styled rather than like you just put pots wherever there was space. This impresses your guests.
2. The Vertical Pallet Herb Wall
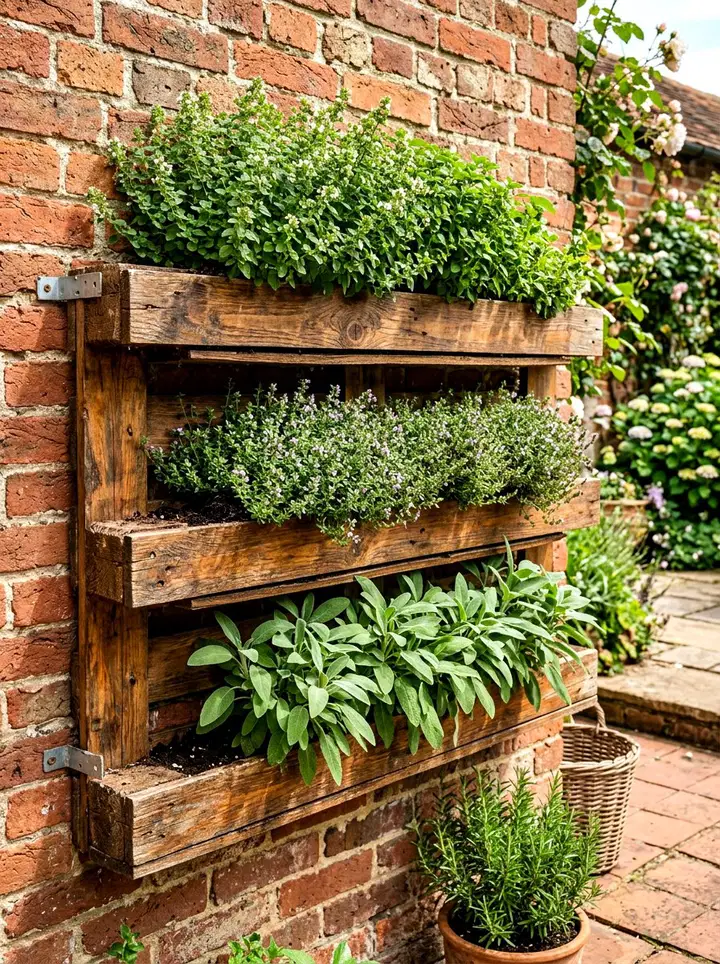
Mount a wooden pallet upright against a sunny outdoor wall.
Staple landscape fabric across the back of each horizontal slat to create planting pockets, fill with gritty compost, and plant compact herbs like thyme, oregano, chives, and small basil varieties directly into the pockets.
The version you don’t see in most tutorials: Face the pallet slightly downward from vertical (about ten degrees) rather than perfectly upright.
The reason for this is that perfectly vertical pallets allow water to run straight out the bottom and the top pockets dry out within hours.
The slight tilt keeps moisture in the pockets long enough to hydrate roots.
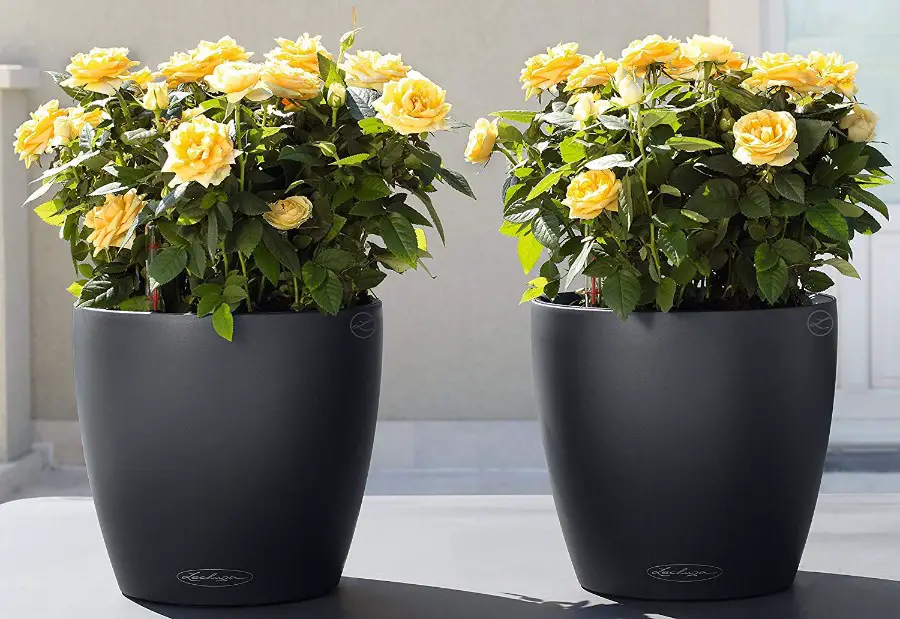
3. The Single Statement Pot
One large pot, forty centimeters across minimum, planted with a single rosemary bush trained over time into a small standard (a single clear stem with a bushy top).
Positioned next to a front door or gate, this looks more deliberate and architectural than any mixed herb arrangement.
Rosemary responds incredibly well to shaping and will hold a form for years.
This is what restaurants and upscale homes use at their entrances. It costs almost nothing to achieve if you start with a young plant and are patient for one season.
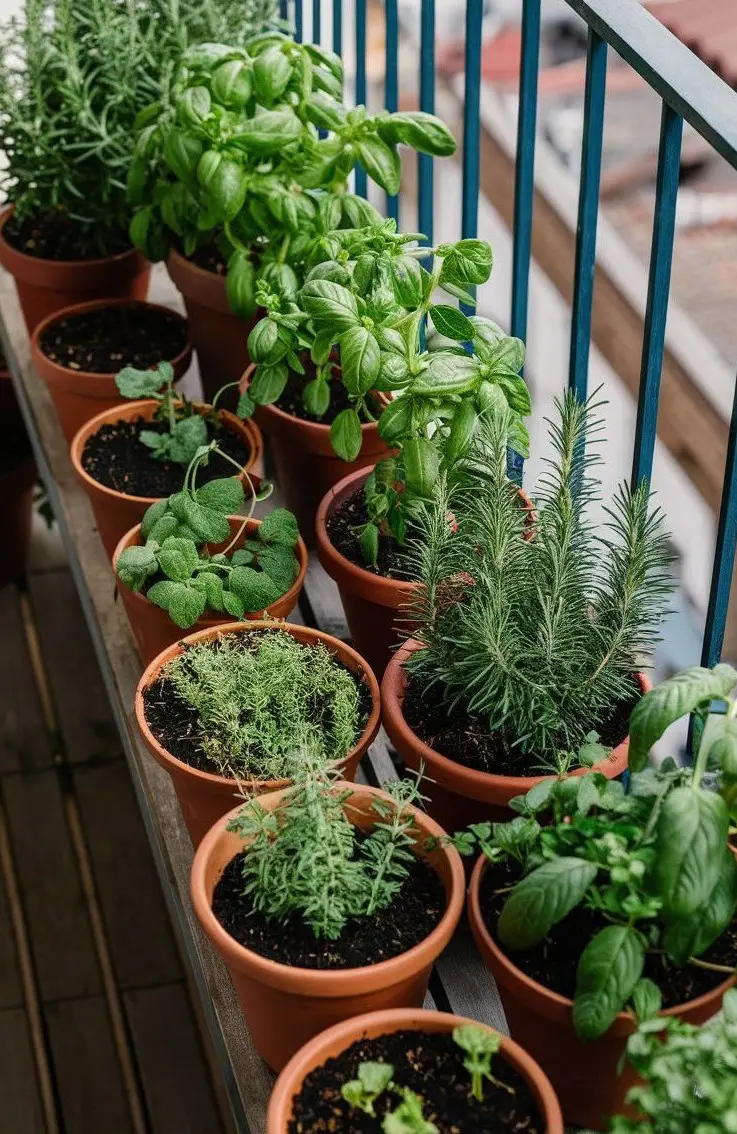
4. The Raised Trough Kitchen Garden
A long rectangular trough planter, at least ninety centimeters long, positioned just outside a kitchen door or on a back porch railing.
Plant it with the herbs you actually cook with most: One basil, one flat-leaf parsley, one chives, one thyme. Keep it within arm’s reach of where you cook.
This idea sounds simple but the positioning is everything. Herb pots placed more than ten steps from the kitchen get used dramatically less.
The closer this trough is to where you actually cook, the more you harvest, and the more you harvest, the better the plants grow. Proximity is the whole strategy.
5. The Stacked Pot Tower
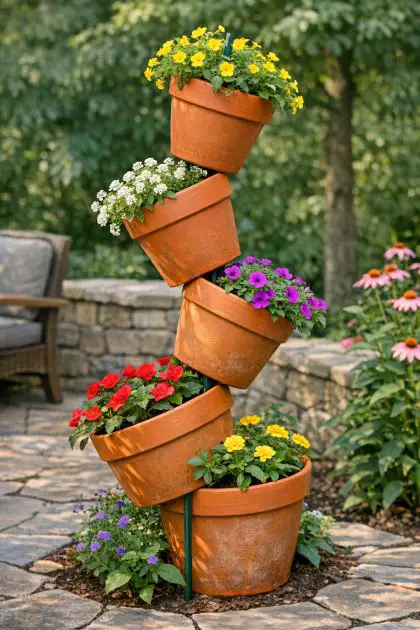
Take three terracotta pots in decreasing sizes, say thirty, twenty, and fifteen centimetres across.
Stack them by filling the largest with compost and pressing the medium pot down into the centre, offset slightly.
Repeat for the smallest.
Plant trailing herbs like thyme and creeping oregano in the top pot so they spill downward, and upright herbs like chives or parsley in the lower levels.
The hidden structural trick: Angle each upper pot slightly off-centre as you stack rather than keeping it perfectly centred.
This creates a spiral planting arrangement where each level gets full sun exposure instead of the upper pot shading the lower ones.
6. The Repurposed Colander Setup
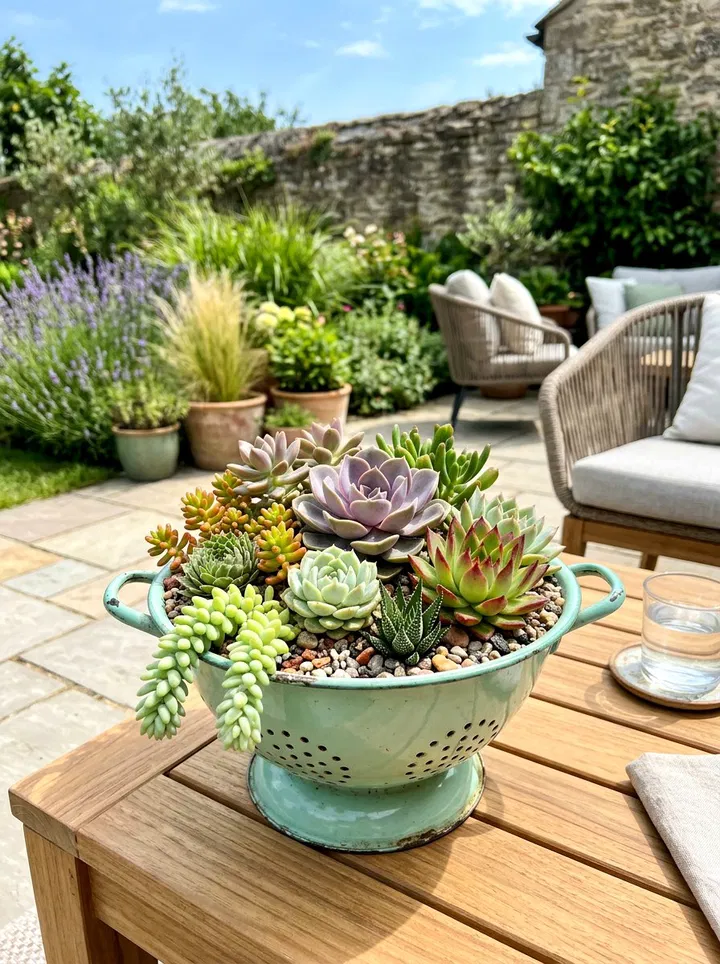
A large stainless steel or enamel colander with its built-in drainage holes makes an outstanding outdoor herb pot for trailing and compact herbs.
Line it with coconut coir, fill with compost, and plant with thyme, chives, or compact basil.
The colander’s drainage is genuinely excellent, far better than most commercial pots.
Hang it from a balcony railing bracket or sit it on a step.
The metallic finish looks deliberately styled in a way that most plastic containers never quite achieve.
And the beauty is that you get to pick it up for almost nothing at a second-hand market.
7. The Wheelbarrow Herb Garden
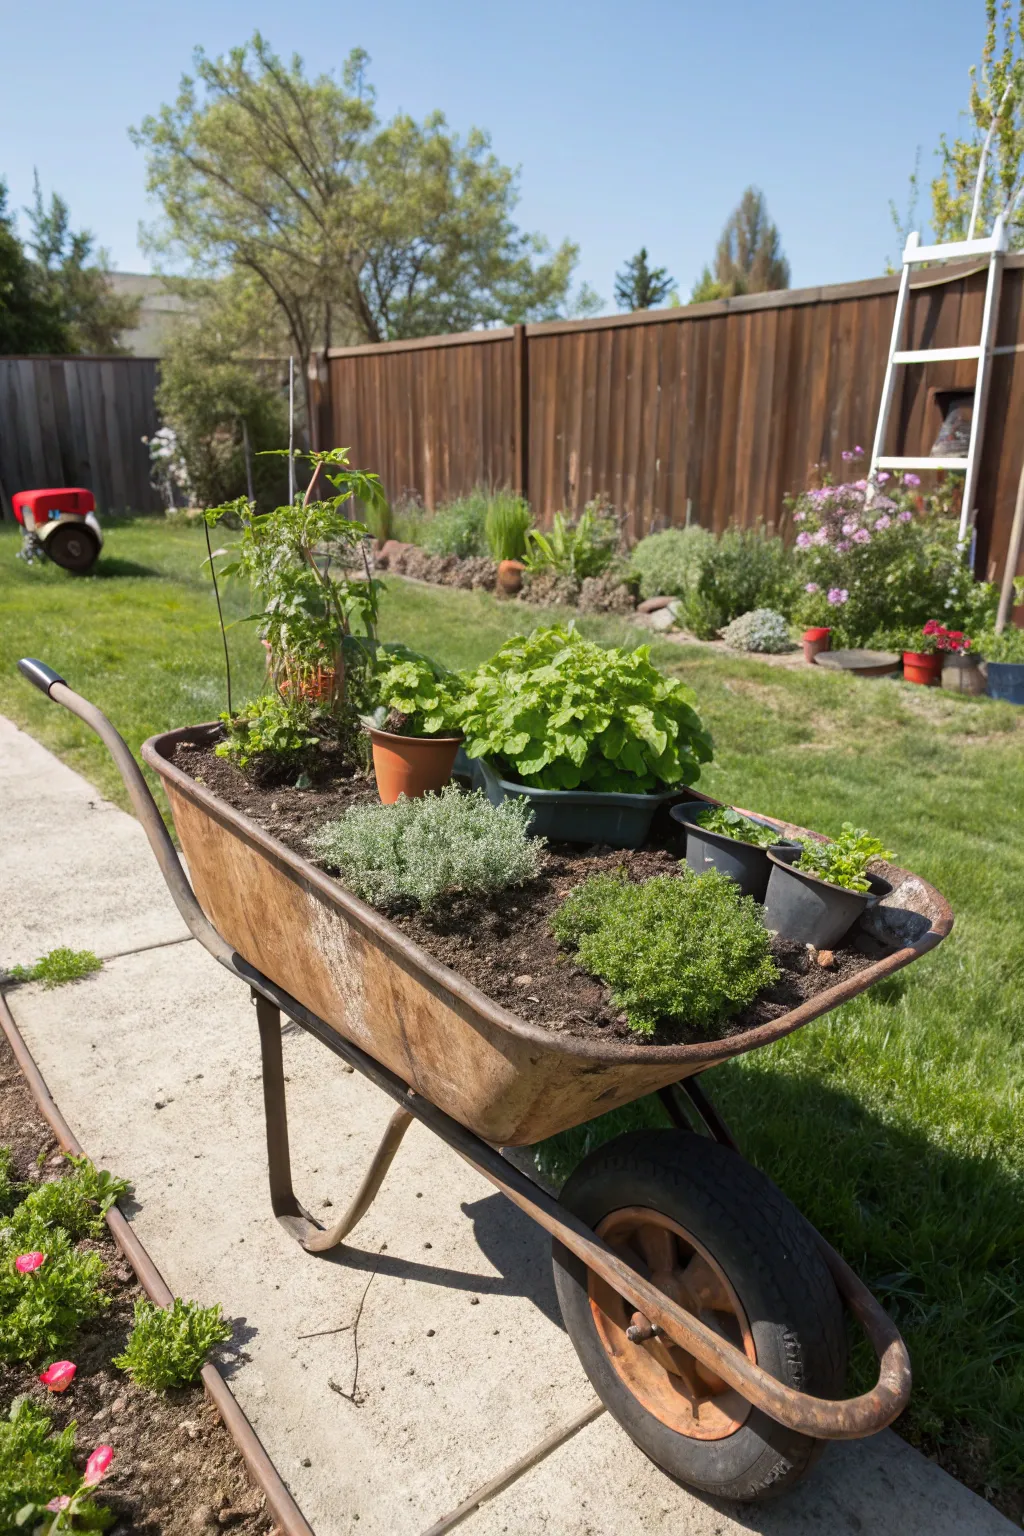
An old wheelbarrow, ideally cast iron or galvanized steel with some character, filled with a mixed herb garden makes one of the most functional and visually interesting outdoor pot herb setups you can build.
Drill several drainage holes in the base, fill with compost, and plant a full kitchen herb collection across the basin.
The wheelbarrow is actually a better container than most people realize.
The depth suits taprooted herbs like parsley and dill that struggle in shallow pots.
The width gives you enough surface area to separate water-hungry and drought-tolerant herbs to opposite ends of the same container.
And it’s mobile, so you can easily move it from one part of the garden to the other.
8. The Balcony Railing Planter Row
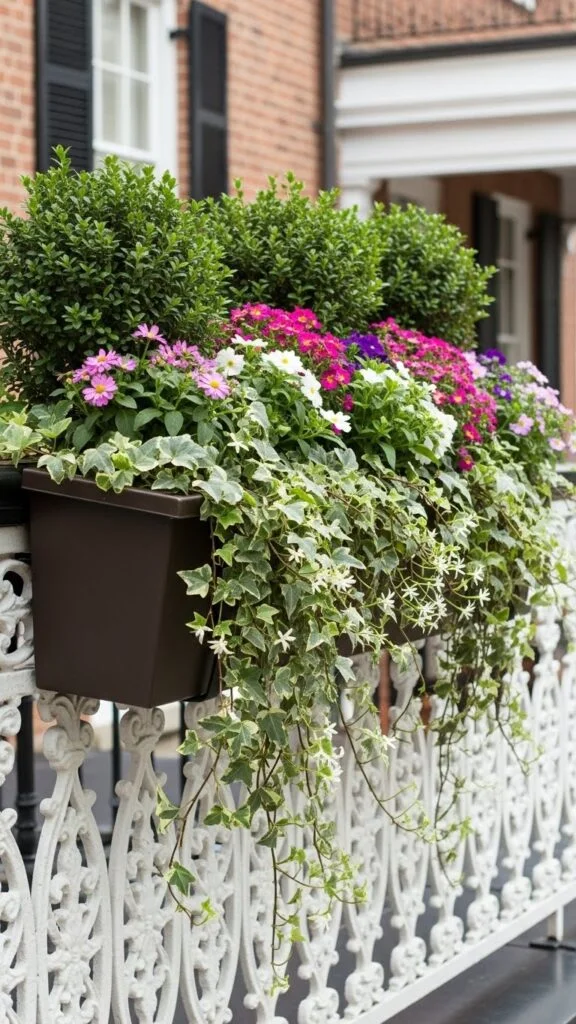
Installing clip-on railing planters along the full length of a balcony railing, each planted with a single herb variety, create an outdoor herb garden that takes up zero floor space.
Alternate heights and leaf textures you can go with: Feathery dill next to broad-leafed basil next to spiky chives next to fine-leafed thyme.
The version that actually works versus the version that looks good for one month: Plant the same herb in clusters of two to three per box rather than mixing herbs in each box.
Mixed railing planters with competing water needs fail in about six weeks. Single-variety boxes look just as good and stay productive for an entire season.
9. The Herb and Edible Flower Pot Pair
Pair a large herb pot with an adjacent pot of edible flowers such as: Nasturtiums, borage, or marigolds.
This combination serves three purposes simultaneously. The flowers attract pollinators that improve overall garden health.
Nasturtium and borage are themselves edible and useful in cooking.
And the visual combination of the two pots looks far more organised than herbs alone.
The specific pairing that works best outdoors: Basil and nasturtium.
The nasturtiums ramble over the edge of their pot and soften the look of the whole arrangement while their roots don’t compete with the basil’s needs.
10. The Entrance Path Herb Gauntlet
Line both sides of a path to your front door or garden entrance with low-growing aromatic herbs in matching pots: Creeping thyme, chamomile, or lemon thyme.
As people brush past, the plants release fragrance. It’s an experience as much as a garden.
The detail most people miss: Choose herbs that tolerate occasional brushing and don’t mind being slightly neglected, because entrance path pots often get forgotten.
Thyme and chamomile will forgive you. Basil will not.
11. The Hanging Basket Herb Garden
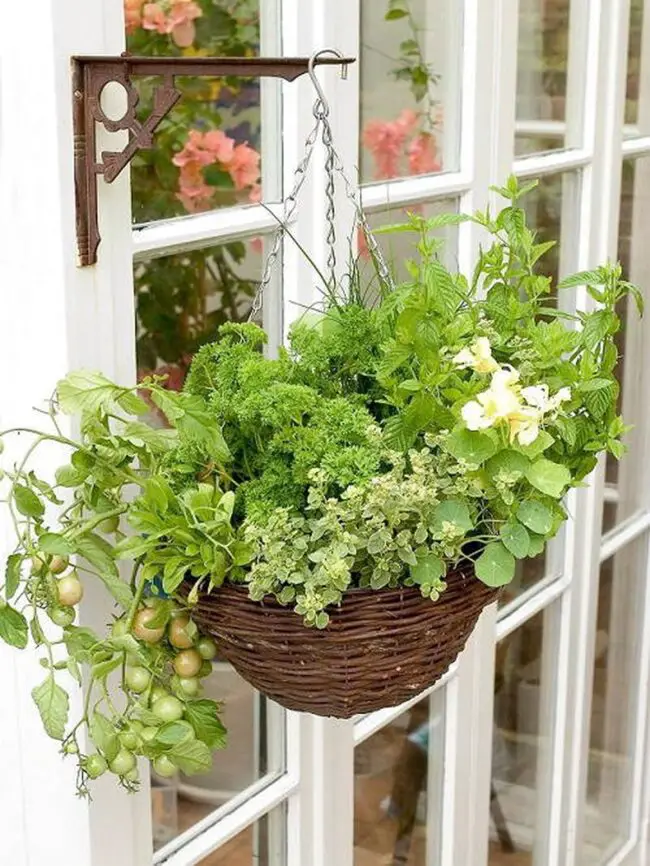
A deep wire hanging basket lined with coconut coir and planted with compact herbs like thyme, oregano, and trailing rosemary creates a beautiful outdoor display that hangs from a pergola, porch beam, or wall bracket.
The insider modification that changes how well these work: Before you plant, line the bottom third of the basket with plastic cut from a bag.
This creates a water reservoir zone at the base that keeps roots moist while the upper coir dries out naturally.
Standard hanging baskets without this modification dry out in a single day in warm weather and demand watering twice daily.
12. The Corrugated Steel Trough
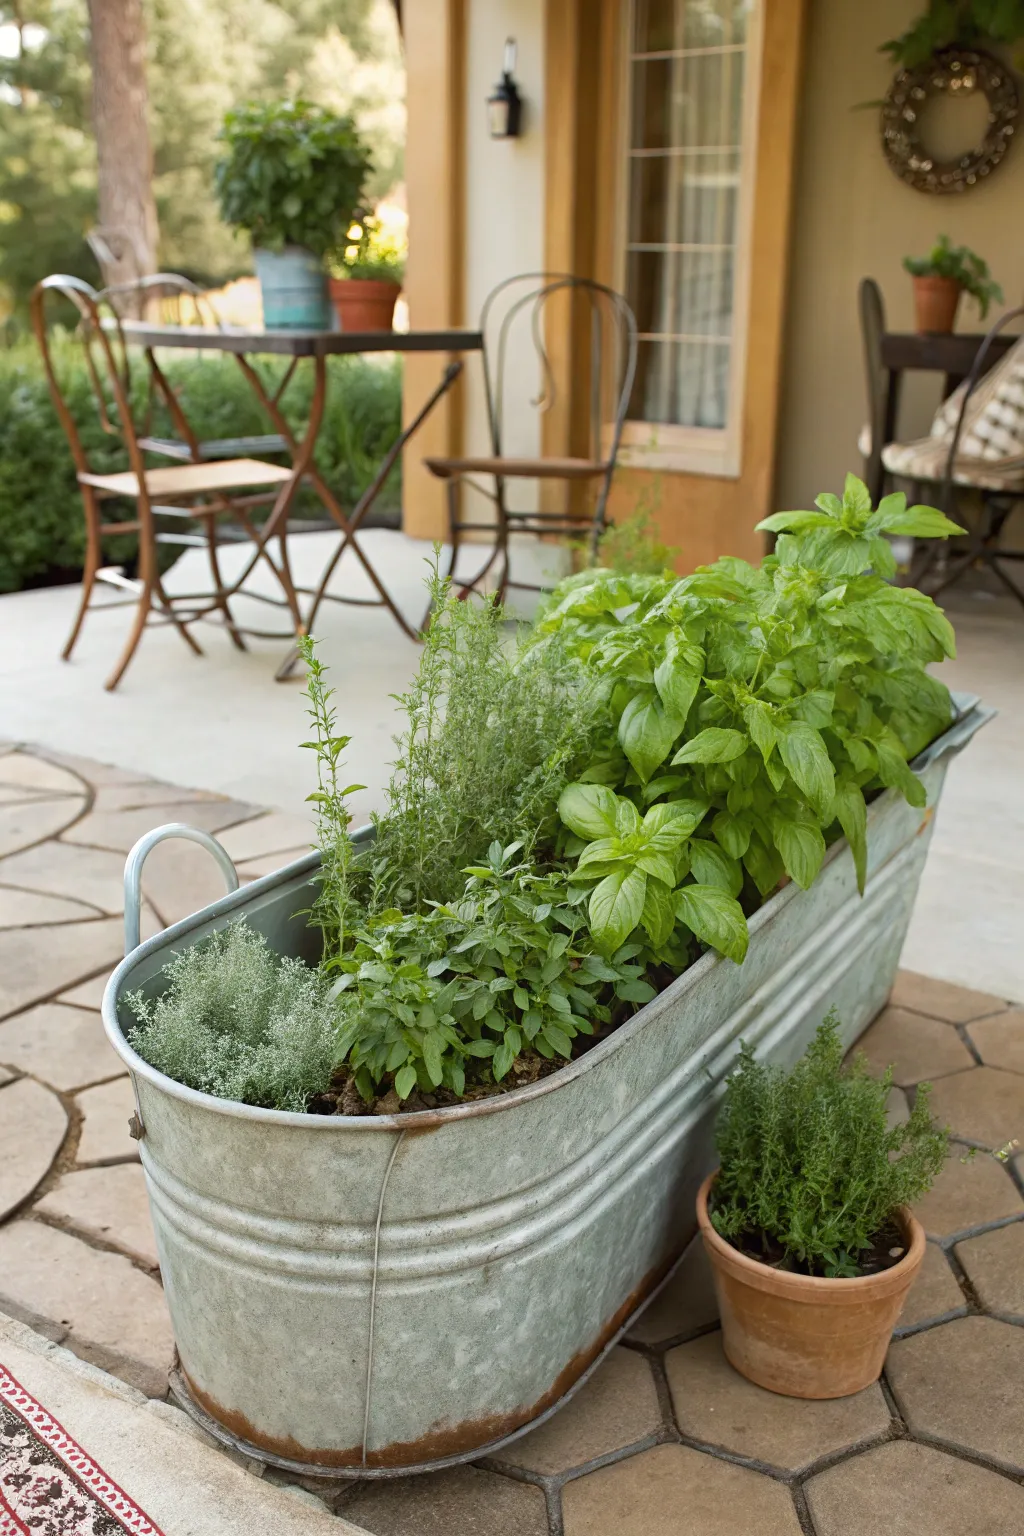
Cut a length of corrugated roofing iron into a long trough shape, seal the ends with timber offcuts, drill drainage holes, and you have one of the most durable, industrial-looking outdoor herb planters available.
Line with landscape fabric to prevent soil loss through the corrugations and plant your full kitchen herb selection.
This is a common sight in commercial restaurant gardens and urban farms.
It costs a fraction of what a comparable timber raised bed would run you, lasts indefinitely outdoors, and the industrial aesthetic works surprisingly well against brick walls, timber fencing, and painted surfaces.
13. The Pot Within a Pot Mint Station
Take your largest decorative outdoor pot, the one you want to be the centrepiece of a patio arrangement, and sink individual plastic pots of mint directly into it so only their rims are visible above the soil surface.
Fill the space between with other compatible herbs.
This gives you the visual unity of a large mixed planting while keeping mint physically isolated underground.
The mint roots cannot escape their inner pot, so the rest of the arrangement survives.
The outer pot looks like a generous, abundant mixed herb garden. Nobody will know it’s an elaborate containment operation.
14. The Stepped Staircase Display
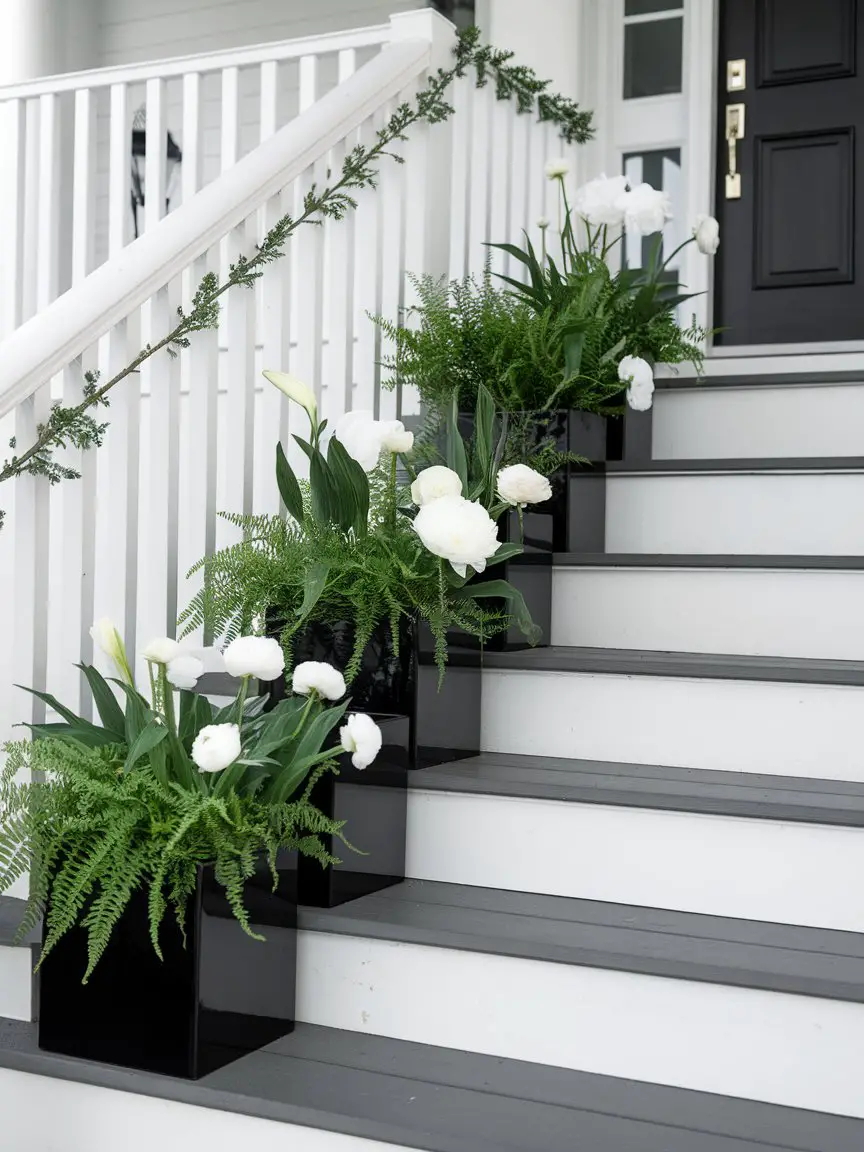
If your outdoor space has steps, use each step as a shelf.
Place a single pot on each step, slightly staggered so they’re visible from below, and plant the same family of herb throughout but in different varieties:
Greek basil on the bottom step, Thai basil on the next, then lemon basil, then purple basil.
The whole staircase becomes a single cohesive display with interesting variation.
This works with thyme varieties (lemon, woolly, creeping, common), mint varieties, or any herb that comes in multiple forms. The staircase itself does the display work for you.
15. The Vintage Crate Herb Garden
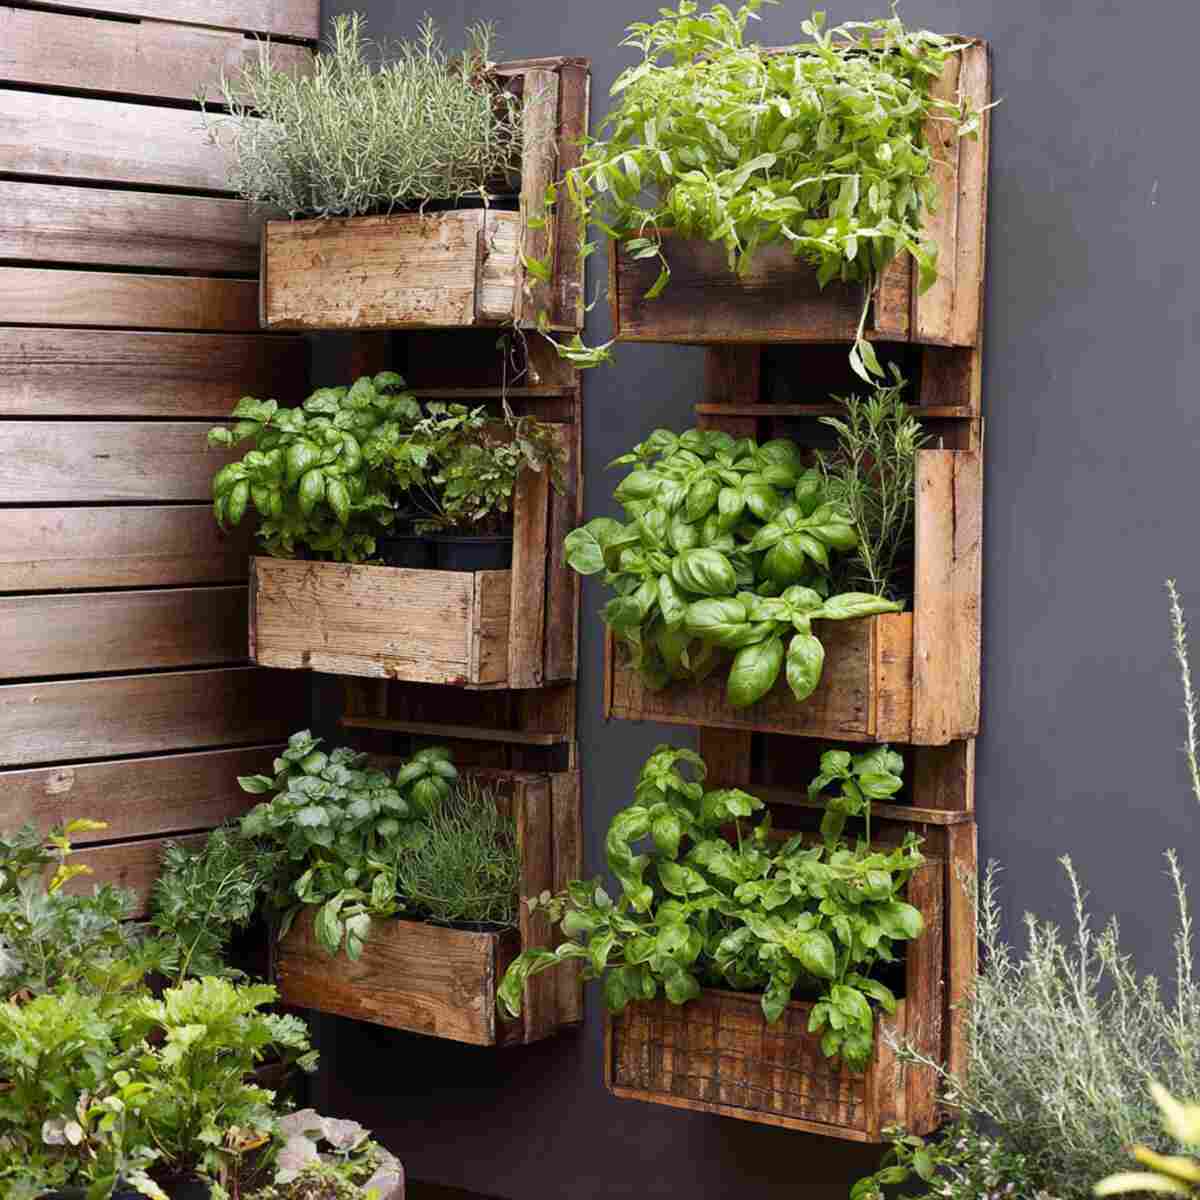 Wooden wine crates, fruit crates, or tea chests lined with coconut coir or plastic sheeting make excellent outdoor herb containers.
Stack two or three at different heights on a patio to create a rustic, layered display.
Line with heavy plastic and punch multiple drainage holes before planting.
Treat the outside of the wood with outdoor oil or varnish before using outdoors, or the crates rot within a single wet season.
This step is what everyone skips and then wonders why the crate looks destroyed after three months.
16. The Outdoor Kitchen Herb Bar
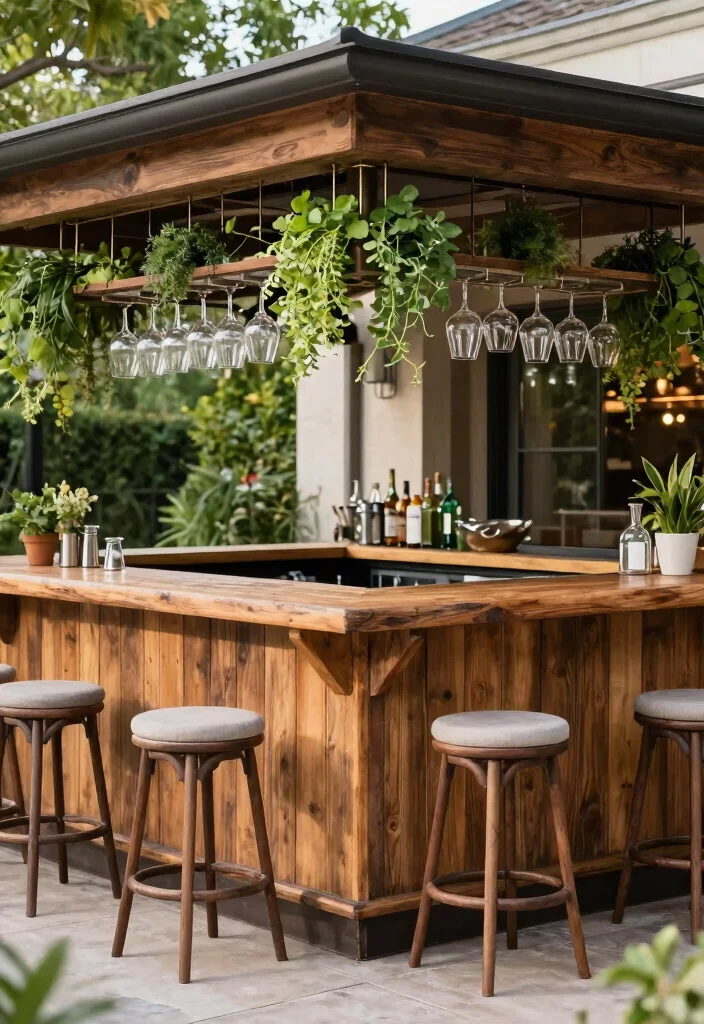
If you have an outdoor kitchen, braai area, or al fresco dining setup, build a dedicated herb bar directly into it.
Line the countertop or a shelf with a row of matching pots planted with the herbs that go with outdoor cooking: Rosemary for meat, thyme for vegetables, flat-leaf parsley for finishing, chilli plants for spice.
The specific detail that elevates this from “pots on a shelf” to a proper installation: Use identical pots in one material, either all terracotta or all glazed ceramic in a single color, and space them at exactly equal intervals.
Visual consistency is what makes a row of pots look intentional rather than accumulated.
17. The Self-Watering Pot System for Travel
If you travel regularly and can’t water every day, invest in self-watering pots with built-in reservoirs for your outdoor herb garden.
These have a false bottom that holds a water reservoir and wicks moisture upward through the soil as needed.
The versions that actually work outdoors: look for reservoirs that hold at least one litre of water per pot.
Smaller reservoirs empty in a day or two in warm weather and defeat the purpose entirely.
Used correctly, these pots can keep herbs thriving through a ten-day absence without any intervention.
18. The Lemongrass Statement Cluster
Three large pots planted with lemongrass, arranged as a tight cluster in a corner of a patio or deck, create a dramatic, tropical-looking screen that doubles as a functional herb garden.
Lemongrass grows to one metre tall and wide in a good-sized pot and the lower stalks can be harvested continuously.
This is one of the most underused outdoor pot herb ideas because lemongrass doesn’t photograph the way basil or lavender does.
In practice it’s one of the most striking, low-maintenance outdoor pot plants you can grow, and it provides genuine structure and privacy to a small outdoor space.
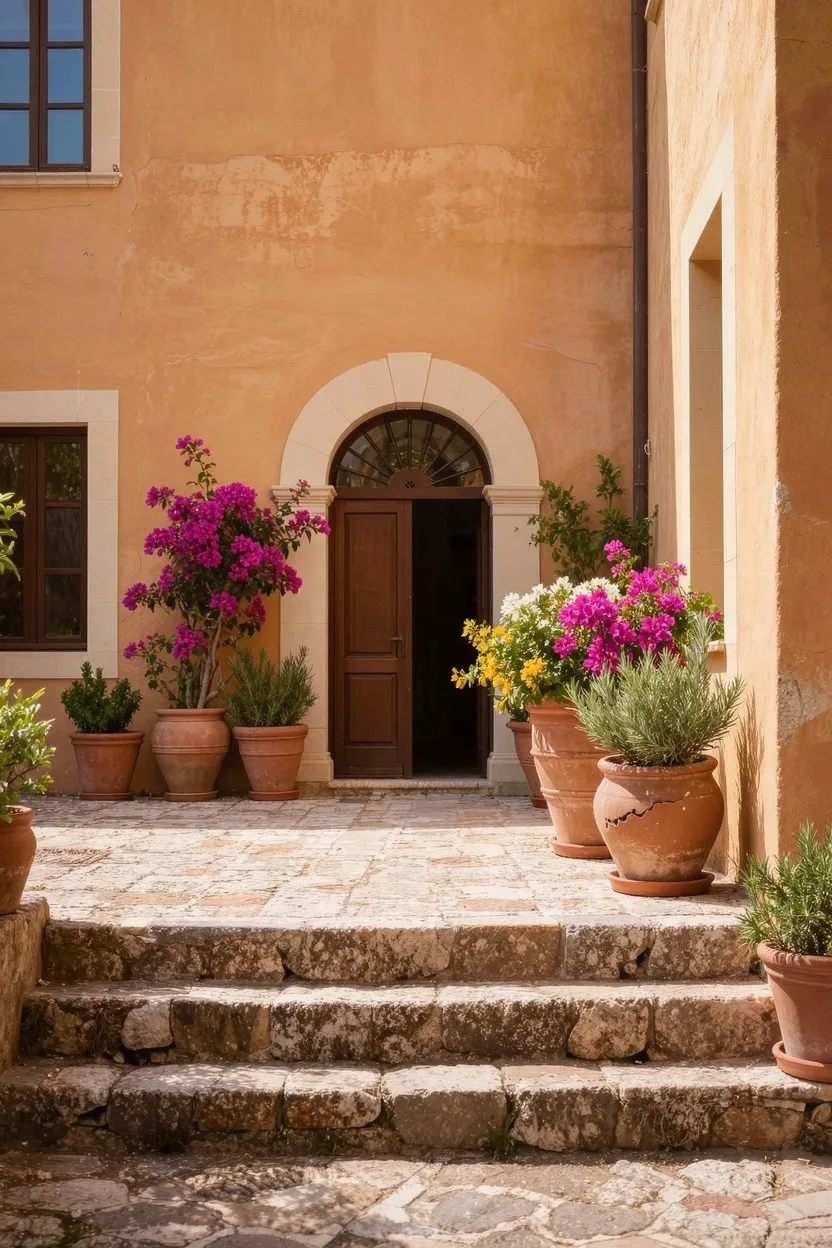
19. The Herb and Gravel Courtyard Garden
In a small courtyard or paved outdoor space, arrange a collection of terracotta herb pots at varying heights across a gravel surface.
The gravel mulch around the base of the pots does two things: It keeps the pots cooler by reflecting rather than absorbing heat, and it prevents soil splash onto pot surfaces during rain, keeping the arrangement looking clean and deliberate.
This is a classic Mediterranean courtyard aesthetic and it translates directly to any small paved outdoor space. The gravel costs almost nothing and the effect is transformative.
20. The Repurposed Bathtub Herb Garden
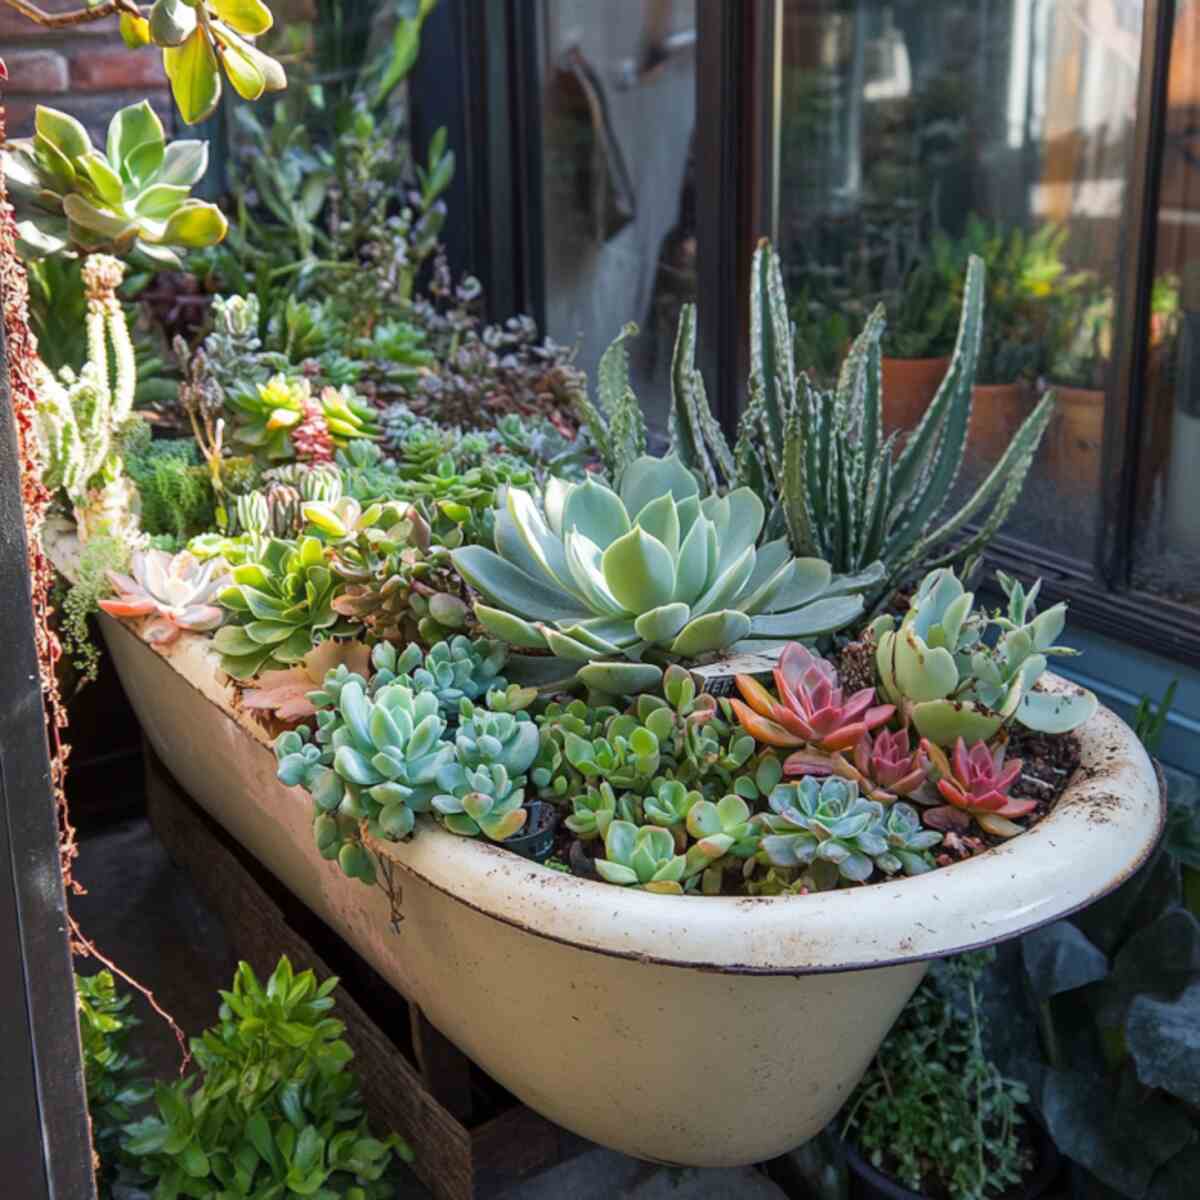
An old freestanding bathtub in an outdoor space becomes one of the most generous and striking herb containers available.
The depth suits virtually every herb, the surface area allows you to plant a genuinely comprehensive collection, and the vintage aesthetic works particularly well in cottage-style outdoor spaces.
Drill at least six drainage holes in the base before planting.
Position it permanently before filling since a soil-filled bathtub is essentially immovable.
Use it as the centrepiece of a kitchen garden area with smaller satellite pots arranged around it.
21. The Fragrance Corner
Designate one corner of your outdoor space exclusively to fragrant herbs in a clustered pot arrangement of: Lavender, lemon thyme, lemon verbena, chamomile, and scented-leaf pelargonium.
This corner is not primarily a cooking herb garden; it’s a sensory space.
Positioned near outdoor seating, it changes the entire character of the area.
The detail that makes this work: Keep the arrangement slightly wild and overflowing rather than tidy and clipped.
Fragrant herbs release more scent when leaves are gently disturbed. An arrangement you brush against as you sit down is more effective than one you admire from a distance.
22. The Matching Color-Coded Pot System
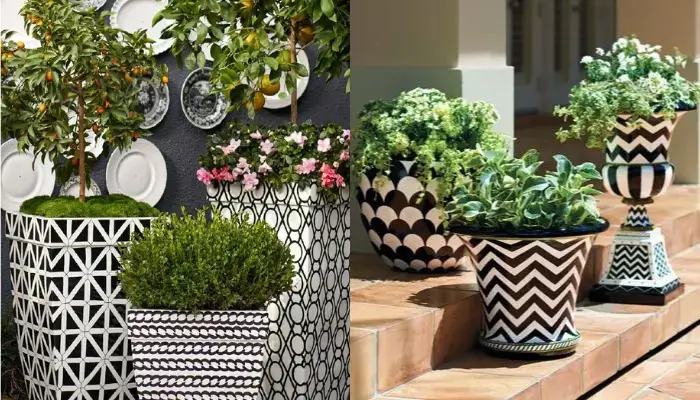
Choose one color for all your herb pots outdoors.
Terracotta is the classic choice, but a row of matching cobalt blue, deep olive green, or matte white pots creates a very different and equally compelling aesthetic.
The key is the matching, not the color itself.
A collection of identical or closely matched pots reads as a designed garden.
A collection of mismatched pots, however individually nice each one might be, reads as accumulated clutter.
This is the single cheapest upgrade most outdoor herb gardens can make and it costs nothing if you’re buying new pots anyway.
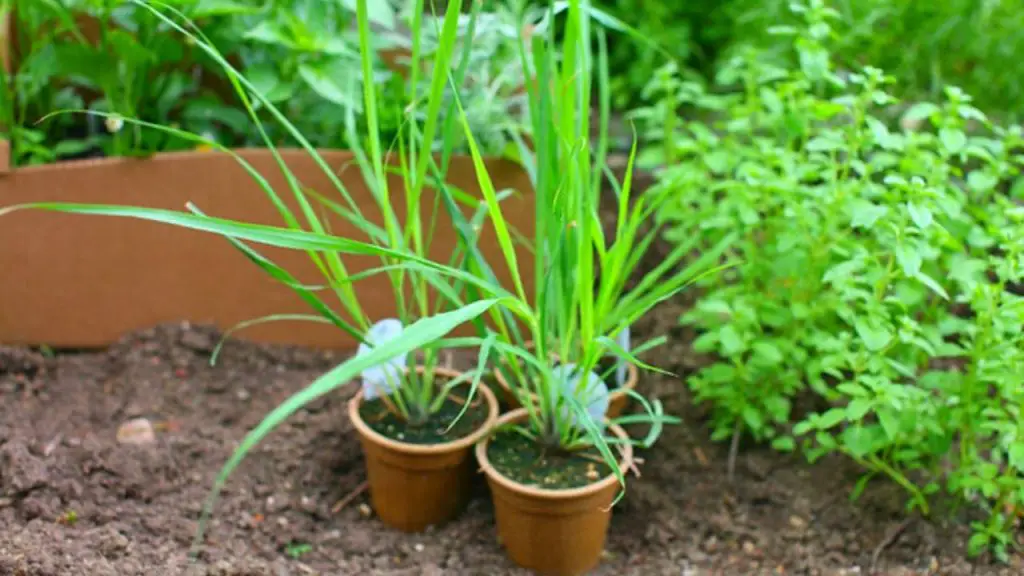
23. The Rooftop Herb Farm
If you have rooftop access, a collection of large, lightweight fabric grow bags planted with a full herb selection creates a rooftop kitchen garden with almost no structural load concerns.
Fabric bags weigh a fraction of terracotta or ceramic, drain better than almost any rigid pot, and fold flat for storage in the off-season.
The rooftop-specific consideration nobody mentions: Wind.
Position taller herbs like lemongrass, dill, and fennel against any available parapet or wall structure that blocks prevailing wind.
Shorter herbs like thyme, oregano, and basil can occupy more exposed positions.
Ignoring wind on a rooftop means fighting constantly against moisture loss and physical plant damage that has nothing to do with your watering or soil.
The Thread Running Through All of These
Every one of these ideas works because it treats herbs as part of an outdoor living space, not just plants that happen to be outside.
The difference between a beautiful outdoor herb pot garden and a sad collection of struggling containers is almost always about intention: Intentional placement, intentional grouping, intentional styling.
Pick two or three ideas from this list that fit your specific space.
Do those well rather than attempting all twenty-three at once.
Remember a tight cluster of terracotta Mediterranean herbs done properly will outperform a sprawling herb garden done carelessly every single time.
The myth: “Just plant your herbs together in one big pot for a beautiful herb garden.”
Every beginner article shows you a gorgeous terracotta bowl with basil, mint, rosemary, and thyme all cozied up together.
It looks incredible in the photo. It’s basically a death trap in practice.
Here’s what actually happens. Mint is a bully. It will colonize every inch of that pot within six weeks and choke everything else out.
Rosemary and thyme want to almost dry out between watering. Basil wants consistent moisture.
You cannot satisfy both in the same container without killing one of them, and you will always kill the basil first because you feel guilty letting anything look thirsty.
The reality you should know: Group herbs by water needs, not by aesthetics. Mediterranean herbs (rosemary, thyme, oregano, sage) share one pot.
Tropical herbs (basil, coriander, lemongrass) share another.
Mint always gets its own pot, no exceptions, ever. This one change will save you more money and frustration than anything else in this article.
The variables many never think about until it’s too late
Pot color is a thermal decision, not a decorative one
A black plastic pot sitting on a sunny balcony will cook root systems alive.
Root zone temperatures above 35°C shut down nutrient uptake entirely, and the herb above looks “mysteriously wilted” while the gardener keeps adding more water, which actually makes it worse.
To avoid this, go for bright-colored pots, terracotta, or double-potting (placing a plastic pot inside a decorative one with an air gap) keeps roots 8 to 12 degrees cooler.
Drainage holes are not enough; drainage architecture matters
The standard advice is “make sure your pot has a hole.”
But if you put potting mix directly on top of that hole, capillary action wicks moisture back up and creates a perched water table at the bottom third of the pot.
Your herbs sit in wet feet even when the top looks dry.
The fix is a 3cm layer of coarse gravel or broken terracotta shards at the base, which breaks that capillary action and lets water actually drain.
Wind is the silent killer on balconies and rooftops
Moving air strips moisture from leaves faster than roots can replace it.
A pot that needs watering every two days at ground level may need watering daily at balcony height.
Your herbs aren’t failing because of bad soil; they’re failing because you’re effectively growing them in a wind tunnel.
Pot size creates a false sense of security
Beginner logic says bigger pot equals more resources equals healthier plant.
In reality, a small herb plant in an oversized pot means the surrounding wet soil sits stagnant, growing fungal pathogens faster than roots can explore it.
Herbs planted in pots only one size larger than their root ball establish and thrive dramatically faster.
The specifics that actually matter
Pot depth over diameter: Herbs like parsley, coriander, and dill are taprooted. They need pots at least 25 to 30cm deep.
Give them a wide shallow bowl and the taproot hits the bottom, the plant stresses, and it bolts within weeks.
Shallow-rooted herbs like thyme and oregano can thrive in 15cm depth. Matching root architecture to pot depth is the single most overlooked sizing decision.
The directional positioning rule: Place herb pots where they get morning sun (east-facing) rather than harsh afternoon sun (west-facing). Morning sun is bright and gentle.
Afternoon equatorial sun through a reflective balcony wall is brutal. The same herbs that struggle in afternoon west exposure thrive with identical morning east exposure.
Harvest timing changes the plant: Cut herbs in the morning after the dew dries but before the day heats up. Essential oil concentration in leaves is highest at that window.
Afternoon harvests taste noticeably blander. This sounds like food-magazine fussiness until you do it once and taste the difference. Then you never harvest at the wrong time again.
The repotting window: Pot up herbs at the start of a growing season, not mid-season. Repotting mid-season stresses the plant at the exact moment you want it producing.
Early rainy season is your prime window to establish and expand container herb gardens before the heat and dry season arrives.
Spacing inside combination pots: When you do combine compatible herbs, the standard advice is “leave a few inches.”
The actual number that works: 15cm center-to-center for compact herbs like thyme, 20 to 25cm for sprawling ones like oregano.
Anything tighter and you get competition for light at the canopy and competition for moisture at the root zone simultaneously.
Want a functional herb garden? Have a succession stack
Here is the framework that separates people with a “cute herb pot” from people with a genuinely functional kitchen herb garden that actually gets used.
Most people plant their whole herb collection at once.
Then it all matures at once, they can’t use it fast enough, it bolts or goes woody simultaneously, and by month three everything looks sad and they’ve lost interest.
The Succession Stack works like this. Divide your herbs into three groups based on lifecycle speed:
Fast (basil, coriander, dill, which bolt within 6 to 8 weeks), Medium (parsley, chives, mint, which last 3 to 6 months), and Anchor (rosemary, thyme, sage, oregano, which are perennial and live for years).
Plant your Anchor herbs first and treat them as permanent infrastructure. Every 4 weeks, add one new pot of Fast herbs from seed.
This staggers your harvests so you always have something at peak flavor, always have something coming up, and the death of one Fast pot doesn’t feel like a failure because two more are coming in behind it.
The psychological effect is as important as the horticultural one. You feel like a successful gardener because something is always thriving.
That keeps you engaged, which means you actually maintain your Anchors, which means your long-term perennial herbs stay healthy for years. The whole system self-reinforces.
Experienced gardeners do this instinctively. They never plant everything at once and they’re never without fresh herbs.
The Succession Stack makes that outcome systematic rather than accidental.