How to Rake a Lawn in Spring: The Right Way, at the Right Time
Last Updated on May 12, 2026 by Duncan
Spring raking is one of the most important and most misunderstood tasks in the lawn care calendar. Done right, it clears the way for a lush, thick, healthy lawn all season. Done wrong, either by doing it too early, too aggressively, or with the wrong tool, it sets your grass back by weeks.
I’ve been raking lawns since I was fifteen, and it took me several seasons of mistakes to understand why technique matters so much here.
The ground is soft and recovering after winter; the grass is fragile; and the difference between a gentle, targeted rake and a hard, aggressive one can mean the difference between a lawn that thrives and one that looks stripped and damaged by May.
This guide covers everything you need to know abour raking the lawn the right way. You will know when to rake, what tool to use, the correct technique, what to do with moss and dead patches, and the full post-raking routine that sets your lawn up for the whole growing season.
Why Spring Raking Matters
A winter’s worth of dead grass, fallen leaves, matted debris, and thatch buildup sits on your lawn by the time spring arrives.
Left in place, that layer acts as a physical barrier where it blocks sunlight, restricting airflow, and preventing water and nutrients from reaching the soil where the roots need them.
Spring raking addresses three specific problems:
1. Removing Thatch and Debris
Thatch is the spongy layer of dead grass blades, root stems, and organic matter that accumulates between the living grass and the soil.
A thin layer of thatch (under ½ inch) is beneficial as it shelters the root zone from temperature extremes and helps retain moisture.
But when thatch exceeds ½ inch, it blocks water and nutrients from penetrating the soil and creates a habitat for pests and disease.
Spring raking also clears winter debris which is branches, leaves, and matted grass clumps that would otherwise slow the lawn’s recovery. For a fuller picture of the connection between thatch management and overall lawn health, see our guide to a greener, thicker, healthier lawn.
2. Disease Prevention
Wet, compressed debris and thick thatch are ideal conditions for snow mold and other fungal diseases to develop over winter.
Raking in early spring breaks up those conditions before the disease has a chance to spread into healthy grass. Consistent removal of moss and dead patches also prevents opportunistic pests from coming about.
3. Encouraging Healthy Growth
Cleared soil receives more sunlight and air which are two things new spring growth needs to get established.
Raking also loosens the very top layer of soil, which improves seed-to-soil contact when you overseed and helps fertilizer and water absorb more evenly.
The groundwork you lay now pays dividends for months. It also directly helps grass seed germinate faster when you sow after raking.
When to Start: Timing Is Everything
The single most common spring raking mistake is starting too soon. The ground needs to be fully thawed and firm before you walk on it and apply any raking pressure. Working soft, waterlogged soil compacts it and rips out the recovering grass roots.
The right time to start:
- When the ground has fully thawed as it feels firm underfoot, not spongy or muddy
- When daytime temperatures are consistently reaching 40–50°F (4–10°C)
- When you can see the first hints of new green growth on the grass blades
- When snow has fully melted with no more freezing nights expected in the near term
A simple test: press your foot firmly into the lawn. If it leaves a deep imprint and water oozes out, the ground is too wet. Come back in a few days. If the imprint is shallow and the ground springs back, you’re ready to rake.
Once you start raking, begin in the spots where the lawn is waking up the slowest which are often areas that still look matted or gray. These are where debris is doing the most damage.
Work section by section across several weekends rather than trying to cover the entire lawn in a single exhausting session.
What Kind of Rake to Use in Spring?
Tool selection matters more for spring raking than for almost any other lawn task. There are three types of rakes you might reach for, and only one is right for this job:
| Rake Type | Good for Spring Lawn Raking? | Why |
|---|---|---|
| Thatch rake (flexible metal tines) | ✔ Yes — use this one | Tines flex enough to pull dead matter without ripping healthy roots |
| Stiff plastic leaf rake | ✘ No | Too rigid — scratches and tears grass rather than lifting thatch cleanly |
| Hard metal garden rake | ✘ No | Too aggressive — will damage recovering grass and soil structure |
A thatch rake has tines specifically designed to have some “give” as you drag them across the lawn.
They penetrate the thatch layer without applying destructive force to the root system beneath. Look for one at your local garden center that has “flexible metal tines” on the label.
For large lawns: You don’t need to hand-rake the entire area in one weekend. Break it into sections and work through them across several weekends. Focus first on the slowest-recovering patches, then move on.
Do You Need a De-Thatching Machine?
Short answer: No, and using one can actually do more harm than good for a typical lawn.
There is a growing trend of homeowners buying cheap de-thatching machines and aggressively stripping their lawns in spring. The result is typically a lawn that looks scalped and stressed going into the growing season the opposite of the goal.
Hand raking in spring is the right approach for most lawns because:
- It removes only the surface dead matter and a small amount of thatch which is exactly the right amount
- It creates airflow without stripping the protective layer the roots depend on
- It keeps you in direct contact with your lawn, which helps you spot problems (moss patches, dead zones, drainage dips) that a machine moves over without registering
The only scenario where a de-thatching machine makes sense is a lawn with a confirmed thatch layer significantly exceeding ½ inch which you can measure by cutting a small plug from the lawn and checking the depth of the brown layer above the soil.
Even then, a single-pass scarifier (not a heavy-duty machine) is usually sufficient.
How to Rake a Lawn in Spring: Step-by-Step
- Check the ground is ready. Press your foot into the lawn. If it’s firm and doesn’t leave a waterlogged imprint, you’re good to go. If it’s still soggy, wait a few days.
- Do a first light pass over the whole lawn. Use your thatch rake with light, consistent pressure. Work in one direction using long, steady strokes. The goal of this first pass is to lift matted grass and break up the worst surface debris, not to remove everything in one go.
- Target the slowest-recovering areas. Patches that still look gray, matted, or compressed after the first pass need more attention. Give these a second pass, still with gentle pressure.
- Collect and remove debris. Rake the pulled-up thatch, dead grass, and leaves into piles and remove them. Don’t leave large piles sitting on the lawn as they’ll smother the grass underneath.
- Rake when the soil is dry, not after rain. Working wet soil pulls good roots along with dead matter. Dry-soil raking is more precise and less damaging.
- Avoid excessive force on young or delicate grass. New spring growth is genuinely fragile. If you feel strong resistance, ease off as you may be pulling at live root systems rather than dead thatch.
- After mowing, you can lightly rake clippings to distribute them evenly across the lawn. Grass clippings decompose and return nutrients to the soil so take care that you don’t remove them entirely. Only rake if clippings have clumped into thick layers that could smother the grass beneath.
Handling Moss and Dead Patches
Spring raking often reveals moss colonies and dead patches that were hidden under winter debris. These need slightly different handling than regular thatch removal.
Moss
Rake moss out gently but thoroughly where the goal is to remove the moss without disturbing the soil layer underneath. Once cleared, inspect the area: moss is always a symptom of an underlying problem, not just a surface nuisance. Common causes include:
- Poor drainage or persistently moist soil
- Heavy shade limiting sunlight to the grass
- Acidic soil (pH below 6.0). Here you should test with an inexpensive soil pH kit
- Thin, weak turf that can’t compete
After removing moss, treat the underlying cause, then overseed the cleared area. Increasing light penetration and airflow through raking makes conditions better for grass and worse for moss regrowth.
For winter-specific lawn health issues, see our tips on keeping your lawn healthy during winter.
Dead Patches
Rake dead grass out of bare patches gently to expose the soil surface. After raking, keep foot traffic off these areas so new seedlings can establish.
Don’t mow over freshly overseeded patches until the new grass is at least 3 inches tall. The exposed soil will be ready for overseeding immediately after raking.
What to Do After Raking
Raking is preparation, not a finishing step. The work you do immediately after raking determines how well the lawn responds through spring and into summer. Here’s the post-raking routine in the right order:
1. Seeding and Overseeding
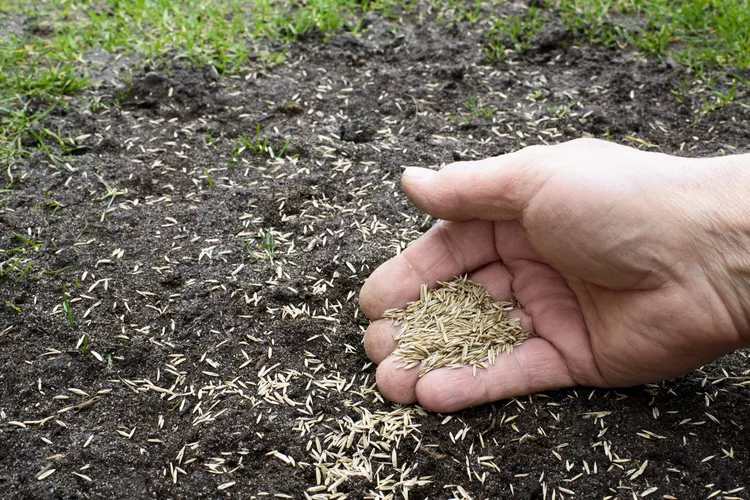
Raking creates ideal conditions for seeding: the surface debris is cleared, the soil is lightly loosened, and the thatch layer is thin enough for seeds to make direct contact with soil which is essential for germination.
Spread grass seed evenly over bare or thin patches. Match the seed variety to what’s already growing in your lawn for a consistent result.
Apply at the manufacturer’s recommended rate. You should note that more seed does not mean faster or better coverage. For detailed guidance, see our article on whether you can put grass seed over existing grass.
After seeding, apply a light top dressing of compost to protect seeds, retain moisture, and feed the germinating seedlings. Keep foot traffic off seeded areas until the new grass is well established.
2. Watering and Fertilizing
After seeding, keep the soil consistently moist until germination is complete but don’t waterlog it. Overwatering washes seeds away and creates conditions favorable for fungal disease.
Watering rules after spring raking:
- Water in the morning so moisture reaches roots before evaporation kicks in
- Avoid evening watering, which leaves the lawn wet overnight and promotes fungal disease
- Water enough to keep the top inch of soil moist, not so much that puddles form
Before fertilizing, do a soil test to establish what nutrients are actually deficient applying a blanket fertilizer without knowing your soil’s needs is wasteful and can burn a stressed lawn.
Most spring lawns benefit from a balanced slow-release fertilizer that feeds roots without pushing excessive top growth too early in the season.
3. Mowing and Regular Maintenance
After raking and seeding, wait until new grass reaches at least 3 inches before the first mow of the season. This gives roots time to anchor before the stress of cutting.
When you do mow:
- Use a sharp mower blade a dull blade tears rather than cuts, leaving ragged edges that brown and slow growth
- Remove no more than one-third of the blade height in a single mow
- Alternate your mowing pattern each session to prevent soil compaction along habitual lines
- Leave clippings on the lawn where possible they decompose and return nitrogen to the soil
For more on what makes grass grow the most, and safe mowing practice, see our lawn maintenance guide for safe mowing.
4. Aeration and Topdressing
If your lawn gets heavy foot traffic, or if drainage was a problem over winter, spring is a good time to aerate after raking.
Aeration creates small holes in the soil that allow oxygen, water, and nutrients to reach the root zone making everything else you do (seeding, fertilizing, watering) more effective.
Aeration tips:
- Use a core aerator for the best results as it removes plugs of soil rather than simply pressing holes, which avoids re-compacting the surface
- Combine aeration with overseeding: the holes created by the aerator give seeds excellent direct soil contact
- After aerating, apply a light topdress of compost, sand, or mulch to improve soil structure and support germination
Frequently Asked Questions
What are the benefits of raking your lawn in spring?
Spring raking removes dead grass, thatch, leaves, and winter debris by clearing the physical barrier that prevents sunlight, air, water, and nutrients from reaching the soil.
It also exposes moss, bare patches, and disease early, when they’re easiest to treat.
The result is a lawn that enters the growing season with better root access to everything it needs to thrive. See our guide on ways to bring back dead grass if your lawn has significant bare areas after winter.
How does raking affect new grass seed application?
Raking creates a clean, lightly loosened soil surface that maximizes seed-to-soil contact.
Seeds sitting on top of dense thatch or compacted debris struggle to germinate because they can’t reach the moisture and warmth in the soil.
A raked surface gives seeds direct contact with the earth which is one of the primary factors in successful germination. If seeds still aren’t taking, see our article on what to do if grass seed doesn’t grow.
What is the best time to begin spring lawn raking?
Start as soon as the ground has fully thawed, is firm underfoot, and grass is beginning to show new green growth typically when daytime temperatures reach 40–50°F (4–10°C) consistently. The ground must be firm, not waterlogged.
Raking on soft, saturated soil compacts it and rips out recovering root systems. When in doubt, wait a few extra days as early raking on soft ground causes more damage than a slight delay. This timing also aligns with when to turn brown grass green fast.
Do you need to rake after every mowing session?
No. Raking after every mow is unnecessary and over time can be counterproductive. Grass clippings left on the lawn break down quickly and return nitrogen and organic matter to the soil.
Only rake after mowing if clippings have clumped into thick, dense layers that could smother the grass beneath which often only happens if you’ve let the grass grow excessively long before mowing.
How does raking improve the lawn’s long-term health?
Raking keeps the thatch layer at the ideal depth which thin enough to allow water, air, and nutrients to penetrate, but present enough to protect the root zone.
It also prevents the buildup of disease-favorable conditions (wet, dense debris) and creates a clean surface for seeding, fertilizing, and aeration to be more effective.
Done consistently each spring, it’s one of the simplest habits that pays the largest dividend in lawn health over time.
What are the first steps in early spring lawn maintenance?
In order: (1) Wait until the ground is thawed and firm. (2) Clear large debris branches, leaves, garden furniture. (3) Do a light rake with a thatch rake to lift matted grass and surface dead matter.
(4) Identify and note problem areas where moss, bare patches, poor drainage spots. (5) Overseed bare areas. (6) Fertilize based on a soil test. (7) Aerate if compaction or drainage is an issue. (8) Begin your regular mowing schedule once new grass reaches 3 inches.
Related Reading
- What Can You Spray On Grass in the Spring?
- How Do You Prepare Your Grass for Spring?
- Can I Put Grass Seed Over Existing Grass?
- Lawn Scarification for Beginners
- How to Get Rid of Snow Mold in Your Lawn
- Lawn Care Tips for a Greener, Thicker, Healthier Lawn
- Ways to Bring Back Dead Grass
Related Posts: